• Skip to main content
  • Skip to primary sidebar
life{in}grace

life{in}grace

live with more presence, passion, & purpose

  • Home
  • About
    • Contact
  • Work with Me
    • Courses
    • Life Mentoring School
    • LIVE Event – Your Best Beautiful Year – January 4, 2020
  • Natural Healing
    • Get Started
    • Essential Oil Resources
  • Free Resources
  • Podcast
  • Books

crafts

Creatively Made Home {Home for the Holidays}

August 13, 2013 by Edie Wadsworth 56 Comments

CMH2 Home Collage Words

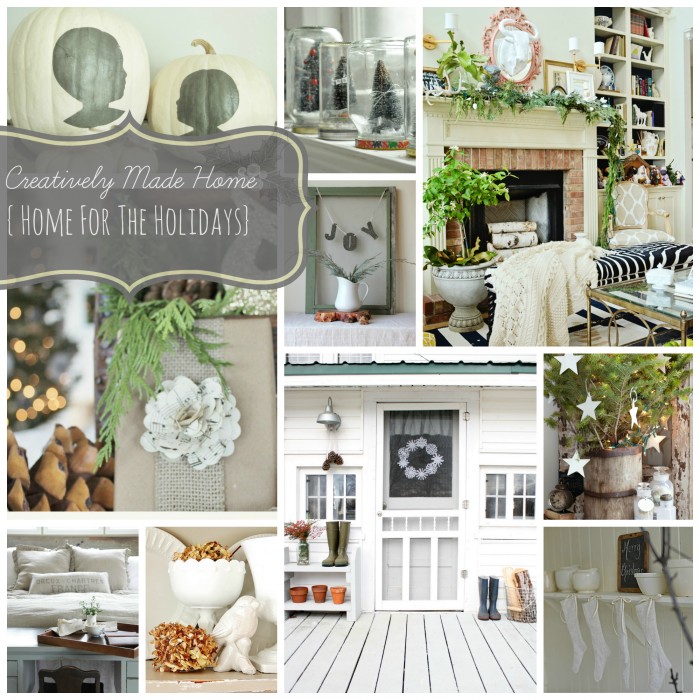
        I am so giddy with excitement to share with you a project I’ve been planning and working on this summer.  I will be teaching an e-course, hosted by Jeanne Oliver as part of her Creatively Made Home series called, Home for the Holidays.  There will be 8 other VERY creative women as we will be share our hearts through projects and videos on how we make the holidays special for our families.

They are:

CM2 round collage NAMES

(Jen Rizzo, Jennifer O’Brien, Karianne from Thistlewood Farms, Jeanne Oliver, Anne Marie Klaske, Cathy Penton, Carol Spinski, Andrea Fowler.)

The course will include recipes, handmade decor, handmade gifts, and stories of our favorite holiday memories.  Early registration for the course begins Monday and if you register during the first two weeks of early registration, the course (normally $58) is $48.  The course will run for four weeks but you have access to the videos for one full year.  Some of the most creative bloggers I know are participating and you have access to ALL their videos and projects plus those I will be teaching.  The course will start October 1st, in plenty of time for you to use many of the ideas in your holiday decorating and cooking this year.

Here’s the description of the course and what is included with your purchase:

Fall is right around the corner and a time when many of us start making our homes warm and cozy for the seasons and holidays ahead.

Because the holidays can also be a time of stress, conflict, loneliness, sadness and disappointment, I want this course to be a reminder of what you bring into your home, your family and the beauty that your life and gifts bring to those around you.

You will be encouraged as you hear honestly from each woman about the times things did not go as planned during their holidays.

You will hear honest discussions about their own journey of hospitality.

You will walk away inspired as you hear about the traditions and special moments from their childhood and how they create special moments with their families today.

You will be able to watch beautiful videos with gift giving ideas, decorating projects and favorite family recipes.

We all want to create authentic moments with our friends and family.

We all desire for the ones we love to leave our homes knowing that they were welcomed and loved.

My hope is that this course will help you to slow down and find the joy and beauty in the holidays.


 WHAT IS INCLUDED

* Each week you will have amazing truthful videos from the nine teachers.

* There will be 30+ project videos.

These will be incredible videos that include everything from cooking, gift giving and decorating.

                                *Tons of beautiful house photos from each of the nine women


*Supply lists and PDFs for each project


*A digital recipe book of the recipes shared in this course

This course is about loving your home, loving your family and blessing those around you….and having fun doing it.

If you have taken my other courses you know how much I put into them.

This course will lavish you with ideas, beauty, inspiration, joy and encouragement!

Come and play with us.

Registration is open NOW and you will have access for one full year!

*******************

Because of the nature of the course there are no refunds.

All other refunds before the course begins fall under the policies in my shop.

**********************

If you would be willing to blog about this project, you can take the course for free.  Just email with the post link, after you have blogged about it and we will get you signed up to take the course for free.

I’m also giving away two spots in the course today to anyone who comments and shares the course with some form of social media.  I trust you so just tell me in your comment where you plan to share the link.

If you decide to register in the early registration phase, you will ALSO  need to register at jeanneoliver.ning.com after you pay for the course.  This will give you access to Jeanne’s teaching classrooms.   You will create your own login and password and will have instant access on the day the course begins, which is October 1st.

I can’t wait to share some holiday inspiration with you!

ediecollageFINAL

Click here to register for the course!!


Filed Under: blogging, confessions, crafts

{ditto} DIY:: Framed Fabric and a Cross

July 1, 2013 by Edie Wadsworth 13 Comments

{ditto} DIY: Inspired Design For the Rest of Us

Welcome to the July {ditto} DIY challenge!

Once a month ten very different bloggers are hosting this challenge to recreate in our own homes a project or design element inspired by a haute couture design. The idea is to inspire everyone to incorporate fine design elements into your own home in a way that fits your own style. (For more details on what {ditto}DIY is all about, check out this post [INSERT LINK TO YOUR INTRO POST].)

{ditto} DIY: Inspired Design for the Rest of Us

The ten hosting bloggers include:

Darlene @ Fieldstone Hill Design
Ruth @ Living Well Spending Less
Cindy @ Skip to My Lou
Jen @ Balancing Beauty & Bedlam
Edie @ Life in Grace
Rachel @ Surviving the Stores
Karin @ Trophy Mom Diaries
Lauren @ I am THAT Lady
Kelly @ View Along The Way
Melissa @ The Inspired Room

This month’s theme is Framed Fabric, and this was our inspiration photograph:

July-ditto-diy

{A framed pair of Ikat fabric art. Image via Neiman Marcus.}

The {ditto} DIY Challenge:

Frame some Fabric! Any fabric, any way….then use it in a lovely display.

Here is my Framed Fabric {ditto}DIY project:

I simply used modge podge to glue a cherished piece of fabric to a piece of cardboard, which I then stuck in a frame.

framedfabric

I’ve got it in my workroom for now but I have a propensity for moving things around and this little treasured frame could end up in my sultry master or in the living room or even in the kitchen.

framedfabric2

What makes this humble little piece of fabric so special is that it was given to me by a very special momma last week, while I was traveling in Nicaragua with Compassion Bloggers.

framedfabric3

I knew I wanted to do something special with it when I got back and this month’s {ditto} DIY couldn’t have been more perfect.

framedfabric4

I was so blessed to be able to meet the girls we sponsor and Diana’s mother makes extra money to help feed their family doing clothing repairs.  She has one of those old fashioned sewing machines that uses a peddle.  I was not a quick study……

(those machines are HARD to use!)

framedfabric5

but together, we stitched this cross, as a reminder that our hearts are forever entwined in mutual  love and partnership for Diana.  She does all the hard work for her daughter and I commit to pray and write and send $38 per month so Diana can go to school, receive medical care, hear the Gospel, and receive emotional and social support from the amazing staff at project N-186.  It frees Diana’s family up to provide for their other children.  Read the story of her beautiful family here and how her father is loving and providing, against all odds.

nicaragua29

The framed cross reminds me to pray and to count every blessing.

framedfabric6

Do you have some sentimental piece of fabric you could frame?  It’s SO easy.

I just took the piece of cardboard that came with the frame and brushed modge podge onto it and applied the cut fabric. I let it dry all day and then, tada!

Easiest project EVER.

framedfabric7


And now comes the fun part! It is time to link up your own fabulous framed fabric projects and join the {ditto} DIY party! It wouldn’t be much of a party if you didn’t stick around, so be sure to check out as many projects as you can! Then be sure to visit Darlene’s site for a peek at next month’s challenge along with some expert design tips on incorporating framed fabric accents into your home.


685x85-Nicaragua-LOVE

****

Filed Under: crafts, DIY, The Workroom, {ditto} DIY Tagged With: crafts, DIY

How to Knit a Dishcloth::{for the beginner}

May 8, 2013 by Edie Wadsworth 183 Comments

how to knit a dishcloth

I like to call these Grannie washcloths.  Kinda like Grannie’s Fudge but without the chocolate.  They are so darn cute and useful and easy to make.  I’ve made 4 this week already and this is the perfect little project in which to learn to knit.  They make THE perfect little handmade gift and you’ll love the texture of them as dishcloths or as facial cloths.  I’ve been knitting them for years and giving them as gifts with bars of soap or with a little kitchen basket of goodies.  It’s the perfect gift for guests, or friends, or your favorite relatives.  If you’ve never knit before, these videos and instructions will walk you through every step.  If you’re an expert knitter, consider making a couple and sending them to me so I can take them on my trip with Compassion to Nicaragua in June.  I think these will be the perfect little gifts to take  for the girls that we meet there.  For the older girls, I’ll include a bar of handmade soap and for the little girls, these will make perfect little baby blankets for tiny baby dolls.  Also, the time spent knitting these is the perfect chance to pray over the kids that we’ll be visiting.

If you’ve never knit before, let me just sing the praises of this long lost art. It’s so relaxing!  And yet, you are doing something productive with your hands.  My mother in law was kind and patient enough to teach the girls and me how to knit several years ago and I am so thankful.  We like to knit while we listen to books on tape. (Homeschooling at its finest!) When we lost our house to fire, I mourned the loss of the sweater I had been knitting for Caiti as she prepared to leave home.  Knitting that sweater was like therapy to me and gave me plenty of time to ponder the joys and heartache of motherhood. Do yourself a favor and learn to knit!  This project is easy enough that once you get the hang of it, you really don’t have to think.  You can carry it with you every you go and knit while you wait for kids at their various activities.  I like to knit at night before bed or when Stevie and I are watching American Pickers.

So,  knit with me, why don’t ya!!  I think you’ll  love it.

Supplies

Size 8, 9, or 10 knitting needles (I prefer bamboo)
Clover Takumi 13-Inch Single point, Size 9

Cotton yarn (Usually called Sugar and Cream and it comes in a variety of colors)
Lily Sugar’n Cream Yarn, Potpourri

Instructions

Here are the official knitting instructions.  If this all looks like greek to you, never fear.  I’ve made a video of each step to make it easy to learn and follow along.  The video took 47 years to upload so even if you don’t want to learn to knit, watch the video and laugh at my Southern twang, so at least I’ll feel like those years of my life weren’t wasted!

Cast on 4 sts.

Row 1: Knit one row.

Row 2: K2, YO, knit to the end of the row.

Repeat row 2 until there are 44 sts

Next row: K1, K2tog, YO, K2tog, knit to the end of the row.

Continue decreasing until 4 sts left. Cast off.

***********************

K1—knit one stitch

K2tog—knit two together

YO—yarn over

***********************


Do you knit or crochet or stitch? I was visiting a friend who had a handmade crocheted dishcloth and now I’m obsessed with trying that, too.

Tell me all about your handicrafts!  Maybe someday I’ll even learn tatting, although it looks pretty tough to me!

how to knit a dishcloth

ps.  In case you didn’t know, this family doctor took the plunge into the world of natural health and essential oils and these oils are BLOWING MY MIND.  If you want to feel better, sleep better, strengthen your immune system, reduce your stress, and clear some of the common toxins out of your life, I’d love to walk with you as you get started.

In the month of December (2016) I’m giving away a signed copy of my book along with a $10 product credit (to repay you for the cost of your shipping) to anyone who joins Young Living with me with a Premium Starter kit.

christmasbookcover

Young Living is giving away a free bottle of Christmas Spirit (my ABSOLUTE favorite Christmas scent and SO GOOD for mood!!) with every starter kit purchase. It’s a great time to join!!

Click here to read more about it!!

16-psk1


Filed Under: crafts, DIY, homemaking, Intentional Living, knitting Tagged With: how to knit a dishcloth

How to Host a French-Inspired Soiree

March 4, 2013 by Edie Wadsworth 35 Comments

Y’all.  This was a fun one, I ain’t gonna lie.

But then, I love parties.  I like to party like it’s 1999.  Except I don’t anymore.  Because that was before Pinterest.  And who wants to party without the help of Pinterest?  Not me.

And I like to plan for them plenty of time in advance so I can froof everything up, without feeling completely stressed and overwhelmed.

The occasion was a clothing party (CABi)  for my friend, Susan, and since I knew that their new Spring line was French-inspired,  I wanted to do a girly, French-y, Anthropologie-esque type party.

So, off to Pinterest, I went-a-searchin’.   (see, Silhouette board and Spring party board.)

I started with colors.  I wanted black and white, with various shades of pink and fresh greens, in the form of plants and topiaries and magnolia clippings.   And silhouettes seemed like a natural addition to a fashion party.    I brought the bust of Aphrodite to the kitchen to be the goddess of our soiree.

She wanted to wear her pearls.  She’s  a goddess.  She can do what she wants.

Nothing says “French” like black and white stripes and cute girlfriends and sisters, sipping on champagne and pink lemonade.

I wanted topiaries but that’s not exactly the easiest thing to find in Bean Station in February. So, I went to our farm and Papa G helped me dig up a few pine tree saplings, which I trimmed up to topiary style.

Does that seem like a hillbilly way to make a topiary?  It seemed so normal at the time.  No animals were harmed in the making of these topiaries.

I covered up the raw dirt with book page butterflies.

I did all kinds of Helter Skelter moves in this photo.

After I got all the black and white accents up, my window treatments seemed a little lacking—like they hadn’t been invited to the party.  So, I bought wide black ribbon from Hobby Lobby and pinned it to the bottom.  It made all the difference.  I may just switch out the ribbon color, periodically, to give them new life!!

I also printed a silhouette and taped it onto a tray and then sat it upright to look like wall decor.

Then, I chopped down half a magnolia tree to put in the vase.

All in a day’s work.

I made a little food, like tangy mushroom soup, cheese tortellini soup, some quiches, some chicken salad croissants, a strawberry dream cake and brie en croute.

I even jazzed up the hardest working gal in my kitchen, with a little homemade scrap paper banner and an adorable silhouette.

The homemade banner may just stay til summer.  Because, why not, right? It’ll  be as if we’re always on the verge of breaking into song and dance.


The cake competed with the tablecloth for star of the show award.  Buttercream always wins.  My motto is:  “It’s not a party without buttercream and champagne.”

Can I get an amen?  The ruffles are so easy to do.  I watched a YouTube video, because YouTube is the fountain of all learning.

To add more silhouettes than one person should possibly be allowed to have in their house, I kept printing them off.  I framed some…..

And when I ran out of frames, I randomly stuck them places…..


I made David a garland of book page butterflies, which he wants to wear indefinitely.  He’s David.  Who am I to object?

The best part, as always, was all the wonderful ladies who came.  My sisters brought friends and my high school bestie, Shawna, brought lots of friends.

Suffice it to say, we had a ball and partied all morning into the afternoon.  I’m still lingering with all the festive touches, hoping that I’ll think of a reason to throw another party soon.

Musical guests were The Lumineers, The Civil Wars, Mumford and Sons, The Avett Brothers and The Wailin’ Jenny’s.

Because it’s not a party without good music.

Okay, hope you felt like you were there.

I wish you would have been!

Mwahhhhhh!

Filed Under: crafts, DIY, parties

How to Make a Skirted Tablecloth {the lazy girl’s guide}

February 19, 2013 by Edie Wadsworth 51 Comments

I love my dining table. Like LOVE it.  It’s an Eye-talian made table that I bought at O.P. Jenkins after our house fire. (I can’t find any more specific information than that).

This is one place I decided not to skimp.

I’m  all about a Goodwill rehab project but I wanted a good, sturdy table. After seeing Julie’s beautiful table, I knew wanted a large round table that would foster all kinds of warm and cozy hospitality.  I’ve tried various swatches of fabrics draped over it to simulate a make shift table cloth but I’m kinda rebellious.  Far be it from me to go buy a table cloth to fit the table.  THAT is way too right inside the box.  When Better Homes and Gardens came to our house, I found a kindred spirit in Elizabeth because not only did she not care that I didn’t have a proper tablecloth, she swore she wouldn’t have used it anyway.  And then she proceeded to duct tape a piece of fabric together and call it a day.  We were obviously separated at birth.

It looked a little something like this.

Then, before Thanksgiving, I hemmed and hawed around and nearly ordered a skirted tablecloth from Ballards.  But it was gonna be $250 for the size of my table and that just seemed OUTrageous.

So, I got my lazy sewing skills on and made one and I HAVE LOVED every raveling thing about IT.  I mean, LOVED it.

It’s imperfect and unfinished and raveling and beautiful.  I wash it every Friday and then drape it back over the table while it’s damp to finish drying it.

The first one I made was this perfect blue-green linen from Hobby Lobby.  It’s the one we use all the time. Here is it, freshly laundered in all its imperfection.  It adds just the right amount of coziness to my industrial/cottage kitchen. I could have ironed it.  But then those 20 minutes of my life are gone forever.  And we’ve got episodes of Gold Rush to catch up on, people.

I made another one this weekend in anticipation of an upcoming soiree at my house.

I used this fabric, that I ordered from Amazon, because apparently, if I can’t order it from Amazon with free shipping, I don’t need it.  It took about 8 yards for my sized table, give or take a yard or two. (I know, my attention to detail is inspiring.)

So, here’s the laziest tutorial ever known to man.  This tutorial will make real seamstresses shudder.  I will do violence to the craft of sewing.  I’m just giving you fair warning.

First, lay the fabric on the table and roughly (I told you there would be violence) cut out a circle in the shape of your table leaving about an inch overhang.  It helps SO much if you buy fabric that’s wide enough to cover the table.  My table is 48 inches in diameter so I made sure my fabric was 54 inches wide.  It makes this step so much easier.

I sat some heavy objects on the table to keep the fabric from moving and then just starting cutting my circle.


Okay, apparently, I sat a vase of flowers on the table but heavy objects would work fine.

THen measure the drop of the table from top to bottom and add 3-4 inches to make sure it gently brushes the ground after it’s sewn together.
I just layed my fabric right on the island and used the tearing method to ‘cut’ my strips. Many fabrics won’t tear and honestly it’s harder to sew if you do that because of the raveling. But I’m like the ten year old who won’t listen. So I tore it into strips. And then cursed it while I sewed. It took 4 1/2 strips of fabric for me but it’ll depend on the diameter of your table.

THen, I turned the circle piece wrong side up and started pinning the strips to the circle. I added in some very imperfect pleats, just by pinning them in place.

You can join the sides of each strip together if you want or not. I sewed all the sides together so my tablecloth skirt would be one continuous piece of fabric. Just pin it along the sides, when you’re joining the strips together.

About halfway around the table, I took it up to the sewing room and sewed what I had pinned because, 1) The fabric gets bulky and heavy fast and it’s easier to deal with 230 straight pins than 500, at a time. 2) I’m terribly impatient and wanted to see what it would look like half way through.
Ten, finish pinning the strips to the circle and the sides of the strips together until it looks like this.

Now, sew the rest of the pinned pieces together and you will be so darn proud of yourself.

Unless you’re me and do violence to your sewing machine by sewing at the speed of  lightning on steroids and break the bobbin thread every five minutes and poke 8,00o tiny holes in your fingers.

I have a love/hate relationship with my sewing machine but I do dearly love the finished product.

I don’t hem the ends, just let the ravel-y goodness drag the ground.  Surely that doesn’t surprise you.

I made this for a fun silhouette/french themed party at my house next week.  We’re making all kinds of goodies, of the crafty and food variety but this one is my favorite so far.

My sincere apologies to all talented seamstresses in the world!

Filed Under: crafts, DIY, homemaking, sewing Tagged With: skirted tablecloth

My Cottage Christmas

December 12, 2012 by Edie Wadsworth 61 Comments

If you’re new to life{in}grace, welcome!  And especially if you’re from Nester’s Home Tour or Melissa’s Home Tour or  Sarah’s Tree Party!  Thanks for hosting, friends!  I just updated my about page and don’t miss my newly painted stri-ped bathroom!  Thanks for visiting!  Hope you find something that makes you smile!

I’m 42 years old and I’m pretty sure I’ve never decorated for Christmas tree the same way twice.  It’s a blessing and a curse.  Thankfully, I like to use simple, natural, easy- to-craft items.  Otherwise, I’d spend a fortune changing my mind every year.  I also never really ‘finish’ decorating.  I’ll be spray painting  pine cones and adding fresh greens until it’s time to take it  all down.  In a way, my Christmas decorating is a lot  like me—-it’s never really ready to meet the Christ child.

I love every last square inch of my new house even though I never meant to spend last year rebuilding.

There are  two problems with my house.   1.  I have no dining room   2. There’s no room for  a tree in the living room.

I get around those obstacles  by soupin’ up the mantel and moving my lemon tree (WHICH IS BLOOMING!) by the fireplace.

Rabbit trail:: I need to do a whole post on the amount of baby-ing we do to that lemon tree.  I almost got my mom one for Christmas but then I remembered that it would be the equivalent of giving her a small child to care for.  Okay, not that bad.  But our lemon tree is so baby-fied that we take her outside to sit in the sun when it’s nice  and then hem and haw about whether or not it’s gonna get too cold for her to stay out overnight.  We’re hoping for lemons by February.

Okay back to the tree.   SO,  that means that my *real* tree has to stake its claim in the eat-in kitchen.  It makes for happy dinners and a floor full of fir needles because someone brushes past it approximately every 3 seconds.


I wanted a tree that looked relaxed and cottage-y and natural.  My Christmas Pinterest boards helped me decide what I liked.  I used large starfish, pine cones, paper birds (template here), paper garland (inspiration Miss Mustard Seed), dried orange slice ornaments (Shannan gave me the idea),  newspaper print leaf garland and magnolia leaves (I don’t know where I saw it first), and my cowhide rug for a tree skirt (spotted under Nester’s tree last year!).  In my humble opinion, it needs something outrageous but I haven’t quite decided what.  I’m thinking giant paper antlers but I’m taking suggestions!

I poked little lights through the orange slices for effect and I made the banner garland out of book pages that I cut and stapled onto twine.

And there’s a few honest to goodness ornaments just to keep up appearances:)

And apparently, I can’t be suited when it comes to paper bird patterns.  I looked through eight million until I finally found this one on Martha’s site.  Of course, it’s the perfect shape.  I would expect nothing less from Martha.  Which I like to pronounce Mah-tha.  I made my girls make these today for ‘art’.  In other words, so I didn’t have to make anymore.


And I’m having fun this year with the packages.

I wrap them in white or brown paper and then look around for something to stick on them.

It’s all very exact and calculated—-branches, left over pom poms from the wreath project, burlap, or whatever else is in reach!

This one is my favorite so far.  I used this template for the antlers,  spray painted the paper gold, added some fresh greens and then wrapped it in twine.

I used the free printables here for the tag.


Now, here’s what I need to know from you.  Do you always decorate your tree the same or do you do it different every year?  If you always decorate it the same, do you know exactly how much money you have in your checking account right now.  That’s what I thought.  We can still be friends.  I’ll come change up your tree and you can balance my checkbook.  Deal?  (Actually, I love sentimental trees filled the same ornaments year after year but that’s not possible for me now, so I make the best of it :)))

Because I may in fact be insane, I decided to paint the bathroom last week.  I love how it turned out and you can read all about it here.

I added some fresh greens and a rosemary tree to make it even more festive for the season.

The girls and I also made a cute pom-pom wreath and then added a Christmas cactus and a pink poinsettia to this little vignette.

And one more thing.  Did you see the preserved boxwood wreaths at Lowe’s??  They’re already on clearance.

I LOVE them and have two hanging in the kitchen!

It’s beginning to be festive around these parts!

And since I now have a partial tear in my calf muscle and am gimpy, Grannie’s in the house, making fudge and all kinds of yummy treats.

And due to said injury, I won’t be putting a tree on the screened porch this year.  Which makes me very sad.

So, here’s the fun from last year!

Happy preparations dear friends!!!

Filed Under: crafts, holidays Tagged With: cottage christmas tree

  • « Go to Previous Page
  • Go to page 1
  • Go to page 2
  • Go to page 3
  • Go to page 4
  • Interim pages omitted …
  • Go to page 6
  • Go to Next Page »

Primary Sidebar

ediewadsworth

Coach. Healer. Life Mentoring School.
💕💕I help women heal & rediscover their purpose & calling.💕💕 Click below for my free purpose field guide!

Dr. Edie Wadsworth|Lifeingrace
2 years ago today, your world shattered into a mil 2 years ago today, your world shattered into a million pieces.

Sometimes I marvel at how we were blessed enough to be there holding you when it all came crashing down. I do know this—I can’t remember my life without you.

I do know that thousands of tears and meals and boo-boos and toy trucks later, we stand in awe of you---your courage, your brave big boy fight, your tender little boy heart, your hilarious old man ways. 

We know how sacred this walk with you is and we don’t take it lightly.

We are here for it all and we couldn’t be more grateful.

We have always loved you and you have always been our special gift.

 Love you little one. Let’s keep listening for Aslan. He will find a way to put everything back together. 

“Herein lies the world. Beautiful and terrible things will happen. Do not be afraid.”
Hiring these two out for all your ring bearer and Hiring these two out for all your ring bearer and flower girl needs.  They provide ample entertainment to your guests and accept plush toys for payment in lieu of money. May or not be VERY strong willed.  And also adorable. @williamsperformance @ginawilliamsh @ameliadurand4
I turned 51 last week and spent a much needed few I turned 51 last week and spent a much needed few days alone with this guy.  As soon as we drove out of the driveway I started crying. I don’t think I realized how much I needed a break.

it was incredible and relaxing and amazing and so life-giving. 

this week it feels like last week was 100 years ago because you know, life. 

I am excited to say that despite the fact that I’m another year older I managed to figure out how to go live on YouTube with my new camera. It only took me approximately 6000 hours. So maybe you’ll join me at noon today on YouTube and we’ll try something new together.

Here’s to 2021. Maybe it will get its act together but if it doesn’t we will get ours together😂🥳❤️❤️❤️
“To have Faith in Christ means, of course, tryin “To have Faith in Christ means, of course, trying to do all that He says. There would be no sense in saying you trusted a person if you would not take his advice. Thus if you have really handed yourself over to Him, it must follow that you are trying to obey Him. But trying in a new way, a less worried way. Not doing these things in order to be saved, but because He has begun to save you already. Not hoping to get to Heaven as a reward for your actions, but inevitably wanting to act in a certain way because a first faint gleam of Heaven is already inside you.”
― C.S. Lewis, Mere Christianity
Got my halo yesterday🤩😇😂 (That ridge lin Got my halo yesterday🤩😇😂

(That ridge line right above my head is the infamous Angel’s Landing)

Here’s to climbing out of tough spots in 2021❤️
What I learned in 2020?? I am HERE FOR ALL THE L What I learned in 2020?? 

I am HERE FOR ALL THE LOUNGE WEAR. 

Amen. Goodnight. 🤩🤩🥳🥳🥳 

Okay fine. Currently sporting sweater from Target which I have worn everyday for 3 months.  Natori PJ’s which I HIGHLY recommend, and Ugg slippers which I’ve worn everyday for a solid year. 

How’s your lounge wear game?? Tell me everything.
Day 2 of LIVE YOUR DREAM starts in 30 min. We’ll Day 2 of LIVE YOUR DREAM starts in 30 min. We’ll be talking all about DESIRE and the difference between false desire and true desire and how true desire leads us to our calling. 

It’s not too late to join us and if you could see the comments inside this group, you would 😭😭😭 and 🥳🥳🥳 because we are getting to the heart of things and it’s only gonna get better! 

If you’re already in, tell us how yesterday’s training impacted you and if you’re not, JOIN US FRIENDS!!

Head over to https://lifeingraceblog.com/dream
We took Tommy boy for this first ski adventure tod We took Tommy boy for this first ski adventure today and it was so satisfying to see him tackle something hard and keep his chin up and have a BALL doing it.

He was very entertaining to his ski school friends, despite the fact that his German instructor couldn’t understand a WORD he said. 😂🥳

But all you mamas out there can see through all the pretty pictures and videos to know that days like today can also be full of frustration.

Making sure everybody has their stuff, the reservations, the snacks, the HASSLE of boots and poles and gloves and skis, the tears, the snappy replies, the hurt feelings, the wrong turns, the missed moments, the potty breaks.

NEED I GO ON??????

But then there’s the down to your soul goodness of being smack dab in the middle of God’s glorious creation, the sheer joy of the wind and sun on your face, the fleeting feeling that everything is right in the world, the triumph of tackling something hard and pushing through all the doubt and fear.

I felt every emotion today. What a privilege to live this life we’ve been given. What grace to live it with these people.

Today was a dream. But like every dream come true, it has a cost, it requires more of you than you think it will. You will want to quit.  A million times.  But what waits for you on the other side is worth fighting for. 

That’s what we’re diving into this week in my online workshop LIVE YOUR DREAM.

You may have given up on setting goals, but don’t stop dreaming.

Come dream with us and let’s make 2021 the year we were willing to be so alive that we would risk feeling EVERY emotion, every setback, every failure in order to see it come true.

We start tomorrow.

It won’t be the same without you.

Join us at https://lifeingraceblog.com/dream.

It’s time to dream again.
❤️❤️❤️❤️❤️❤️

What’s one thing you’re dreaming about this year???
It was magical. ⛄️⛄️⛄️ Know what’s It was magical. ⛄️⛄️⛄️

Know what’s more magical for me???? The week between Christmas and the new year and I’ve made it even more epic by hosting an online workshop called LIVE YOUR DREAM🥳🥳🥳🥳

This one is for the dreamers and the doers!! Join me at lifeingraceblog.com/dream and let’s make some magic❤️❤️❤️❤️

Tell us in the comments if you’re already in!!!
  • Facebook
  • Instagram
  • Twitter

© Copyright 2008-2019 life{in}grace · All Rights Reserved · Graphic Design by Jenna Riccio Laible · Website by Erin Ulrich