• Skip to main content
  • Skip to primary sidebar
life{in}grace

life{in}grace

live with more presence, passion, & purpose

  • Home
  • About
    • Contact
  • Work with Me
    • Courses
    • Life Mentoring School
    • LIVE Event – Your Best Beautiful Year – January 4, 2020
  • Natural Healing
    • Get Started
    • Essential Oil Resources
  • Free Resources
  • Podcast
  • Books

DIY

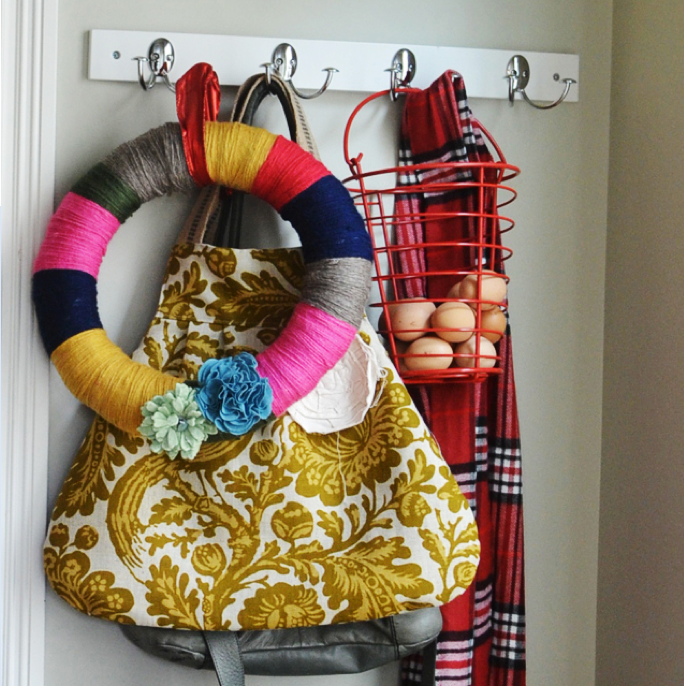
Yarn Wrapped Wreath

December 4, 2014 by Edie Wadsworth 10 Comments

Preppy_Yarn_docx

We are so enjoying Advent and a very SLOW move toward Christmas. In other words, I still have pumpkins in my kitchen and on my front porch.

I’m obsessed with all things yarn right now so as we speak, I’m knitting some cool bracelets and a cowl or two.  I made these wreaths last Christmas and I love them SO MUCH!  This project is so easy and takes a little over an hour.  I love to craft during the holidays because it forces me to slow down, to SIT DOWN.  I can listen to music or podcasts or I can eat Grannie’s fudge but I can’t run myself ragged while I’m doing it.  It’s a great way to teach yourself how to relax.  Or at least it is for me.  Yarn bracelets coming soon!  I also made a pom pom wreath last year which I then converted to a  pom pom garland, so check it out too!

What you’ll need:

  • Foam/Straw/Styrofoam wreath (sold at craft stores for $2-$3)
  • Yarn – any kind, I used a #4 medium weight
  • Felt or linen flowers or your choice of embellishments
  • Spray adhesive
  • Scissors
  • Ribbon/string for hanging


What you’ll do:

  • Do not remove the plastic wrapping from the wreath, especially if you’re using the straw kind.  It’s easier to just wrap the yarn right around the plastic wrapping.
  • Cut four strips of yarn the same length, about two yards.
  • Hold those four pieces together and after spraying a little adhesive onto the wreath form, begin wrapping.  Wrap it in such a way as to cover up the ‘tails’ of the four strands of yarn.
  • When you’ve wrapped those four strands, make sure you leave the ‘tails’ of those strands on the back side of the wreath.  You’ll use the next set of four strands to then cover the ‘tails’ of the previous strands.  (I illustrate this is the video, if that’s confusing!)
  • Continue spraying and wrapping, until your wreath is covered and full.  It took me about an hour to finish one wreath.  The reason I use four strands at a time and cut them to a manageable length is because a) it’s way faster and b) you can avoid trying to wrap a whole skein of yarn through the wreath form.
  • When you’re finished, use a piece of coordinating ribbon to hide the last set of ‘tails’ from your yarn.
  • It looks wonky from the back unless you’re a perfectionist which I AM NOT.  But it only shows from one side, right?

And may your crafting force you to slow down dear friends!
openhouse

p.s—I’m joining my friend Myquillin’s wreath party so head on over for more homemade wreath goodness!  And in case you’re in need for some colorful quirky Christmas cheer, head over to my Christmas tour from last year.  And by the way?  The crazy mannequin with the evergreen bough is coming back!!


MY NEWEST BLOG SPONSOR:


This post is generously sponsored by my YL. I am into natural choices for my family, and this is the main way I help boost our immune systems and alleviate lots of minor aches, pains, and injuries.  Read more about how we are using them everyday! My Young Living essential oils are also my newest business venture, and the oils are so well loved that they sponsor my blog!!! Thank you, friends!  Enroll by clicking here.

Filed Under: DIY, holidays, homemaking, tutorials

How to Set Up a Baking Center

September 10, 2014 by Edie Wadsworth 26 Comments

bakingnographics

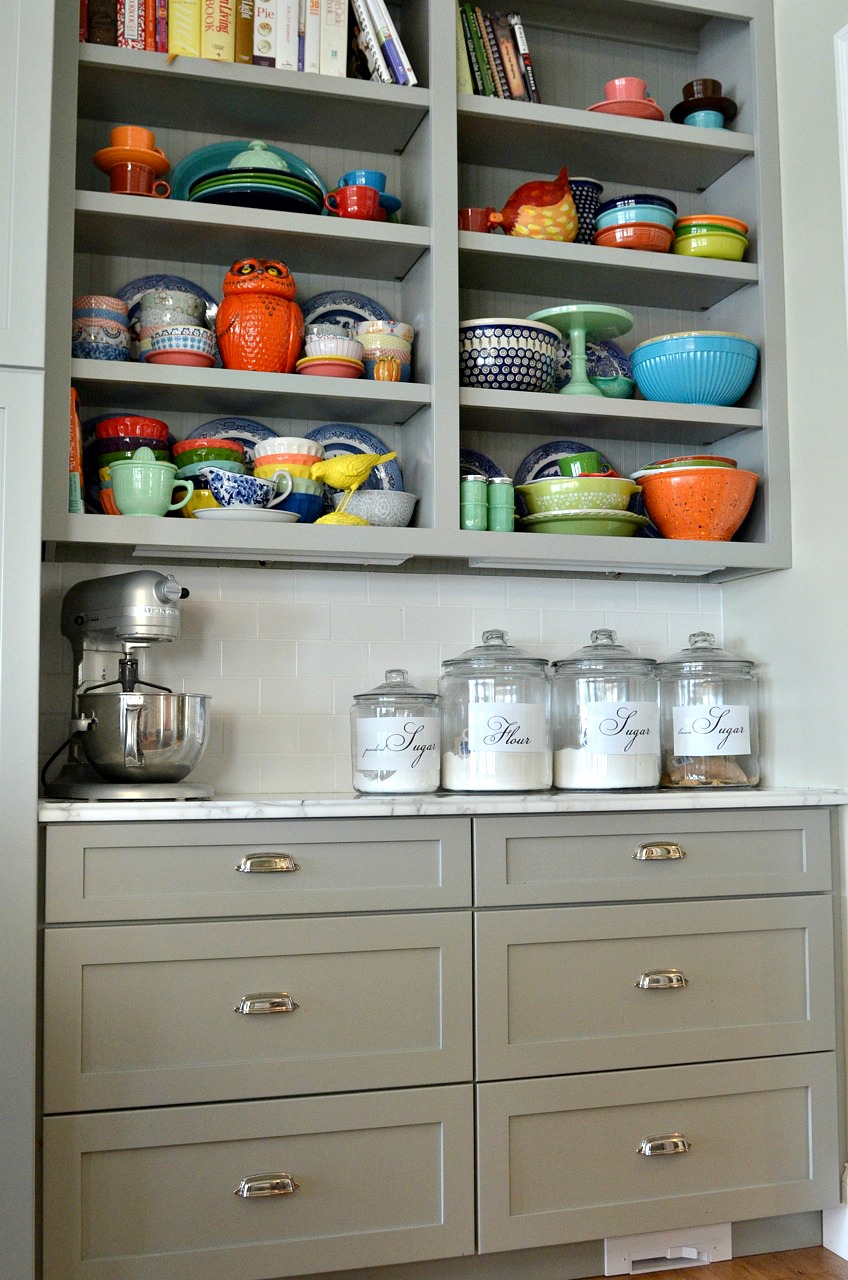
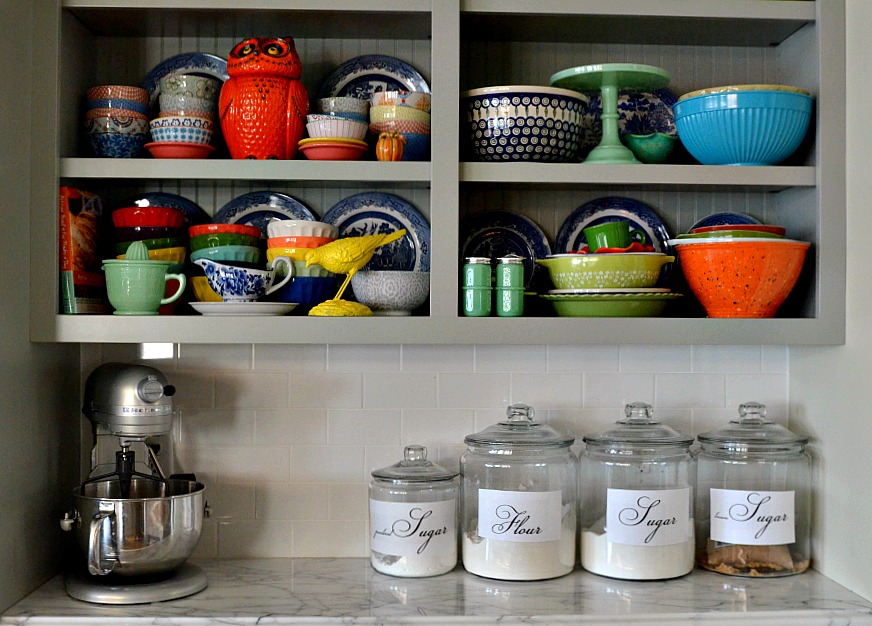
I’ve never quite had a baking center like this but it was a priority when we rebuilt our house. I’ve had various versions of one for a long time and here’s the truth of the matter—-if your supplies are easily accessible and organized, you’ll bake more.  (You might also like a full tour of the kitchen and a  list of my 10 favorite kitchen tools!)

The flour and sugar that are sitting on my counter are practically begging me to bake something. AND, I never run out of stuff because I always know when I need it. So, besides chicken stock, apparently I hoard baking supplies too. But, let’s look on the bright side, there’s always flour.

baking

So, it’s worth the effort to think through your spaces and see where you could incorporate and organize your supplies. Here’s my advice. [Read more…] about How to Set Up a Baking Center

Filed Under: DIY, from my kitchen, home organization, homemaking, hospitality

DIY Arrow Jewelry Holder

March 24, 2014 by Edie Wadsworth 11 Comments

Welcome Sasha from Lemonade Makin’ Mama to the blog today!  She has a great blog, full of beautiful words and eye candy galore and a shop that will quickly become one of your favorites.  I’m so excited about the project she’s sharing today and  I can’t wait to make one for myself!  I know you’re gonna love and welcome her!

I’m Sasha and I blog over at lemoandemakinmama.com.  I was so thrilled when Edie asked me to come hang out over here today, as she’s been a long time inspiration for me in so many aspects of being a wife, mother, friend and godly woman!  (Always awesome when you can partner up with your blog crushes.)  Edie asked me tell you just a bit about myself before I share a great DIY craft with you.  I’m a mom of two kids- a son Joe, who is becoming a teenager next week. (I’m seriously dying on the inside) and a daughter, Ava who will be eleven next month.  My son has Asperger’s and I keep that mostly private on my blog for his sake, but it’s a big piece of my heart as a mom, as we navigate tricky waters.  I blog once a week, with a group of other moms for a Seattle radio station, here, and love the collective wisdom I get to glean from all these other mamas doing life.  I sell my artwork and a few other random items at my etsy shop here, and I’ve been married to my high school sweetheart for going on nineteen years!   I love painting things white, but I also love color. I love hosting overnight guests, campfire time in the backyard, and deep talks.  Life is too short for small talk. (I’d love to get to know you better so stop on by my blog sometime and say hello!)

As moms, it’s often easy to lose ourselves in the very daily (and often mundane) tasks of life isn’t it?  This year I’ve taken a good look at areas I want to improve in my own self, some deep inside my heart, others a bit more surface level. The goal is to be a balanced wife, mother and woman so they all have their place.  One of the surface areas I’m trying to make more of an effort in, is my outward appearance. Just the basics of putting together an outfit that looks intentional (and clean) with a few accessories- because, raise you hand if you’ve ever been a member of the “I wore yoga pants all day because they were easy, but never actually worked out in them,” club.  (Um. Guilty.)

As a mostly stay at home mom, I find comfort often wins out for me, and besides, who is going to see me?
Well.  The people I love most in the world, is who.  Of course, they don’t love me for how I look, (thank goodness!) but I sure feel a bit more presentable when I’ve put some effort into a more polished look an I can’t help but think that reflects in how I feel about myself and even outwardly act on some level.  As a mom, do you ever find that it’s the small things that tend to slip at first, and then they become piece of our identity? Beauty comes from the inside, but you’ve probably heard it said, that a little mascara also doesn’t hurt?  (grin)  Anyway, my personal goal this year has been to put on at least one piece of jewelry every day, let myself feel feminine, and know that as I age and change, I can still put my best foot forward.  You get this, I know you do. Which brings me to simple jewelry organization.  My shoestring budget and I went shopping, and we decided to bust something out together so I could put my jewelry items out where I’d see and then eventually remember to actually wear them and I would love to share this fairly simple DIY idea with you today!


Instructions for this DIY:

I found a balsa wood craft dowel (7/8″) at JoAnns for $2.49.  Then I grabbed a thin strip of wood (sized 1/32 x 3 x24″) for $2.99 but I used a 40% off coupon.  This was so thin I could cut it with a pair of scissors.  I went to Lowes next and bought a pack of gold assorted screw hooks for $3.97.  I had self leveling hangers at home, along with some antique gold paint that I planned to use but neither of those items would break the bank if you needed to purchase them.  I drew a simple triangle for one end of my arrow hanger and then just did an end piece that wasn’t too complicated. That’s the best way that I can really describe it for you.  The first time, the wood split when I cut it but I had plenty of extra wood and finally got both a front and end piece for my arrow.  I borrowed my man’s hack saw and cut grooves into the ends of the dowel.  The grooves don’t need to be very deep and the thin wood I used for the arrow ends fit perfectly into the grooves, with no glue needed.  (Make sure the grooves both go the same direction.)  I choose the smallest screw hooks for this and decided to place them 3″ apart.  It turned out that the dowel wood was so soft I could press it into the marks I’d drawn, then screw them in all the way with my fingers.

Then I added some self leveling hangers to the backside.  (That will be the toughest part of this project and if I’d been smarter,  I might have thought to add those before putting in the screw hooks on the reverse sides.  It all worked out however) soft antique gold finish, so I used this metallic rub all over it.  (I didn’t buff it. I painted it on with a brush and let that be that. I even painted over the shiny gold hooks so everything looked even.)
I used some picture hooks that I already had to hang this and it only took about an hour from start to finish!
I can’t begin to tell you how much more I am grabbing a little sparkle for my wrist or around my neck, now that I have everything within reach.  I love being able to see these items and it’s helping me take just a bit better care of myself on the outside, anyway and I hope this inspires YOU!
And thank you so much sweet Edie, for letting me hang out with your readers today!  I just adore you and all you do.  Thank you for being such a great source of inspiration for myself and others in this blog-world!


Filed Under: DIY

Christmas Brunch Menu and Jam Thumbprints

December 23, 2013 by Edie Wadsworth 10 Comments

christmas brunch

My mother passed the baton to me a few years ago, so now I host Christmas Eve Brunch for my family.  It’s one of my favorite traditions.  I thought I’d share our menu, in case you might hosting breakfast or brunch yourself. Also at the bottom is my recipe for Jam Thumbprints.  Besides fudge, they’re my favorite Christmas treat.

Here’s what we’re having:

  • Homemade Waffles ( I have changed this recipe a little to make it my own, but it’s a wonderful waffle and pancake recipe.  It’s a little labor intensive to make the baking mix, but once you make it, it’ll last for a couple of months, depending on how much you make waffles.  We’re on a nearly every Saturday schedule!)
  • Biscuits and Gravy—we’re Southern, what can I say.  I have no apologies to make.  I use equal parts bacon fat and flour (usually 1/2 cup of each) and brown the flour until it’s medium brown.  I then add a little sugar (maybe 1 t.) and a little nutmeg, salt and pepper.  Then I add a can of evaporated milk and probably 2 cups of regular milk.  Stir  over medium heat until it thickens a little.  I make these biscuits and then I cheat and use frozen biscuits.
  • Quiche Lorraine—if you haven’t tried this one yet, I beg you, BECAUSE ham cooked in bacon fat will change your life. Amen.
  • Dutch Babies—aka German pancakes.  They’re amazing and I can’t get enough.
  • Ham and Swiss sliders—everybody in the South makes these.  If you haven’t tried them, do yourself a favor!
  • Bacon, Sausage, and Ham—(I try to precook the meat the day before and then reheat Christmas Eve morning, otherwise, my whole house smells like bacon.  Not that there’s anything wrong with that, mind you.)
  • Variety of sweets, including Grannie’s fudge, Jam Thumbprints (recipe below), spritzer cookies, chocolate crinkles
  • Mimosas and wassail
  • 24 Hour Cherry Salad—THIS? Is my favorite food of the day.  Here’s how my mom does it.  Take 1 can of pineapple tidbits, drained, and mix with 1 jar of chopped marachino cherries and about 12-15  large marshmallows, cut into twelth’s—each piece being about the size of miniature marshmallows.  Why can’t you use miniature marshmallows?  Because my grandmother says it doesn’t turn out right and grannie’s know best.  Let that sit overnight and then in the morning, whip up about 1 1/2 cups of heavy whipping cream, adding 1/2 cup of sugar and 1 tsp of vanilla.  Fold the fresh whipped cream into the fruit and marshmallow mixture.  I use about 3/4 of a 20 oz can of pineapples and a ten oz jar of cherries.  This is how we cook around here, what can  I say!?
  • Challah or Swiss Braided Bread or Santa Lucia Braided Wreath—this is a great breakfast recipe, and the one you see in the above picture.  We make it for St. Lucia’s day on Dec. 13, but I’m making for brunch as well.  It can be served plain with butter and jam on the side or served with a citrus glaze, as shown above.  There are lots of recipes for this out there, but I use this one, usually.

Yes, I must get busy.  But, first I wanted to leave you with my jam thumbprints recipe.  The key to these is good jam.  Don’t skimp. Use all fruit or some other good brand of jam.

jam thumbprints

  • 3 sticks of  butter, at room temperature
  • 1 cup sugar
  • 1 teaspoon pure vanilla extract
  • 3 1/2 cups flour
  • 1/4 teaspoon salt
  • your favorite good jam

What you’ll do:

  • Mix together the butter and sugar until just combined and add vanilla.
  • Add the flour and salt to the creamed butter and sugar.
  • Mix until the dough starts to come together.
  • Dump on a floured board and roll together into a ball.
  • Wrap in plastic wrap and chill for 30 minutes.
  • Pinch off the dough into equal sized balls, sized how you want.
  • Place the balls on an ungreased cookie sheet and press a light indentation into the top of each with your finger.
  • Drop 1/4 teaspoon of jam into each indentation.
  • Bake for 20 to 25 minutes, until barely light brown around the edges.

*****************************

In response to the controversy lately in the news regarding our Christian faith and culture, I wrote a very long piece about Why Theology Matters.  You can read it here.

Blessed Advent to you and yours.

xoxo,

edie

Filed Under: DIY, from my kitchen, holidays, homemaking

December Menu Plan

December 4, 2013 by Edie Wadsworth 43 Comments

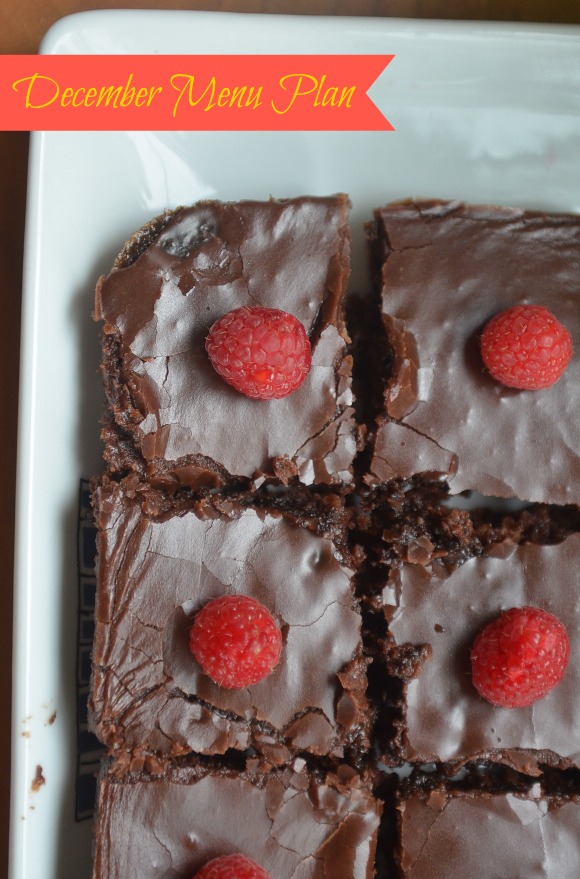
Okay, these menu plans take forever to compile.  Sorry it’s late and let me know if it helps you!  There’s some good stuff on here this month, so click through and see what  your family might enjoy!

December Menu Plan via lifeingrace

Week 1

  • Monday, December 2—Pumpkin Chipotle Soup
  • Tuesday, December 3—Italian Sausage and Broccoli Pasta
  • Wednesday, December 4—Hungarian Potato Goulash
  • Thursday, December 5—Buffalo Chicken Quesadillas
  • Friday, December 6—Homemade Pizza (Try our new flavor with pesto, spicy eye-talian sausage, feta, spinach and sun dried tomatoes—SO GOOD!)
  • Saturday, December 7—Broiled Salmon, Salad with Lemon-Mint Vinaigrette, and Lemon Roasted Potatoes, Chocolate Meringue Cake with Raspberries (we’re having Darlene’s family for the night and I can hardly wait to get my hands on that baby and those cutie boys!!)
  • Sunday, December  8—Dutch Babies (these are DIVINE!), Quiche Lorraine, Homemade Petro’s for dinner using this chili

Week 2

  • Monday, December 9—Baked Potato Bar (Wrap large potatoes in aluminum foil, adding salt, pepper, and a pat of butter before you wrap them up.  Bake at 400 for 1 hour, 45 minutes.  Serve with leftover chili, chives (don’t forego the chives!!), cheddar cheese, bacon bits, sour cream, and butter.  I usually make a salad and bread to serve alongside.
  • Tuesday, December 10—Lemon and Garlic Roasted Chicken with Root Vegetables (will use leftover chicken for Thursday)
  • Wednesday, December 11—Italian Sloppy Joes served on italian bread
  • Thursday, December 12—Chicken Pot Pie Soup, with leftover chicken from Monday
  • Friday, December 13—Butternut Squash and Black Bean Enchiladas
  • Saturday, December 14—Onion Bisque Soup with Cheese Toast Floaters (I promised this recipe last month, and I’m hoping to actually get it posted!)
  • Sunday, December 15—Coconut Chicken Salad

Week 3

  • Monday, December 16—Broccoli Cheese Soup with Homemade Honey Wheat Bread
  • Tuesday, December 17—Middle Eastern Style Chicken (quick, tasty,  and uses rotisserie chicken)
  • Wednesday, December 18—Hot Roast Beef Sandwiches (Make extra and keep for any company that might need a snack!)
  • Thursday, December 19—Spicy Beef Stew with Cheddar Grits
  • Friday, December 20—Copy cat Chick-Fil-A sandwiches (we didn’t have these last month, so they’re back on!)
  • Saturday, December 21—Gnocchi Carbonara
  • Sunday, December 22—Appetizers (more to come!)

Week 4 (Thanksgiving Week!)

  • Monday, December 23—Turkey breast in crock pot for Turkey Noodle Soup and for the salad on Saturday
  • Tuesday, December 24—Christmas Brunch, menu coming soon, Shrimp Stew for supper
  • Wednesday, December 25—Christmas Pasta
  • Thursday, December 26—Baked ham and Rhodes rolls to add to the leftovers, Warm Potato Salad
  • Friday, December 27—Leek and Potato Soup, Pesto paninis (recipe coming—also promised last month and NOT executed)
  • Saturday, December 28—Asian Citrus Salad with turkey strips

I’ve stopping here, for now, because these take FOREVER.  I don’t know about y’all, but ordering take out is what we’ll probably be doing at this point.

I have used emeals a lot in the past and their program coordinates with the sales at various grocery stores, so click on the link below and check out their plans, too!

Hope your November is off to an awesome start!

EMEALS EASY AND DELICIOUS DINNER RECIPES


If you’re new around here?  Thank you for visiting my blog!  I’m honored you’re here and I hope you’ll find some encouragement (and some laughter!) for your days.  Visit my about page, which highlights some of my popular posts or will at least show you a peak into my crazy people.  You can subscribe to this blog by email here.  I am currently addicted to Pinterest, so follow at your own risk.  I also post updates to Facebook, Instagram, and Twitter.

Filed Under: DIY, from my kitchen, menu planning

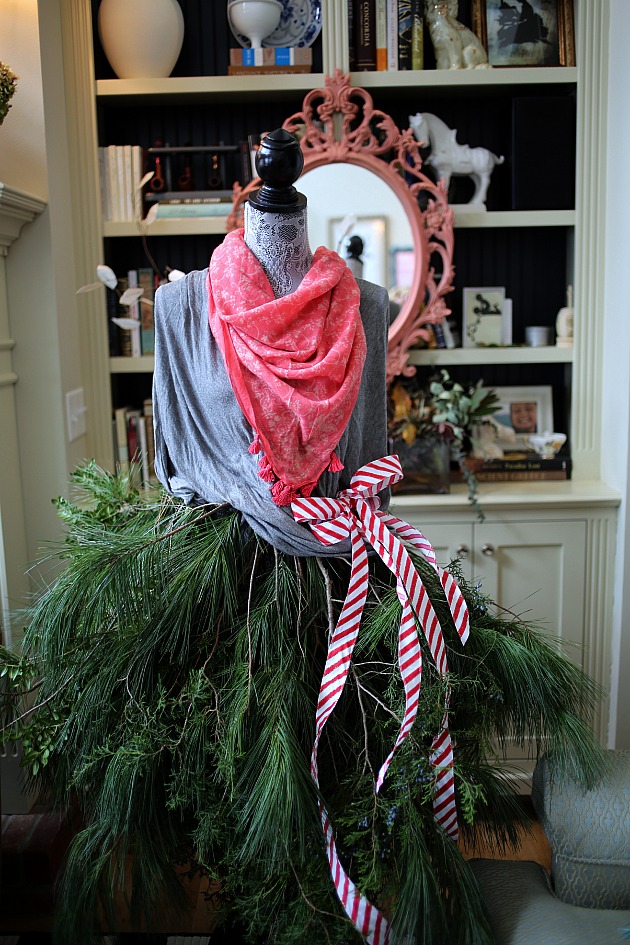
Bedazzled Mannequin {aka Mrs. Tumnus, the Faun}

December 3, 2013 by Edie Wadsworth 75 Comments

mrstumnus

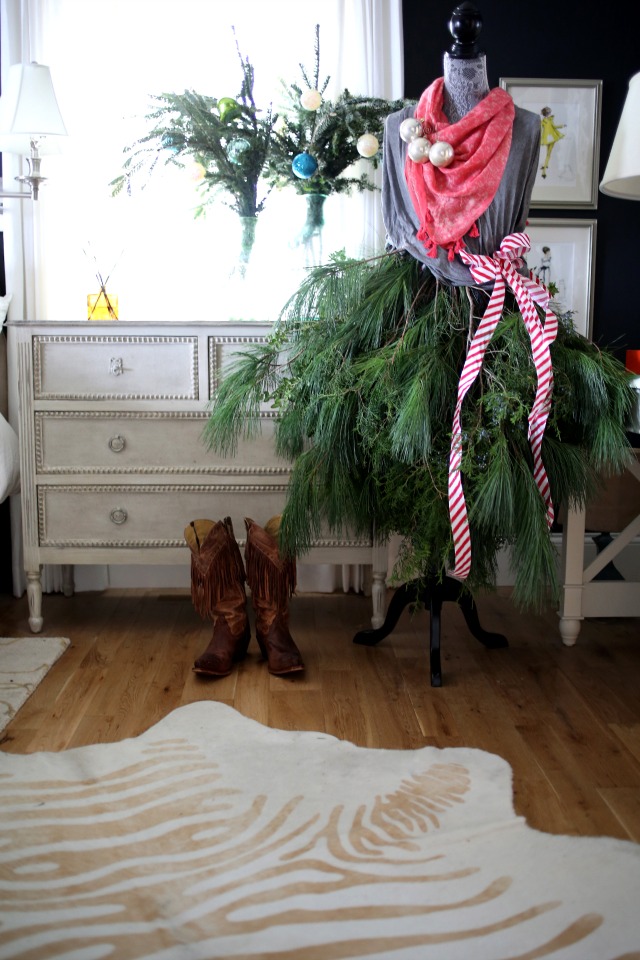
I’ve had my eye on this project for at least 3 years.  Finally, my bedazzled mannequin dreams have come true.  I want one in every room, much to Stevie’s pain and suffering.

The first thing you should know about this project is—it’s prickly.  The second thing you should know is that your mannequin must be evenly weighted with greenery, lest she fall in the middle of the night and prickle your husband to death.  The third thing you should know is that all the trouble is totally worth it. As we were bedecking here with branches, she kept toppling over.  We solved this problem by stuffing boxwood into her backside.  Baby’s got back.

Y’all.  I LOVE my faun lady.  I’ve named her Mrs. Tumnus,  because I think she pairs well with Mr. Tumnus, from The Lion, the Witch, and the Wardrobe.   I do believe that this is my favorite project of all time ever.  I say that for every project, but let’s pretend I don’t.

My friend, Tammy and I, tackled this, from the multitude of examples on Pinterest.  We had  the determination of Rocky Balboa and  the spirit of Sanford and Son. We wired the tops of the branches together and then wound some ribbon through them and tied them on. That makes it sound easy, which it wasn’t, but it wasn’t hard either.

Here’s what I need to know from you.

Should we keep her in the bedroom? (Stevie may veto this, but who knows, maybe he’s always had a fondness for faux fauns.)

mrstumnus2

In the master bathroom? (She looks so pretty in here, because of the light walls and sparse decor!)

mrstumnus3

Or in the living room, by the mantle?


mrstumnus4

The only other thing I’m worried about is that she’s wearing my red scarf and my pajama shirt, which I may not be able to live without.  In other words, she may have to change clothes.

Okay, what’s your vote?

Filed Under: crafts, Decorating, DIY, holidays

  • Go to page 1
  • Go to page 2
  • Go to page 3
  • Interim pages omitted …
  • Go to page 8
  • Go to Next Page »

Primary Sidebar

ediewadsworth

Coach. Healer. Life Mentoring School.
💕💕I help women heal & rediscover their purpose & calling.💕💕 Click below for my free purpose field guide!

Dr. Edie Wadsworth|Lifeingrace
2 years ago today, your world shattered into a mil 2 years ago today, your world shattered into a million pieces.

Sometimes I marvel at how we were blessed enough to be there holding you when it all came crashing down. I do know this—I can’t remember my life without you.

I do know that thousands of tears and meals and boo-boos and toy trucks later, we stand in awe of you---your courage, your brave big boy fight, your tender little boy heart, your hilarious old man ways. 

We know how sacred this walk with you is and we don’t take it lightly.

We are here for it all and we couldn’t be more grateful.

We have always loved you and you have always been our special gift.

 Love you little one. Let’s keep listening for Aslan. He will find a way to put everything back together. 

“Herein lies the world. Beautiful and terrible things will happen. Do not be afraid.”
Hiring these two out for all your ring bearer and Hiring these two out for all your ring bearer and flower girl needs.  They provide ample entertainment to your guests and accept plush toys for payment in lieu of money. May or not be VERY strong willed.  And also adorable. @williamsperformance @ginawilliamsh @ameliadurand4
I turned 51 last week and spent a much needed few I turned 51 last week and spent a much needed few days alone with this guy.  As soon as we drove out of the driveway I started crying. I don’t think I realized how much I needed a break.

it was incredible and relaxing and amazing and so life-giving. 

this week it feels like last week was 100 years ago because you know, life. 

I am excited to say that despite the fact that I’m another year older I managed to figure out how to go live on YouTube with my new camera. It only took me approximately 6000 hours. So maybe you’ll join me at noon today on YouTube and we’ll try something new together.

Here’s to 2021. Maybe it will get its act together but if it doesn’t we will get ours together😂🥳❤️❤️❤️
“To have Faith in Christ means, of course, tryin “To have Faith in Christ means, of course, trying to do all that He says. There would be no sense in saying you trusted a person if you would not take his advice. Thus if you have really handed yourself over to Him, it must follow that you are trying to obey Him. But trying in a new way, a less worried way. Not doing these things in order to be saved, but because He has begun to save you already. Not hoping to get to Heaven as a reward for your actions, but inevitably wanting to act in a certain way because a first faint gleam of Heaven is already inside you.”
― C.S. Lewis, Mere Christianity
Got my halo yesterday🤩😇😂 (That ridge lin Got my halo yesterday🤩😇😂

(That ridge line right above my head is the infamous Angel’s Landing)

Here’s to climbing out of tough spots in 2021❤️
What I learned in 2020?? I am HERE FOR ALL THE L What I learned in 2020?? 

I am HERE FOR ALL THE LOUNGE WEAR. 

Amen. Goodnight. 🤩🤩🥳🥳🥳 

Okay fine. Currently sporting sweater from Target which I have worn everyday for 3 months.  Natori PJ’s which I HIGHLY recommend, and Ugg slippers which I’ve worn everyday for a solid year. 

How’s your lounge wear game?? Tell me everything.
Day 2 of LIVE YOUR DREAM starts in 30 min. We’ll Day 2 of LIVE YOUR DREAM starts in 30 min. We’ll be talking all about DESIRE and the difference between false desire and true desire and how true desire leads us to our calling. 

It’s not too late to join us and if you could see the comments inside this group, you would 😭😭😭 and 🥳🥳🥳 because we are getting to the heart of things and it’s only gonna get better! 

If you’re already in, tell us how yesterday’s training impacted you and if you’re not, JOIN US FRIENDS!!

Head over to https://lifeingraceblog.com/dream
We took Tommy boy for this first ski adventure tod We took Tommy boy for this first ski adventure today and it was so satisfying to see him tackle something hard and keep his chin up and have a BALL doing it.

He was very entertaining to his ski school friends, despite the fact that his German instructor couldn’t understand a WORD he said. 😂🥳

But all you mamas out there can see through all the pretty pictures and videos to know that days like today can also be full of frustration.

Making sure everybody has their stuff, the reservations, the snacks, the HASSLE of boots and poles and gloves and skis, the tears, the snappy replies, the hurt feelings, the wrong turns, the missed moments, the potty breaks.

NEED I GO ON??????

But then there’s the down to your soul goodness of being smack dab in the middle of God’s glorious creation, the sheer joy of the wind and sun on your face, the fleeting feeling that everything is right in the world, the triumph of tackling something hard and pushing through all the doubt and fear.

I felt every emotion today. What a privilege to live this life we’ve been given. What grace to live it with these people.

Today was a dream. But like every dream come true, it has a cost, it requires more of you than you think it will. You will want to quit.  A million times.  But what waits for you on the other side is worth fighting for. 

That’s what we’re diving into this week in my online workshop LIVE YOUR DREAM.

You may have given up on setting goals, but don’t stop dreaming.

Come dream with us and let’s make 2021 the year we were willing to be so alive that we would risk feeling EVERY emotion, every setback, every failure in order to see it come true.

We start tomorrow.

It won’t be the same without you.

Join us at https://lifeingraceblog.com/dream.

It’s time to dream again.
❤️❤️❤️❤️❤️❤️

What’s one thing you’re dreaming about this year???
It was magical. ⛄️⛄️⛄️ Know what’s It was magical. ⛄️⛄️⛄️

Know what’s more magical for me???? The week between Christmas and the new year and I’ve made it even more epic by hosting an online workshop called LIVE YOUR DREAM🥳🥳🥳🥳

This one is for the dreamers and the doers!! Join me at lifeingraceblog.com/dream and let’s make some magic❤️❤️❤️❤️

Tell us in the comments if you’re already in!!!
  • Facebook
  • Instagram
  • Twitter

© Copyright 2008-2019 life{in}grace · All Rights Reserved · Graphic Design by Jenna Riccio Laible · Website by Erin Ulrich