• Skip to main content
  • Skip to primary sidebar
life{in}grace

life{in}grace

live with more presence, passion, & purpose

  • Home
  • About
    • Contact
  • Work with Me
    • Courses
    • Life Mentoring School
    • LIVE Event – Your Best Beautiful Year – January 4, 2020
  • Natural Healing
    • Get Started
    • Essential Oil Resources
  • Free Resources
  • Podcast
  • Books

tutorials

Yarn Wrapped Wreath

December 4, 2014 by Edie Wadsworth 10 Comments

Preppy_Yarn_docx

We are so enjoying Advent and a very SLOW move toward Christmas. In other words, I still have pumpkins in my kitchen and on my front porch.

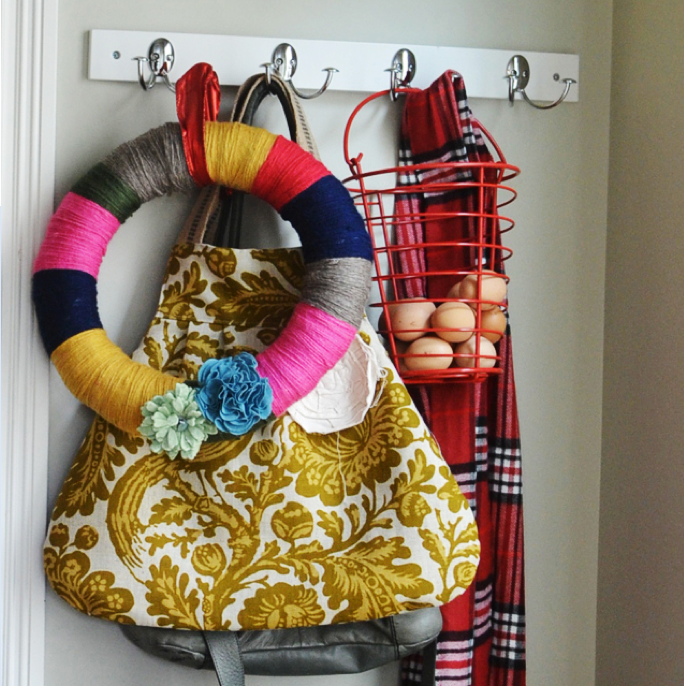
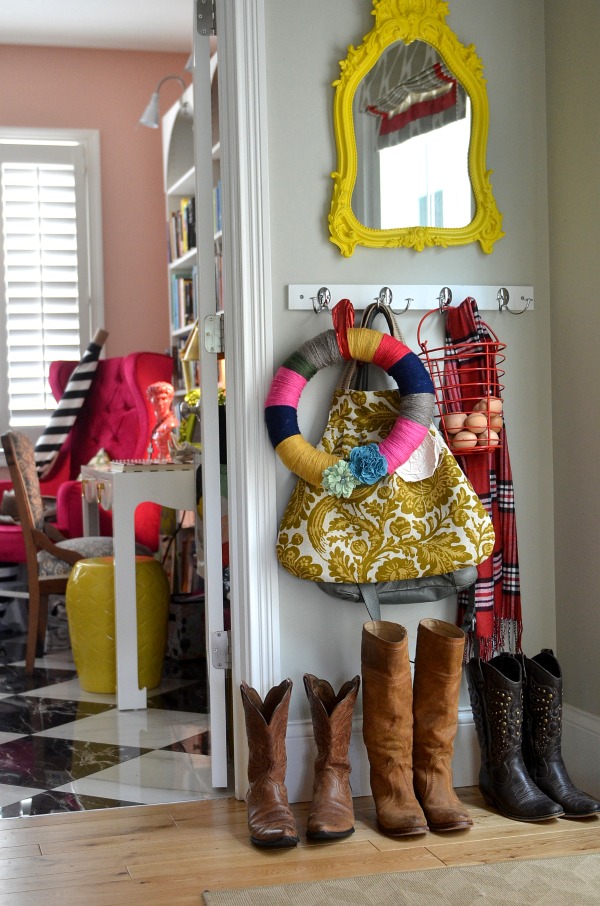
I’m obsessed with all things yarn right now so as we speak, I’m knitting some cool bracelets and a cowl or two.  I made these wreaths last Christmas and I love them SO MUCH!  This project is so easy and takes a little over an hour.  I love to craft during the holidays because it forces me to slow down, to SIT DOWN.  I can listen to music or podcasts or I can eat Grannie’s fudge but I can’t run myself ragged while I’m doing it.  It’s a great way to teach yourself how to relax.  Or at least it is for me.  Yarn bracelets coming soon!  I also made a pom pom wreath last year which I then converted to a  pom pom garland, so check it out too!

What you’ll need:

  • Foam/Straw/Styrofoam wreath (sold at craft stores for $2-$3)
  • Yarn – any kind, I used a #4 medium weight
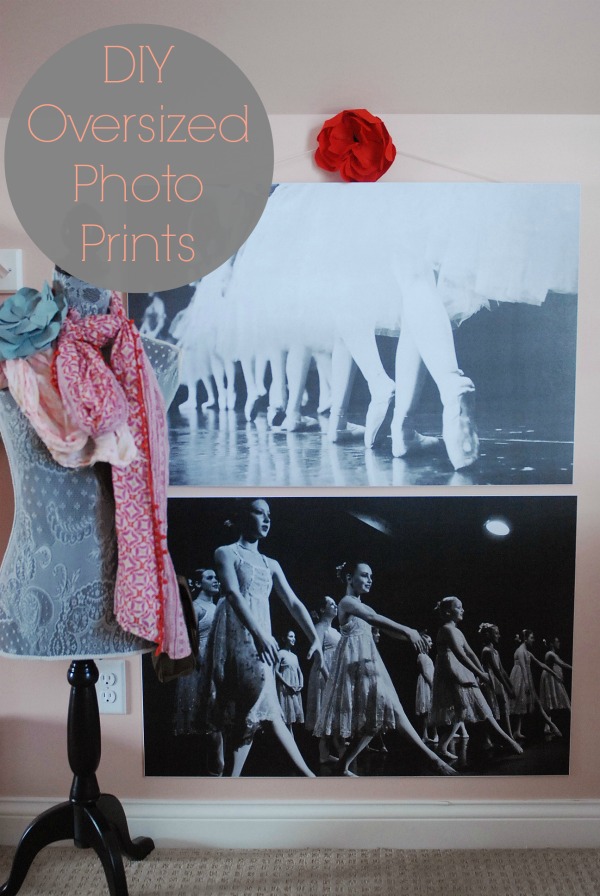
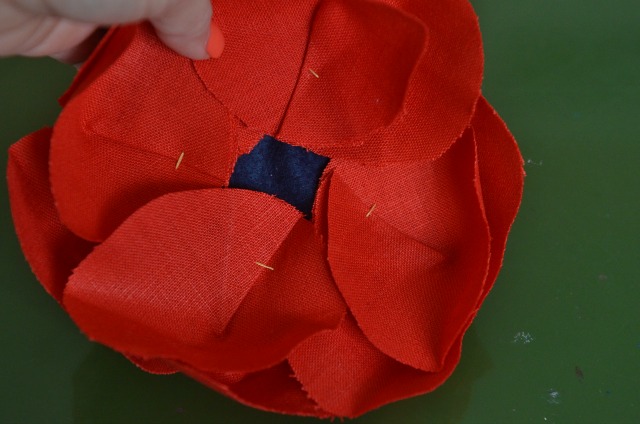
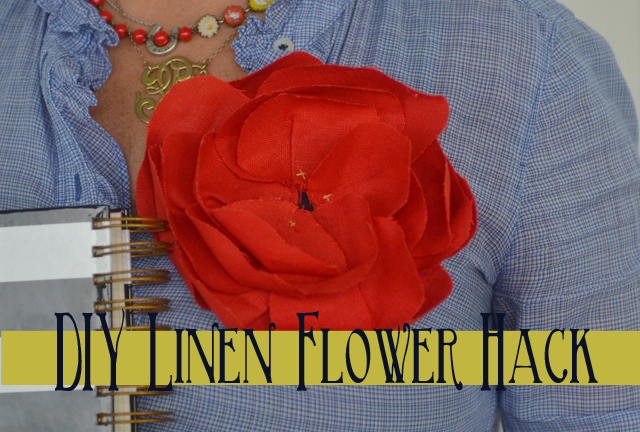
  • Felt or linen flowers or your choice of embellishments
  • Spray adhesive
  • Scissors
  • Ribbon/string for hanging


What you’ll do:

  • Do not remove the plastic wrapping from the wreath, especially if you’re using the straw kind.  It’s easier to just wrap the yarn right around the plastic wrapping.
  • Cut four strips of yarn the same length, about two yards.
  • Hold those four pieces together and after spraying a little adhesive onto the wreath form, begin wrapping.  Wrap it in such a way as to cover up the ‘tails’ of the four strands of yarn.
  • When you’ve wrapped those four strands, make sure you leave the ‘tails’ of those strands on the back side of the wreath.  You’ll use the next set of four strands to then cover the ‘tails’ of the previous strands.  (I illustrate this is the video, if that’s confusing!)
  • Continue spraying and wrapping, until your wreath is covered and full.  It took me about an hour to finish one wreath.  The reason I use four strands at a time and cut them to a manageable length is because a) it’s way faster and b) you can avoid trying to wrap a whole skein of yarn through the wreath form.
  • When you’re finished, use a piece of coordinating ribbon to hide the last set of ‘tails’ from your yarn.
  • It looks wonky from the back unless you’re a perfectionist which I AM NOT.  But it only shows from one side, right?

And may your crafting force you to slow down dear friends!

openhouse

p.s—I’m joining my friend Myquillin’s wreath party so head on over for more homemade wreath goodness!  And in case you’re in need for some colorful quirky Christmas cheer, head over to my Christmas tour from last year.  And by the way?  The crazy mannequin with the evergreen bough is coming back!!


MY NEWEST BLOG SPONSOR:


This post is generously sponsored by my YL. I am into natural choices for my family, and this is the main way I help boost our immune systems and alleviate lots of minor aches, pains, and injuries.  Read more about how we are using them everyday! My Young Living essential oils are also my newest business venture, and the oils are so well loved that they sponsor my blog!!! Thank you, friends!  Enroll by clicking here.

Filed Under: DIY, holidays, homemaking, tutorials

12 Days of Handmade Christmas (all in one day!)

November 11, 2013 by Edie Wadsworth 9 Comments

12 Days of Handmade Christmas via lifeingrace

I’ve hosted the 12 Days of Handmade Christmas for the last few years, but this year, I had too many deadlines.  So, instead of 12 Days, I’m sharing my favorite 12 projects from the past few years, including a few I posted this year.    Hope you will find some inspiration for making the holidays more meaningful and more handmade.  Enjoy!

For a full list of the past projects, 12 Days 2009, 12 Days 2010, 12 Days 2012!

1.  The Handmade Dishmat

I’ve made this project so many times.  It’s my favorite thing to give for Christmas, with my favorite cookbook wrapped inside.  This mat takes about an 1 1/2 and everyone I’ve ever made one for LOVES it.  I have my friend, Darby, to thank.  It’s the gift that keeps on giving.  My sister just made me one and I’m in heaven!

12 Days of Handmade Christmas via lifeingrace

2.  The Linen Flower (Pin)

This is my new favorite project.  They’re so fun to make and are perfect plate/table decorations as well as beautiful flower pins.  They take 1-2 hours to make.

12 Days of Handmade Christmas via lifeingrace


3.  Large Zippered Make-Up Bag

Thank you to Miss Jan for this awesome project! I’ve made it for gifts many times and it’s easy and fun and easy to personalize!

12 Days of Handmade Christmas via lifeingrace

4. Large Photo Prints (mounted to foamboard)

These would make great gifts for kids, teens, or adults.  They’re so easy and so personal!

12 Days of Handmade Christmas via lifeingrace

5. DIY Alphabet Crayons

Thank you, Meg, for sharing this awesome project so many years ago.  So colorful and fun, just like Meg!

12 Days of Handmade Christmas via lifeingrace

6.  Fabric Camera Strap

I’ve made plenty of these, too! They’re so easy and make the perfect gift for your friends who love their cameras!  Cheryl shared this project with us several years ago and it’s still one of my favorites!

12 Days of Handmade Christmas via lifeingrace

7.  Hand-knit Dishcloth

This is THE perfect time of year to learn to knit and this is THE perfect project on which to learn.  These make wonderful little gifts wrapped up in soaps or homemade dish soap!

12 Days of Handmade Christmas via lifeingrace

8. DIY Felt Scarf

Thank you, Julie, for sharing this project last year.  I’m determined to make one this year and can’t wait to try one in a gold/mustard color!

12 Days of Handmade Christmas via lifeingrace

9.  DIY Monogrammed Candle

Amy shared this project during our very first 12 Days and it’s still THE most popular 12 Days post. (Thank you, friend!) Make one or 12 for your favorite family and friends!

12 Days of Handmade Christmas via lifeingrace

10. Grannie’s Homemade Fudge

This is my favorite gift to give away.  And my favorite holiday treat to make.  It’s so easy and SO delicious!  Thank you, Grannie!

12 Days of Handmade Christmas via lifeingrace

11. DIY Crayon Roll

The super talented Lindsey shared this post with us and it’s been one of the most popular of the 12 Days posts.  Make some for traveling gifts for your own littles or for all the lovely littles in your life.  Thank you, Lindsey!

12 Days of Handmade Christmas via lifeingrace

12.  Homemade Honey Wheat Bread

Perhaps, THE perfect Christmas gift!  I usually gift it with some homemade strawberry jam or local honey.  It’s love at first bite.  I get these clear cellophane bags from Amazon and give bread away all year!

12 Days of Handmade Christmas via lifeingrace

Have you made any of these projects?

What’s your favorite (easy-ish) handmade gift to give to others?  Leave links or descriptions in the comments.

Happy Veterans Day and thank you to those who serve our blessed country and to those who love them!

If you’re new around here?  Thank you for visiting my blog!  I’m honored you’re here and I hope you’ll find some encouragement (and some laughter!) for your days.  Visit my about page, which highlights some of my popular posts or will at least show you a peak into my crazy people.  You can subscribe to this blog by email here.  I am currently addicted to Pinterest, so follow at your own risk.  I also post updates to Facebook, Instagram, and Twitter.

Filed Under: 12 Days of Christmas tutorials, crafts, DIY, holidays, tutorials

DIY Large Photo Prints

September 15, 2013 by Edie Wadsworth 30 Comments

DIY large photo prints

DIY large photo prints?  Sort of.  I suppose all in all, this isn’t so much of a Do It Yourself project as it is a Let Hobby Lobby Do It For You project.  But, let’s not argue over semantics.  I had to coordinate this project and it’s pretty cheap— so I’m calling it a DIY.  As you know, I just finished  decorating the teen room, so go see all about it! This little project is just icing on the cake. I’ll tell you all about my thoughts on creating a room for teen/tween, but trust me when I say that art is important.  You want to create a room that is inspiring and expressive.

((Speaking of expressive, see that big poofy red tutu? All I’m gonna say right now is RED tour and Nashville. T-5 days. My girls have voted me mom of the year.))

Emme’s room has a few great artistic pieces,  but to finish the space, we decided to have some oversized photos of her first love, ballet.  We had them printed and then mounted to foam board, for the perfect personal touch.

largeprints2

I first saw Jenny do this a couple years ago and directed my sister to her blog when she wanted to do something similar for her daughter’s room.  There were a few kinks in the mounting process with the thin photo paper wrinkling, so I searched around the internets for more ideas. What I really did was stalk Pinterest.  It has replaced Google as my primary search engine.  I found lots of easy tutorials, but  I decided to check on pricing to have the print shop mount them for me, after reading that Staples can mount them fairly cheap.   The big box store in my town, which shall not be named,  was NOT very nice to me that day.  I wasn’t sure if my favorite local print shop could do them, but I called and he was able to print them but not mount them.  He said Hobby Lobby could do it for about $10-$15, with a high heat process where the photo looks like it is part of the foam board.  So, after I had them printed, I  took them to Hobby Lobby to have them mounted.  They did it WHILE I waited! and just like that, I came home with these awesome oversized prints ready to hang. I’m giddy with how it turned out!  They were about $15 each total, including the printing and mounting. Art made easy.  And cheap.  I embellished the top print with my DIY red emerson flower!

DIY large photo prints

Here are a few tips for creating your own oversized photo prints:

  1. In order to do them this cheaply, you’ll need to print them on engineering paper in black and white.  I price checked my printer and in order to do these in color, it would be about $25 per photo.  I still think that’s reasonable, but black and white worked perfect for us in Emme’s room
  2. Choose photos that would be enhanced by being printed in black and white.  If you’re unsure, just use a free editing program like PicMonkey and convert the photo to black and white and see if you like it.  I edited mine to black and white before I even printed them.  I was very pleased with how they turned out!
  3. Choose the largest size of the photo you can.  I often have to resize photos for my blog, reducing them from say, 4200×2800 to 600×400.  Keep them at the largest size for this project. The more detailed the photo is, the better.  Your print shop  will tell you if the photo size you send  is too small to be printed in these sizes.  I had my photos printed at 36×24.
  4. Email the photo to your print shop (Office Max and Staples both do these, but use your local guy if you have one!) or take it to them on a jump drive.
  5. After the photo is printed, take it to Hobby Lobby and ask them to mount it on foam board.  They can do it while you wait and it looks SO professional.  They use some heating method to adhere the photo onto the board and trim it to perfectly fit.  With your 40% coupon, you can have this done for around $12, including the foam board and the process.  You could buy the materials and do it slightly cheaper yourself, but then I would have to ask, why would you?!  These are so amazing, I promise!
  6. Hobby Lobby sells the sawhorse hangers that can be used to mount the board to the wall.  You could also use 3M hooks or just 3M double sided tape.  One of mine is just taped straight to the wall with the double sided tape because I’ve used 3M over and over without any issues before.  To be super safe, though, just use the sawhorse thingamajigs and hang it right on the wall like a picture frame.

Here’s what those look like, FYI.

DIY large photo prints

Now, please excuse me while I make plans to print oversized photos of my girls, Julissa and Diana!

I’ve got some other great projects and some time tested recipes if you’re visiting from another blog.  Or visit my about page, which features some of my most read posts.  Thanks for stopping by!

Sharing this project with Richella at Imparting Grace and Leslie at Create It Thursdays.

Filed Under: crafts, Decorating, DIY, tutorials

DIY Linen Flower Tutorial {Emerson Flower Hack}

September 3, 2013 by Edie Wadsworth 41 Comments

DIY Linen Flower Tutorial

(my black and white Day Designer is from the talented Whitney English)

DIY Linen Flower Tutorial

I’ve been in love with the Emerson Fry flower pin for years.  I got my first one 3 years ago and now have 3 of them.  Sadly, they do no make them anymore so those of us who are super fans are up a creek, except not anymore!  Since  I still wear mine ALL the time, I decided to deconstruct it (I actually took it apart!) and figure out to make some for a few friends and family.   I’ve had to re-fluff and re-starch mine over the years but they’ve held up remarkably well for as much as I’ve worn them.  About knee deep into this project (which I’ve been working on for a good week), I decided to see if anyone else had made them, and lo and behold, my friend, Amy, from Playing Sublimely, did them with her crafting friends 2 years ago. She is a crafty girl and I’m trying to beg her to be part of our 12 Days of Handmade Christmas this year.  The only difference in our tutorials is that mine may insult you because it’s ridiculously detailed and bossy.

Y’all.  I ADORE these flowers.  They take about an hour to make and it’s WELL worth the time and effort.  I was so impressed with how they turned out.  Also, the red one is my favorite but I’m making navy blue, as we speak, and I want to find some light pink or blue linen too.

My most important advice for this project is DON’T SKIMP on the linen. You need good quality, lightweight linen, which I couldn’t find at Hobby Lobby. You’ll probably have to go to a fabric store, but it’ll be well worth it in the end.  I made a flower with the blue linen from Hobby Lobby that I used to make my skirted tablecloth, and it’s not nearly as pretty as the ones with the fine gauge linen!

Here’s what you’ll need:

  • Lightweight linen  (I had to go to Hancock’s and with 40% off it was still $10 per yard.  You can probably make 4 flowers at least but don’t skimp on thicker, cheaper linen! These flowers sold for $60-70 each and I’m guessing part of the priciness was the cost of the linen.)
  • Navy felt—I couldn’t find the right color navy (for my personal taste) in the squares so I bought a couple yards of navy felt.
  • Good scissors—It makes your life easier if you have good, sharp scissors, especially if you’re gonna make several.
  • Heavy Spray Starch—You will do the bulk of this project at the ironing board because these flowers need plenty of starch to hold their shape
  • Iron
  • Templates  (You can download mine below)
  • Gold Thread and an embroidery needle—used to sew the petals onto the felt.
  • Hot glue—to glue the 2nd navy felt circle
  • Brooch pins


DIY Linen Flower Tutorial

1.  Spray you linen with spray starch and then iron it.  You’ll spray and iron it again, but the more starch you put into the flowers, the better they’ll hold their shape.

2.  Using the template—which you can download here for the actual size of the petals and here for the 80% smaller version—cut out your petals.  You’ll need 10 large ones and 9 small ones.  I’ve provided two different sized templates for this reason.  The larger template is the actual size of the flowers so if you want to trace the shape onto the linen with a pencil, use that size.  I used the 80% smaller version so that I could just hold the template with one hand, and cut around it, leaving a 20% margin.  See below if that confuses you!

edie2

DIY Linen Flower Tutorial

3.  Spray your petals again, crease the bottom like shown below and then iron the crease into the flower.  You want to JUST iron the crease so that the petal curves upward slightly.

DIY Linen Flower Tutorial

4. Keep cutting petals until you have 10 large ones and 9 small ones, spray starching them and ironing the creases as you go.  When you’re ready with your petals, cut out 2 square felt circles.  I used my coffee mug and just traced the bottom and cut it out.  The diameter of my circle is about 3 1/4 inches.

DIY Linen Flower Tutorial

Now it’s time to sew the petals onto the felt.  You’ll do six large petals around the felt circle, somewhat evenly spaced.  You could be precise and mark the circles with six evenly spaced marks but I’m too much of a free spirit for that.  Actually, I tried it, just to be thorough, and it wasn’t worth the worry.  The last 3 I’ve made, I didn’t try to be too precise.

DIY Linen Flower Tutorial

Here’s what it looks like after the first row of six is sewn on.  Next, sew the four large petals that are left onto the felt, staggering them in between the ones already sewn.

DIY Linen Flower Tutorial


You will do the same thing with the smaller petals, staggering them to make it look like petals on a flower!  There’s no exact science here.  With the smaller petals, I do one row of 5 and then finish with four on top.

emerson9
The last row of four, you will sew on with an X stitch to make it look pretty!

DIY Linen Flower Tutorial

The last step is to take your second felt circle and hot glue it to the back of the other circle, to cover up the stitches.  Attach you  brooch pin in between the layers by cutting small slits in the 2nd felt circle and feeding the pin through.  It’s hard to explain so I’ll show a photo of that later today, when the sun is up!

And TADA!! Your lovely linen flower is finished!  I can think of 101 reasons to make a bunch of these and give them as gifts or use them as decoration.  I have two of mine attached to a wreath I made and they look awesome!

Hope you had a great long weekend and try to squeeze some time in for making stuff with your hands this week.  It’s all kinds of fun!

DIY Linen Flower Tutorial

linen

More tutorials?  Sure, I’ve got plenty!

Also, I’m linking today with Beth and Sharon and Cheryl today, so visit there for lots of other DIY projects!

Filed Under: crafts, DIY, tutorials

DIY White Lacquer Desk {and Tween Room progress}

August 23, 2013 by Edie Wadsworth 70 Comments

DIY white lacquer desk
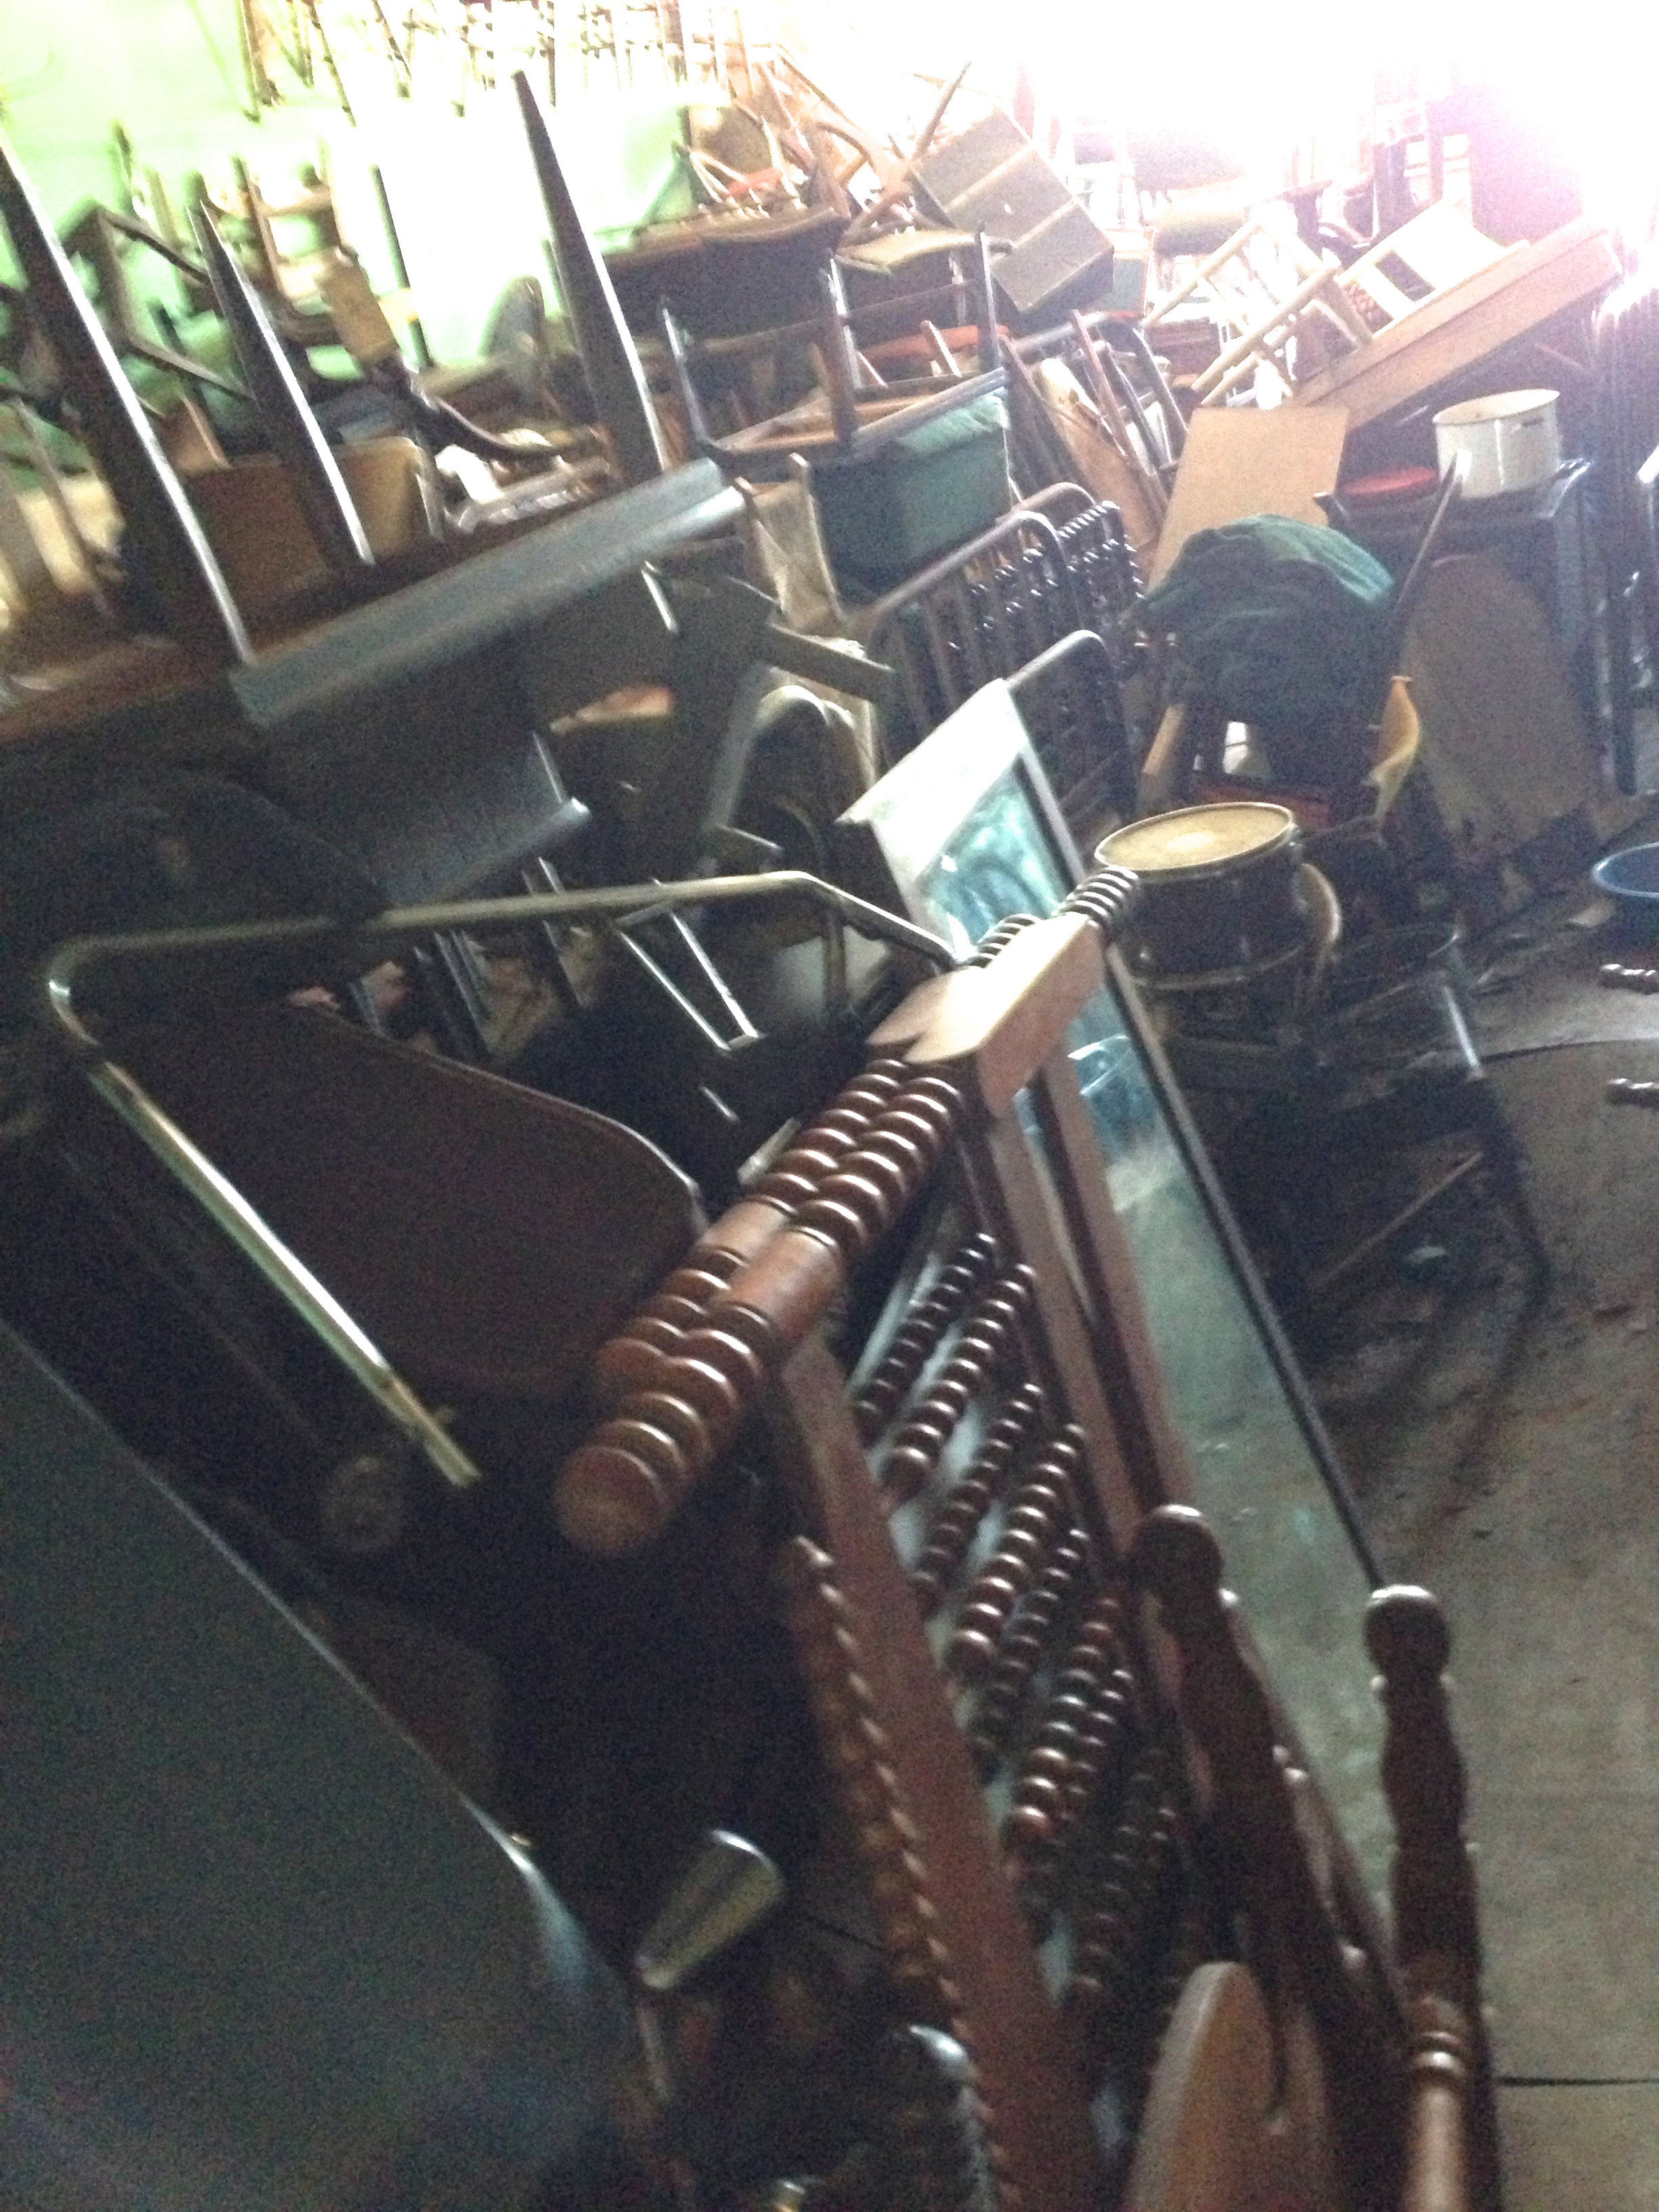
I risked life and limb to bring this post to you.  But I know how you like  a good story. So, here goes.

Antique and thrift stores have ruined me forever.  I almost NEVER see new furniture I love.  Yet, nearly every time I go into a good antique store, the possibilities are brimming.  I could recover that.  I could change out the hardware on that.  I could repaint that and bedazzle it with a bust of David.  And on and on it goes.  So, when Emme needed a desk for her new tween room, I knew just where we needed to go.  There’s an antique store near us that looks like a bad, dusty version of the Room of Requirement in Harry Potter.

UnknownIn other words, it makes me  feel like I’ve died and gone to hoarder’s  purgatory heaven. Except that it’s way scarier than what you imagine hoarder’s heaven would look like. When you walk in the door, it’s dimly lit, with piles dishes and pyrex teetering ever so precariously from every narrow isle.  There’s figurines galore and enough salt and pepper shakers to season all the food in the free world. Don’t look upwards, lest you see the hundreds of sharp farm implements, which seem to be waiting to impale you at any moment. It smells like a stale, poorly ventilated Goodwill and my daughters have been known to dry heave whilst looking for hidden treasures with their mother.  Life is hard and full of funny smells, is all I can tell you.  The floor where the furniture is stacked slants at about a 30 degree angle, so stable shoe wear is highly recommended.

The ends of the isles are so full that you have to do a lot of backtracking to get to the next isle. That gives you plenty of chances to knock down a whole slew of scary looking baby dolls. What gives with the dolls, anyway?  I’ve never been in the market for nekkid, scary looking dolls with matted hair. So you might be tempted to ask the obvious question.

Why do I love it so?  Because there’s almost nothing you can think of, made in the last hundred years, that’s not in this building.  This is not a shopping excursion.  This is Operation Find That Desk— Without Being Crushed Under loads of Glassware Never to Be Found Again.  This is not a project for the faint of heart. You gotta to bring your A game.

And I’ve never been short on hustle.

In case you think I exaggerate, I present the room stacked with gobs of furniture.


photo 3

You see piles of odd furniture.  I see endless opportunity.

I asked if there was an old desk. He took me right to this baby—an old sewing desk that had just the right bones for a good rehab job.

What do I look for in a piece of furniture?  1) It hadn’t been painted, so would be easy to sand and paint,  2) It was structurally sound with no broken parts, 3) It looked possible to dislodge it from it’s current dwelling place.

So, we went to Sonic for slushes while the kind man brought our desk into the light of day.  I should have grabbed the typewriter, too, but I have enough things in my life that need attention right now.

photo 2
DIY white lacquer desk

I knew I wanted to paint it in high gloss white, so Nick and I sanded it and then began painting it with Valspar’s white lacquer paint.

Here are my tips for this type of painting project:

  • Sand it down well.  I use this mouse sander, Black & Decker MS2000 Multi Sander with Smart Select and it works wonders and is VERY fast.
  • Lacquer paint is oil-based and I don’t like to clean brushes that have oil based paint on them.  I don’t like paint thinner.  SO.  I use an old paint brush and just throw it away when I’m done. Lazy or brilliant.  You decide.
  • High gloss paint is so beautiful when it’s dry  but as you’re painting with it, you’ll fret and worry about brush marks,etc.  Don’t worry.  It will be smooth and shiny and beautiful when you’re done, almost no matter what you do.
  • I did two coats on this but it looked pretty darn awesome after one coat.  I bought 1 quart of Valspar high gloss white paint and had plenty left for other projects.
  • I use Krylon 1000 Premium Metallic Spray Paint, Gold for all my gold spray paint jobs and it is fantastic. I spray painted the existing hardware and it turned out perfect.

DIY white lacquer desk

I hope to have this room finished in the next week or two.  I’ve got a couple light fixtures to have installed and one certain disco ball and some pictures to hang.  But we’re close.

DIY white lacquer desk

The irony of this whole long post on the story of the white lacquered desk is this—she hasn’t sat here one time to do her homework.

NOT. ONE. TIME.

I like to sit there, when I’m visiting the tween room.  It’s a great place to sit, dear friends.  It LOOKS like it would be a dandy place to study, too.

DIY white lacquer desk

But, inevitably, she and her sister choose the schoolroom, where we’ve spent so many hundreds of hours, learning and crafting and reading together.  I’m doing better and I know it was the right thing to do for now, but giving up homeschooling was one of the hardest things I’ve done.  I miss those girls like something awful.

I guess old habits are hard to break, not matter what age you are!

My question for you is this.  If you ever come to Bean Station to visit me, will you make the trek to the Room of Requirement with me?  I’ll buy you cherry limeade and we’ll dig for treasures together!

******************

A whole post, with sources, is coming for this room.  Check out my Tween Room Pinterest Board for lots of tween room decorating ideas.  Hopefully, we’ll be ready in a week or two!

Happy Weekending!

I’m linking this project at Sara’s awesome blog!

Filed Under: Decorating, DIY, tutorials

DIY Chalk Paint Placemats

August 6, 2013 by Edie Wadsworth 19 Comments

DIY chalk paint placemats

DIY Chalk Paint Placemats

You have GOT to make these.  They are all kinds of fun!

Ruth and her family are here visiting this week and we’ve already had a ball.   She and I are co-teaching a workshop on Hospitality this weekend at the Becoming Conference. We’re brainstorming about all this fun stuff we’re gonna do but time is a wastin’ while we make the best chocolate chip cookies ever and drink mojitos.   In other words, momma’s got work to do.  This is one of the fun projects we’re showing and I’d thought I’d share it with y’all first.

I saw these wooden chalk painted placemats first in a showhouse last year in Asheville.  The outdoor patio table was bedecked with them and I’ve wanted to make them ever sense.  They were so easy and cheap and fun that I know you’ll want to make a few.  Both Ruth’s and my girls have had so much fun writing on them this week, when they weren’t spilling maple syrup on them.  They wipe clean very easy with a damp cloth so fresh new art is possible every meal!

What you need:

1 piece of plywood, cut into placemat size squares.  (Lowe’s and Home Depot can both do this for free!)

1-2 quarts of chalk paint

1 6 inch roller

Chalk and a few kids to make some great chalk art!

Here’s how I did it:

1. Buy a piece of decent grade plywood or MDF board and have it cut to the size of a placemat.

Plywood comes in different thicknesses and grades.  It doesn’t really matter exactly what type you use, just find one that is pretty smooth so that the chalk placemats are relatively easy to erase.  I took my square placemat into Lowe’s and bought  a piece of smooth, higher grade plywood (23/32″ thick) and had them cut into as many placemat size boards they could.   I like that the plywood is decently thick but not too thick.  You could choose plywood that’s much thinner but I’m not sure if they’d hold up as well.  I paid about $20 for the piece of wood and it made 15 placemats!  That’s a lot of placemats but you could give a stack as a gift for someone you love.

The placemat I used as a template was a standard size, around 12×18.  If your placemats need to overlap in order to fit on your table, you’ll want to have the plywood cut smaller so that you can fit them all on your table.  BUT. I like orienting them vertically sometimes too (as shown below) and then you won’t have trouble fitting them, unless your table is really small.  Take home message—measure first to make sure they’ll fit because you won’t be able to overlap them like you do fabric mats.  Depending on the size you settle on, you’ll have between 15-18 placemats, which is a lot but you could give a stack as a gift for someone you love!

2.  Paint them with chalk paint.

I used some Valspar chalk paint that I had left over from the Tween Room chalk wall but I’ve also used Rust-Oleum 206540 Chalkboard Brush-On, Black, 30-Ounce and it works just as well.  I rolled it on with a six inch roller, which makes the job super fast. I painted the first side and two edges and then let that dry.  Then, I painted a second coat on the same side.  After that dried, I turned them over and did the same thing on the back side.  It works better and dries faster if you prop one end of wood onto something small (I used a candle jars) so that air can move all around it to dry them.  They dry very fast and mine were done in a few hours.

chalkplacemats

You know from my plethora of past tablescapes from Thanksgiving and other holidays, that there’ll be no end to the good uses for these chalk mats.

What DIY’s are you working on lately?  Think you’d use the chalk mats?

We used them last week when we had chicken pot pie soup!  And since I like to call myself the soup whisperer, check out my other soup recipes here!chickenpotpiesoup-463x700

Happy Tuesday!

I’m adding this project to Traci’s DIY link party!

Filed Under: DIY, homemaking, Intentional Living, tutorials

  • Go to page 1
  • Go to page 2
  • Go to page 3
  • Interim pages omitted …
  • Go to page 8
  • Go to Next Page »

Primary Sidebar

ediewadsworth

Coach. Healer. Life Mentoring School.
💕💕I help women heal & rediscover their purpose & calling.💕💕 Click below for my free purpose field guide!

Dr. Edie Wadsworth|Lifeingrace
2 years ago today, your world shattered into a mil 2 years ago today, your world shattered into a million pieces.

Sometimes I marvel at how we were blessed enough to be there holding you when it all came crashing down. I do know this—I can’t remember my life without you.

I do know that thousands of tears and meals and boo-boos and toy trucks later, we stand in awe of you---your courage, your brave big boy fight, your tender little boy heart, your hilarious old man ways. 

We know how sacred this walk with you is and we don’t take it lightly.

We are here for it all and we couldn’t be more grateful.

We have always loved you and you have always been our special gift.

 Love you little one. Let’s keep listening for Aslan. He will find a way to put everything back together. 

“Herein lies the world. Beautiful and terrible things will happen. Do not be afraid.”
Hiring these two out for all your ring bearer and Hiring these two out for all your ring bearer and flower girl needs.  They provide ample entertainment to your guests and accept plush toys for payment in lieu of money. May or not be VERY strong willed.  And also adorable. @williamsperformance @ginawilliamsh @ameliadurand4
I turned 51 last week and spent a much needed few I turned 51 last week and spent a much needed few days alone with this guy.  As soon as we drove out of the driveway I started crying. I don’t think I realized how much I needed a break.

it was incredible and relaxing and amazing and so life-giving. 

this week it feels like last week was 100 years ago because you know, life. 

I am excited to say that despite the fact that I’m another year older I managed to figure out how to go live on YouTube with my new camera. It only took me approximately 6000 hours. So maybe you’ll join me at noon today on YouTube and we’ll try something new together.

Here’s to 2021. Maybe it will get its act together but if it doesn’t we will get ours together😂🥳❤️❤️❤️
“To have Faith in Christ means, of course, tryin “To have Faith in Christ means, of course, trying to do all that He says. There would be no sense in saying you trusted a person if you would not take his advice. Thus if you have really handed yourself over to Him, it must follow that you are trying to obey Him. But trying in a new way, a less worried way. Not doing these things in order to be saved, but because He has begun to save you already. Not hoping to get to Heaven as a reward for your actions, but inevitably wanting to act in a certain way because a first faint gleam of Heaven is already inside you.”
― C.S. Lewis, Mere Christianity
Got my halo yesterday🤩😇😂 (That ridge lin Got my halo yesterday🤩😇😂

(That ridge line right above my head is the infamous Angel’s Landing)

Here’s to climbing out of tough spots in 2021❤️
What I learned in 2020?? I am HERE FOR ALL THE L What I learned in 2020?? 

I am HERE FOR ALL THE LOUNGE WEAR. 

Amen. Goodnight. 🤩🤩🥳🥳🥳 

Okay fine. Currently sporting sweater from Target which I have worn everyday for 3 months.  Natori PJ’s which I HIGHLY recommend, and Ugg slippers which I’ve worn everyday for a solid year. 

How’s your lounge wear game?? Tell me everything.
Day 2 of LIVE YOUR DREAM starts in 30 min. We’ll Day 2 of LIVE YOUR DREAM starts in 30 min. We’ll be talking all about DESIRE and the difference between false desire and true desire and how true desire leads us to our calling. 

It’s not too late to join us and if you could see the comments inside this group, you would 😭😭😭 and 🥳🥳🥳 because we are getting to the heart of things and it’s only gonna get better! 

If you’re already in, tell us how yesterday’s training impacted you and if you’re not, JOIN US FRIENDS!!

Head over to https://lifeingraceblog.com/dream
We took Tommy boy for this first ski adventure tod We took Tommy boy for this first ski adventure today and it was so satisfying to see him tackle something hard and keep his chin up and have a BALL doing it.

He was very entertaining to his ski school friends, despite the fact that his German instructor couldn’t understand a WORD he said. 😂🥳

But all you mamas out there can see through all the pretty pictures and videos to know that days like today can also be full of frustration.

Making sure everybody has their stuff, the reservations, the snacks, the HASSLE of boots and poles and gloves and skis, the tears, the snappy replies, the hurt feelings, the wrong turns, the missed moments, the potty breaks.

NEED I GO ON??????

But then there’s the down to your soul goodness of being smack dab in the middle of God’s glorious creation, the sheer joy of the wind and sun on your face, the fleeting feeling that everything is right in the world, the triumph of tackling something hard and pushing through all the doubt and fear.

I felt every emotion today. What a privilege to live this life we’ve been given. What grace to live it with these people.

Today was a dream. But like every dream come true, it has a cost, it requires more of you than you think it will. You will want to quit.  A million times.  But what waits for you on the other side is worth fighting for. 

That’s what we’re diving into this week in my online workshop LIVE YOUR DREAM.

You may have given up on setting goals, but don’t stop dreaming.

Come dream with us and let’s make 2021 the year we were willing to be so alive that we would risk feeling EVERY emotion, every setback, every failure in order to see it come true.

We start tomorrow.

It won’t be the same without you.

Join us at https://lifeingraceblog.com/dream.

It’s time to dream again.
❤️❤️❤️❤️❤️❤️

What’s one thing you’re dreaming about this year???
It was magical. ⛄️⛄️⛄️ Know what’s It was magical. ⛄️⛄️⛄️

Know what’s more magical for me???? The week between Christmas and the new year and I’ve made it even more epic by hosting an online workshop called LIVE YOUR DREAM🥳🥳🥳🥳

This one is for the dreamers and the doers!! Join me at lifeingraceblog.com/dream and let’s make some magic❤️❤️❤️❤️

Tell us in the comments if you’re already in!!!
  • Facebook
  • Instagram
  • Twitter

© Copyright 2008-2019 life{in}grace · All Rights Reserved · Graphic Design by Jenna Riccio Laible · Website by Erin Ulrich