• Skip to main content
  • Skip to primary sidebar
life{in}grace

life{in}grace

live with more presence, passion, & purpose

  • Home
  • About
    • Contact
  • Work with Me
    • Courses
    • Life Mentoring School
    • LIVE Event – Your Best Beautiful Year – January 4, 2020
  • Natural Healing
    • Get Started
    • Essential Oil Resources
  • Free Resources
  • Podcast
  • Books

12 Days of Christmas tutorials

12 Days of Handmade Christmas (all in one day!)

November 11, 2013 by Edie Wadsworth 9 Comments

12 Days of Handmade Christmas via lifeingrace

I’ve hosted the 12 Days of Handmade Christmas for the last few years, but this year, I had too many deadlines.  So, instead of 12 Days, I’m sharing my favorite 12 projects from the past few years, including a few I posted this year.    Hope you will find some inspiration for making the holidays more meaningful and more handmade.  Enjoy!

For a full list of the past projects, 12 Days 2009, 12 Days 2010, 12 Days 2012!

1.  The Handmade Dishmat

I’ve made this project so many times.  It’s my favorite thing to give for Christmas, with my favorite cookbook wrapped inside.  This mat takes about an 1 1/2 and everyone I’ve ever made one for LOVES it.  I have my friend, Darby, to thank.  It’s the gift that keeps on giving.  My sister just made me one and I’m in heaven!

12 Days of Handmade Christmas via lifeingrace

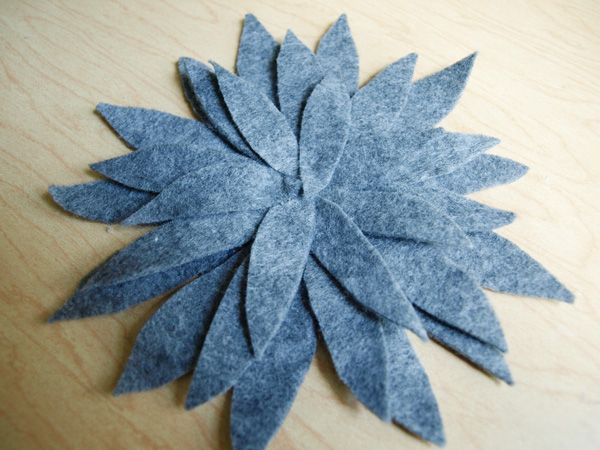
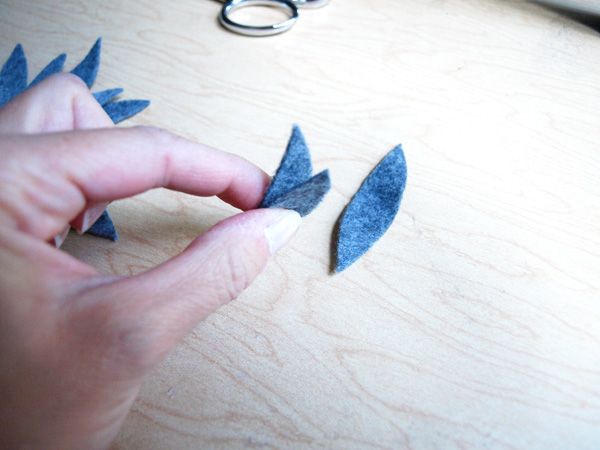
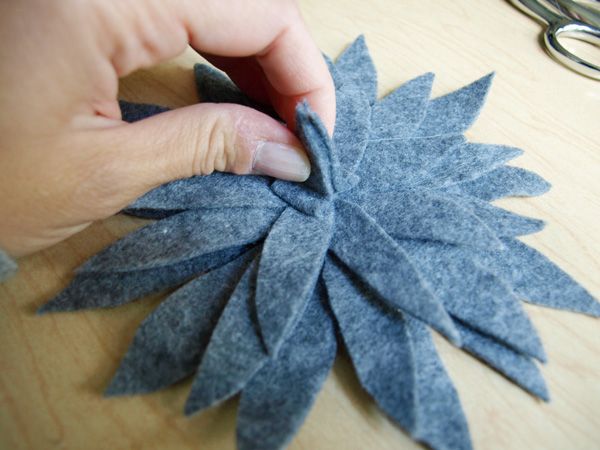
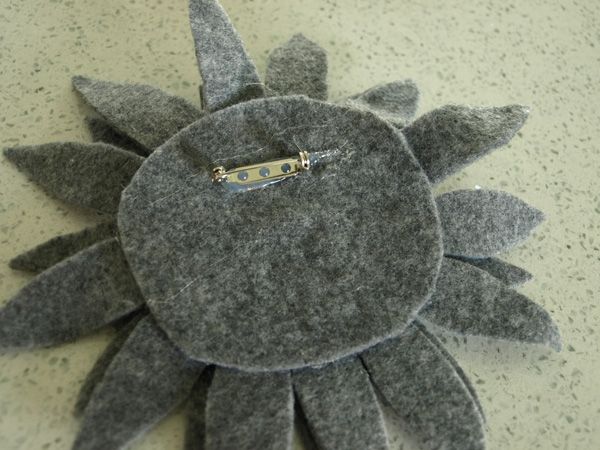
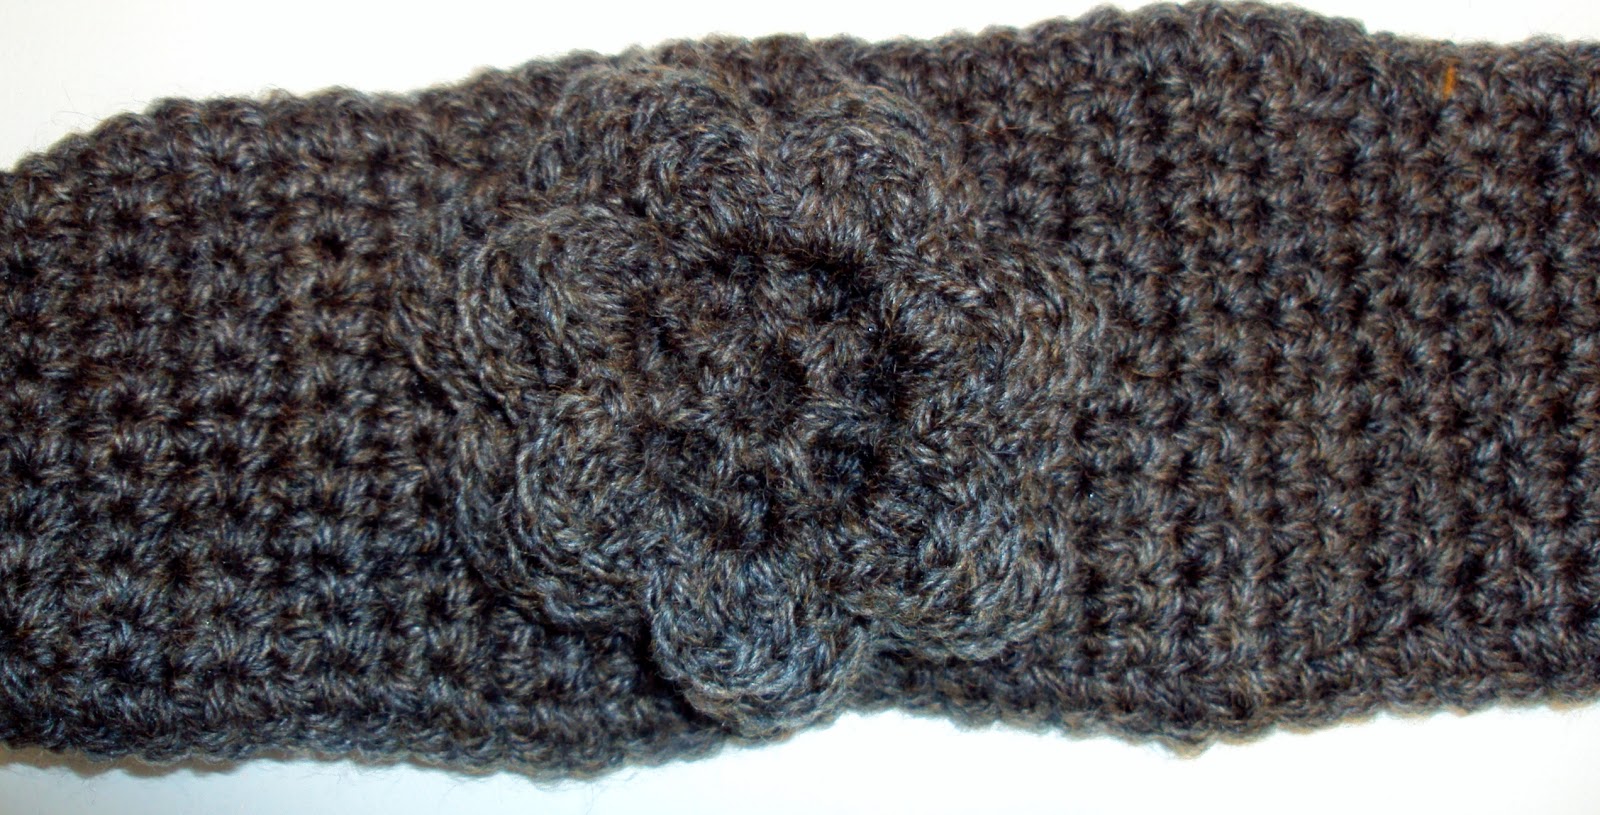
2.  The Linen Flower (Pin)

This is my new favorite project.  They’re so fun to make and are perfect plate/table decorations as well as beautiful flower pins.  They take 1-2 hours to make.

12 Days of Handmade Christmas via lifeingrace


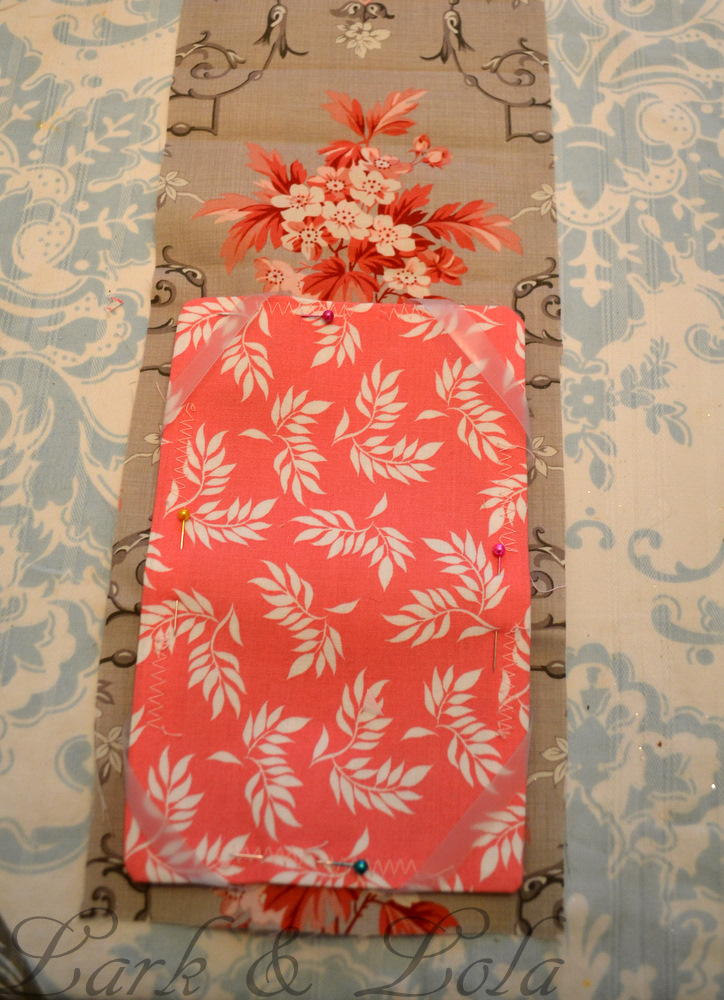
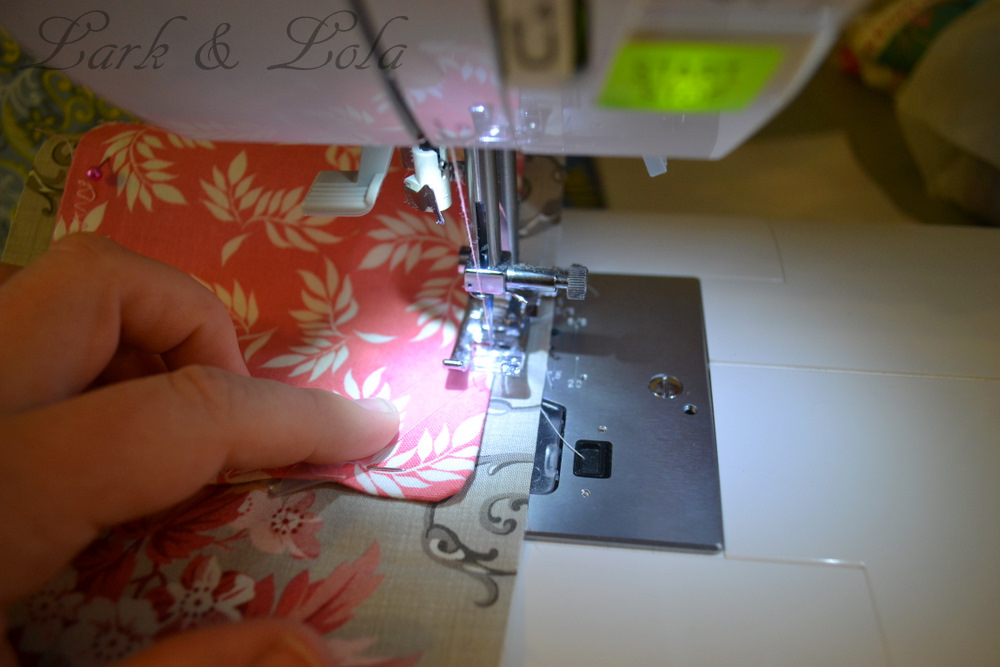
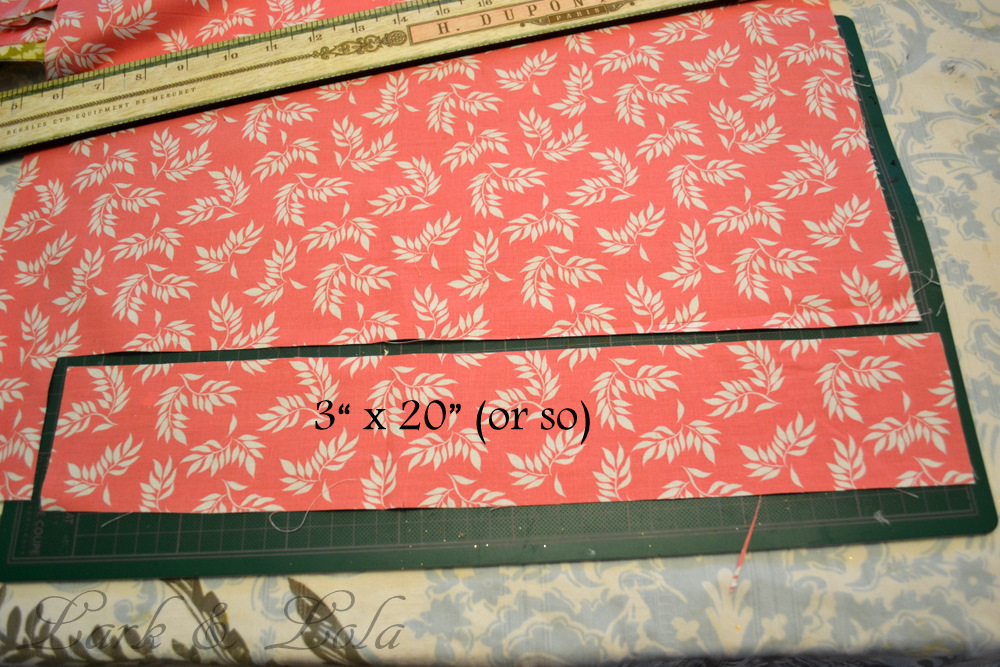
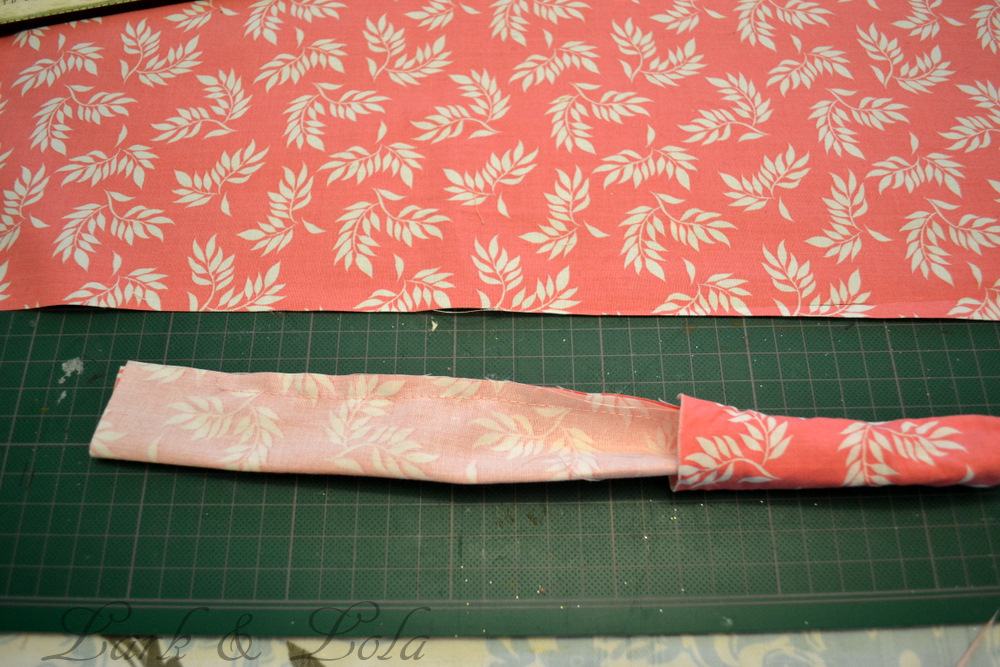
3.  Large Zippered Make-Up Bag

Thank you to Miss Jan for this awesome project! I’ve made it for gifts many times and it’s easy and fun and easy to personalize!

12 Days of Handmade Christmas via lifeingrace

4. Large Photo Prints (mounted to foamboard)

These would make great gifts for kids, teens, or adults.  They’re so easy and so personal!

12 Days of Handmade Christmas via lifeingrace

5. DIY Alphabet Crayons

Thank you, Meg, for sharing this awesome project so many years ago.  So colorful and fun, just like Meg!

12 Days of Handmade Christmas via lifeingrace

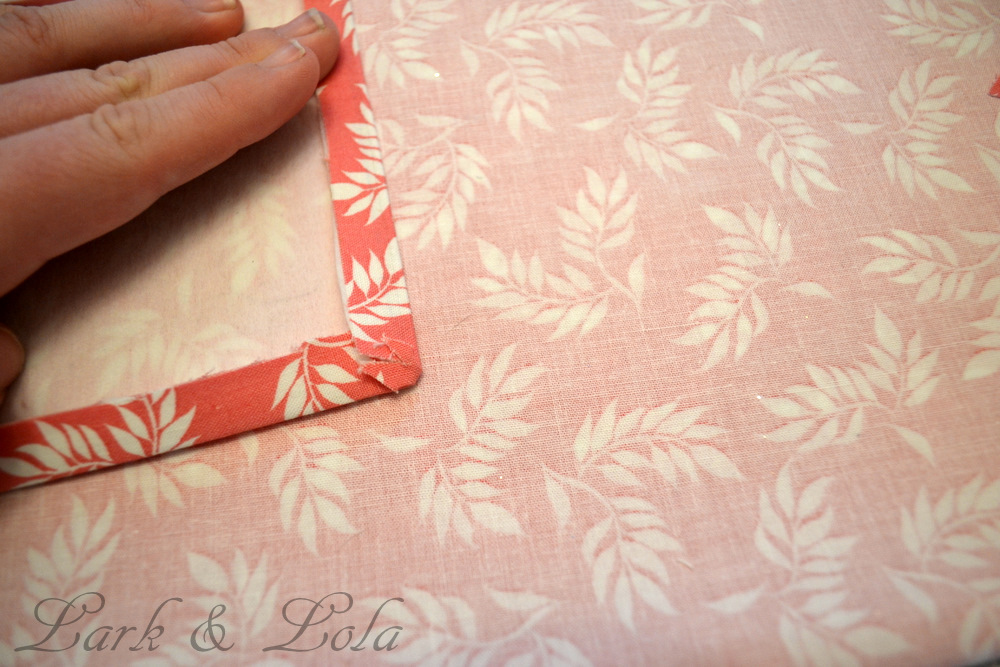
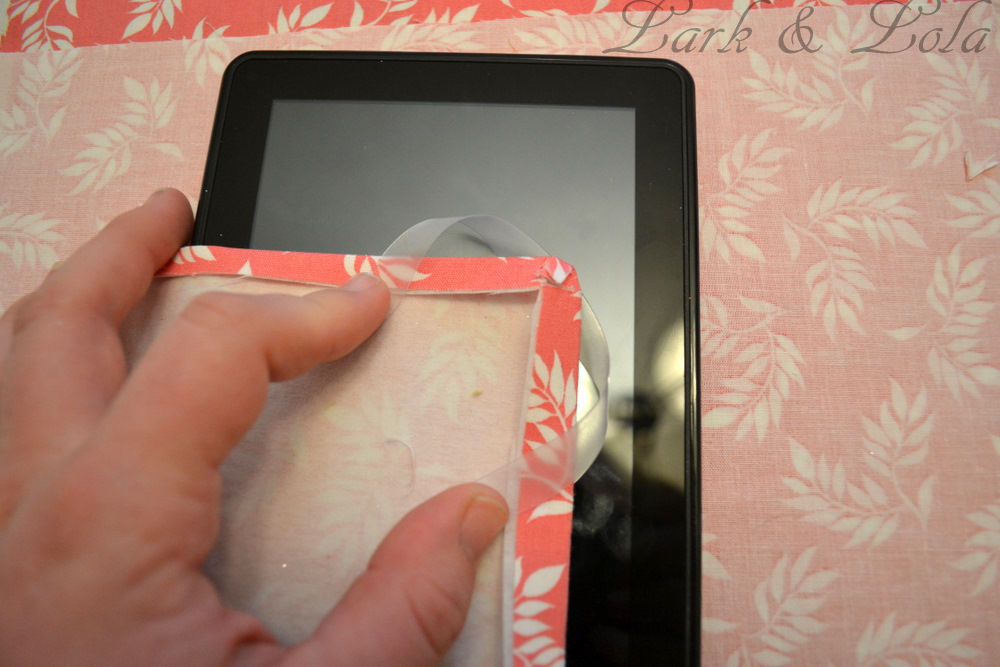
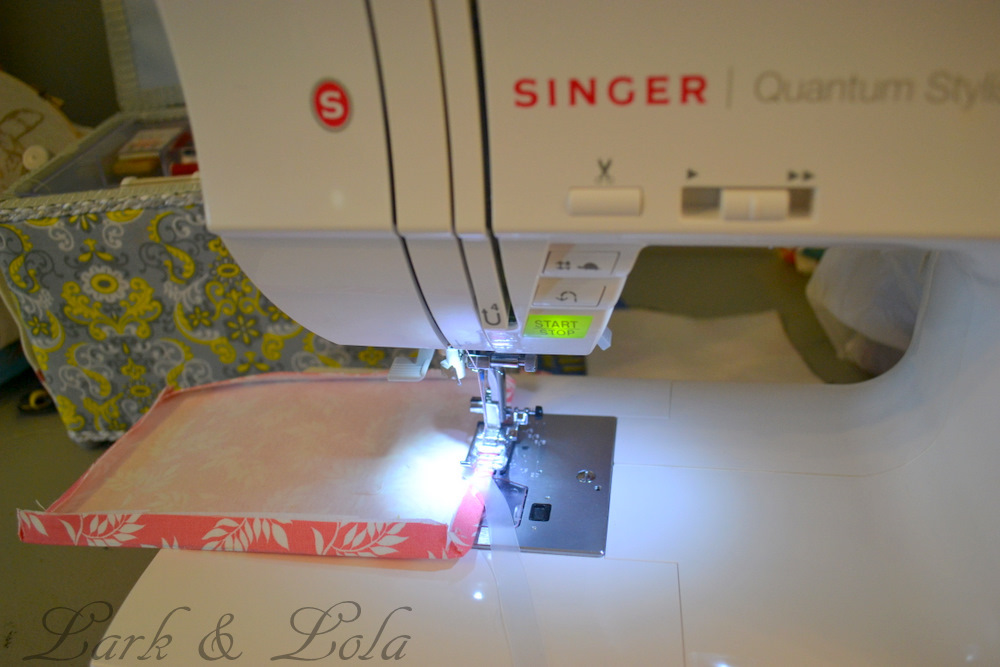
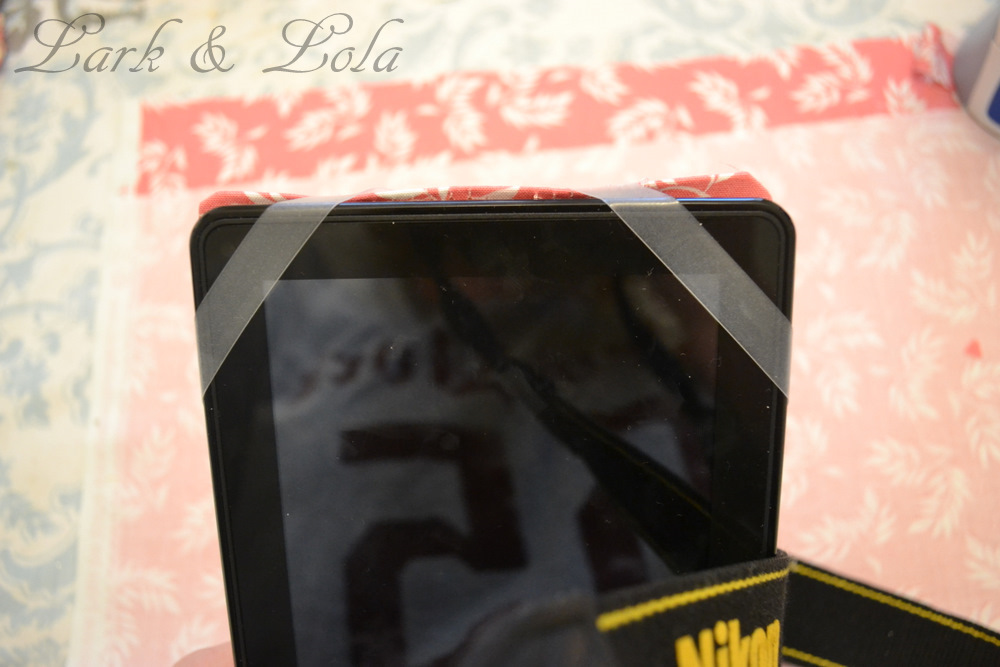
6.  Fabric Camera Strap

I’ve made plenty of these, too! They’re so easy and make the perfect gift for your friends who love their cameras!  Cheryl shared this project with us several years ago and it’s still one of my favorites!

12 Days of Handmade Christmas via lifeingrace

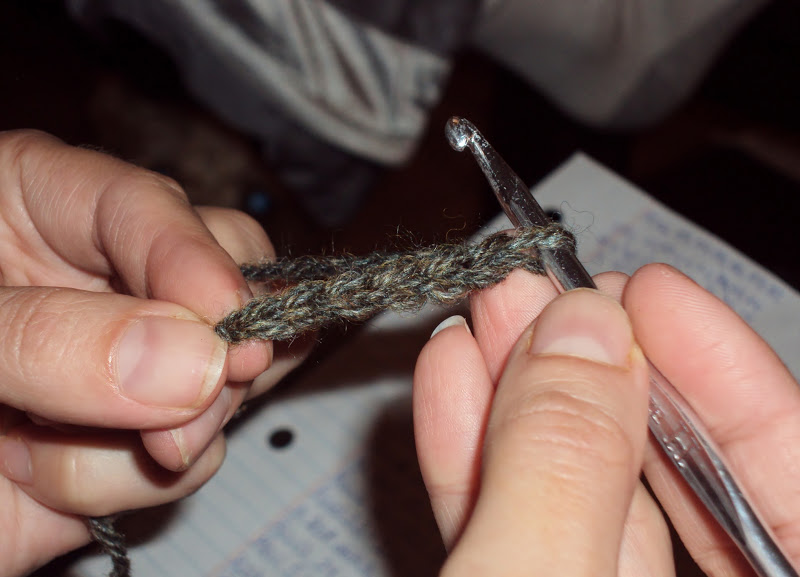
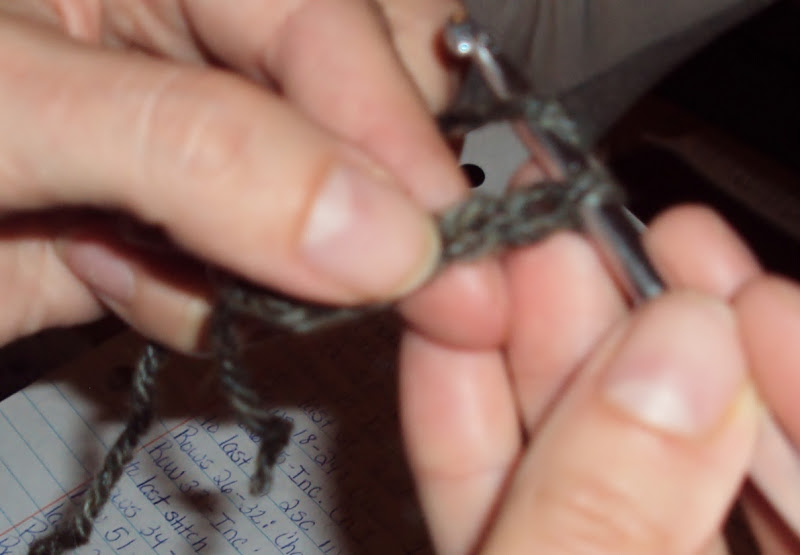
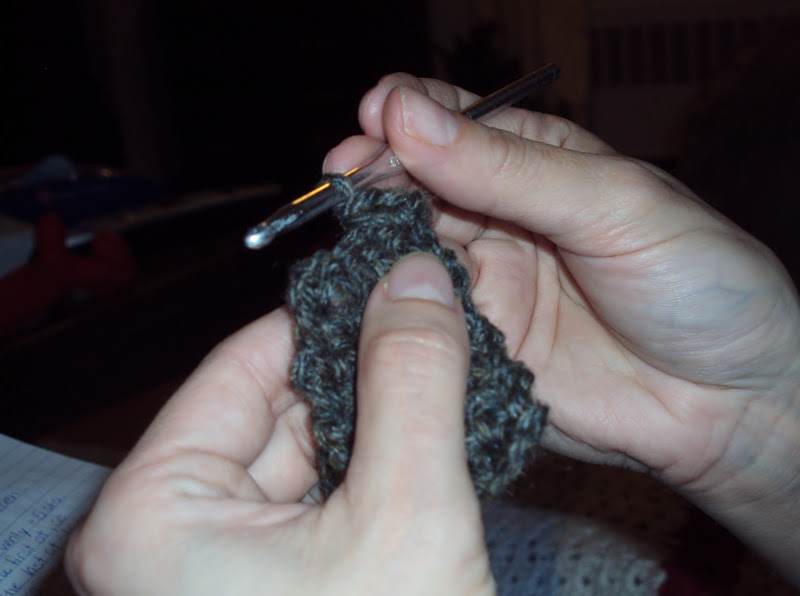
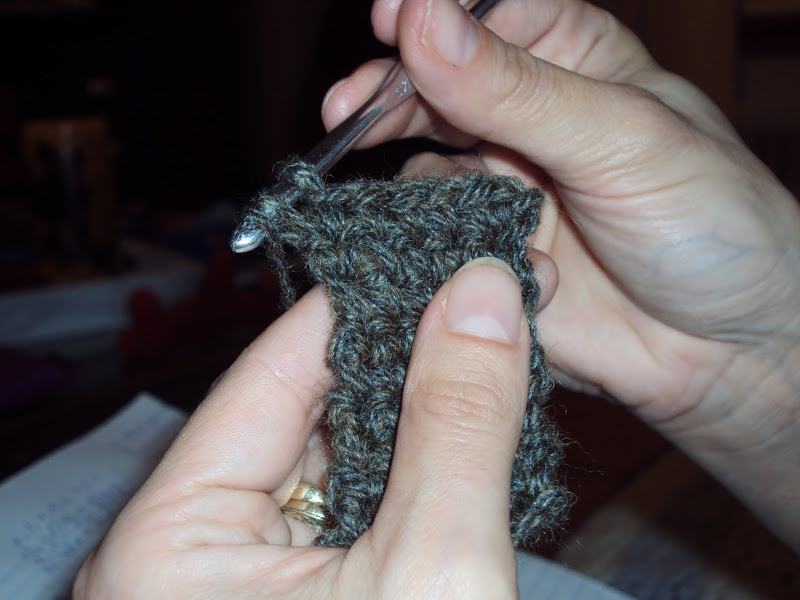
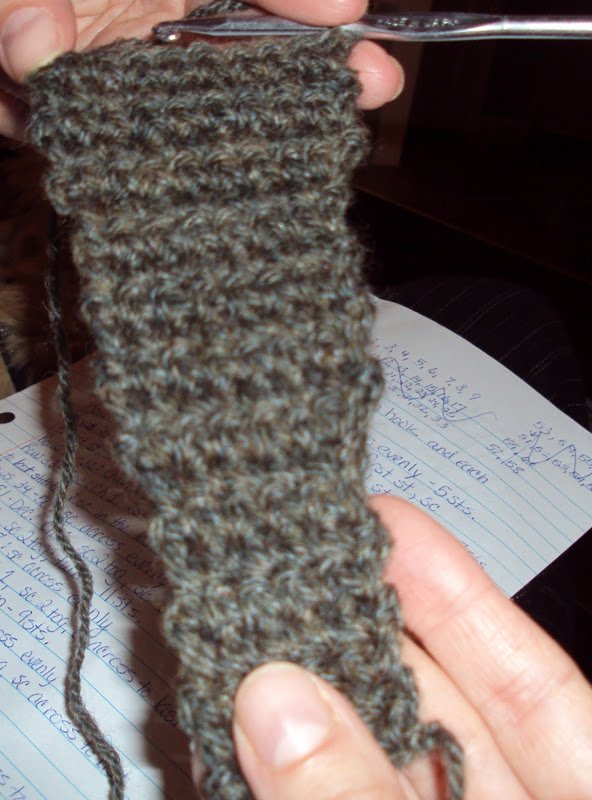
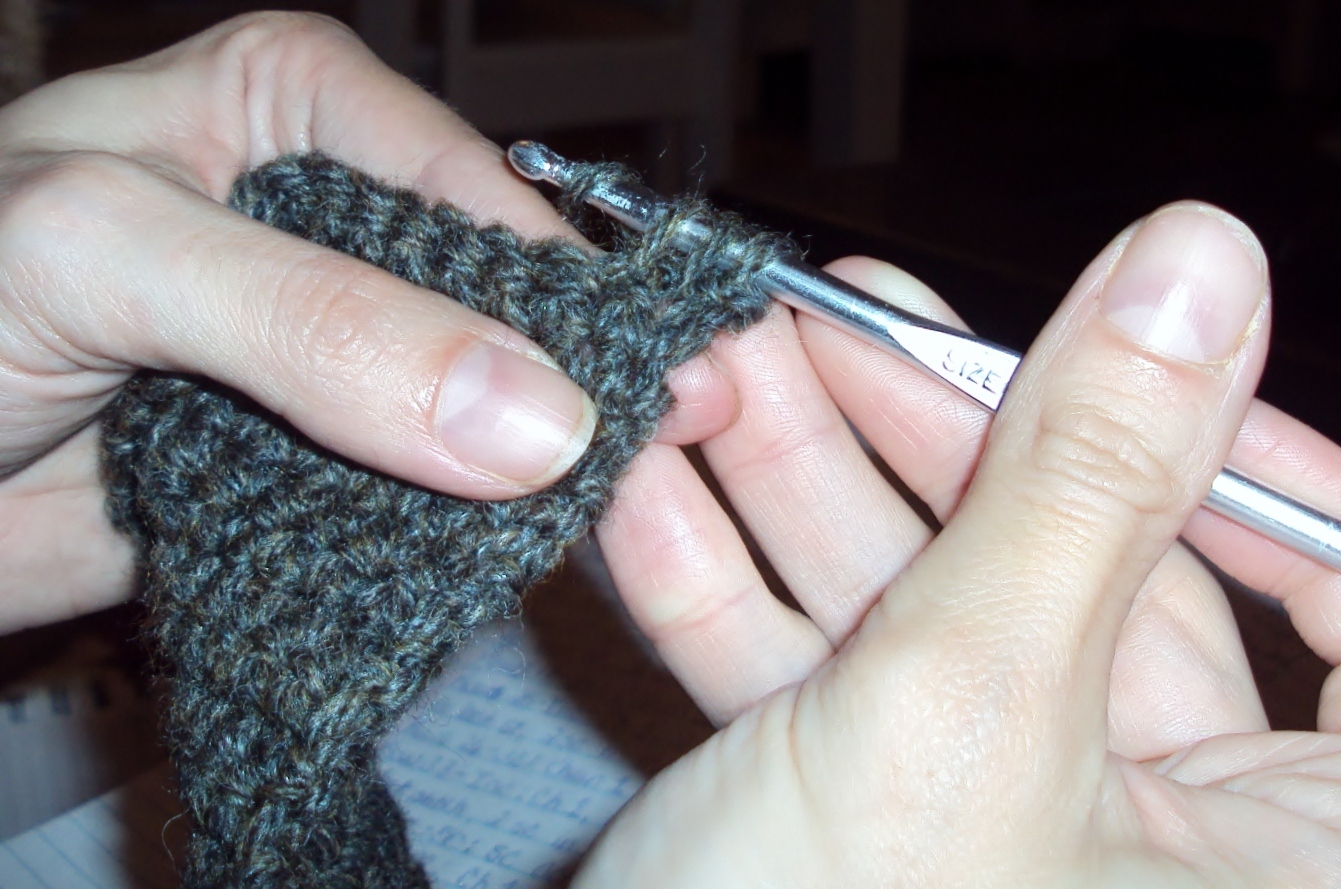
7.  Hand-knit Dishcloth

This is THE perfect time of year to learn to knit and this is THE perfect project on which to learn.  These make wonderful little gifts wrapped up in soaps or homemade dish soap!
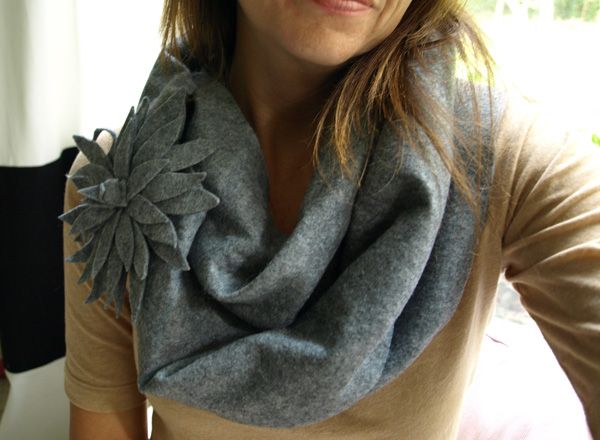
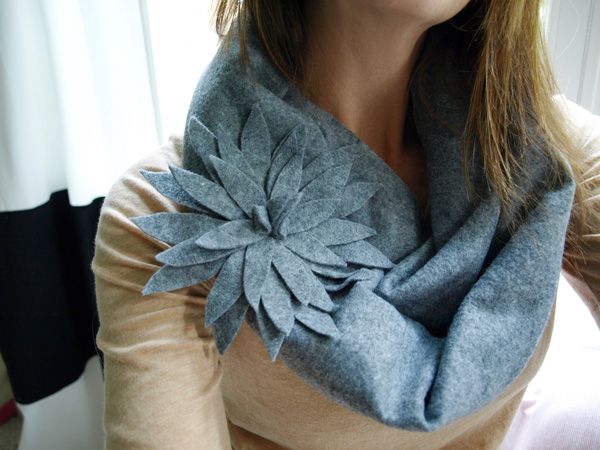
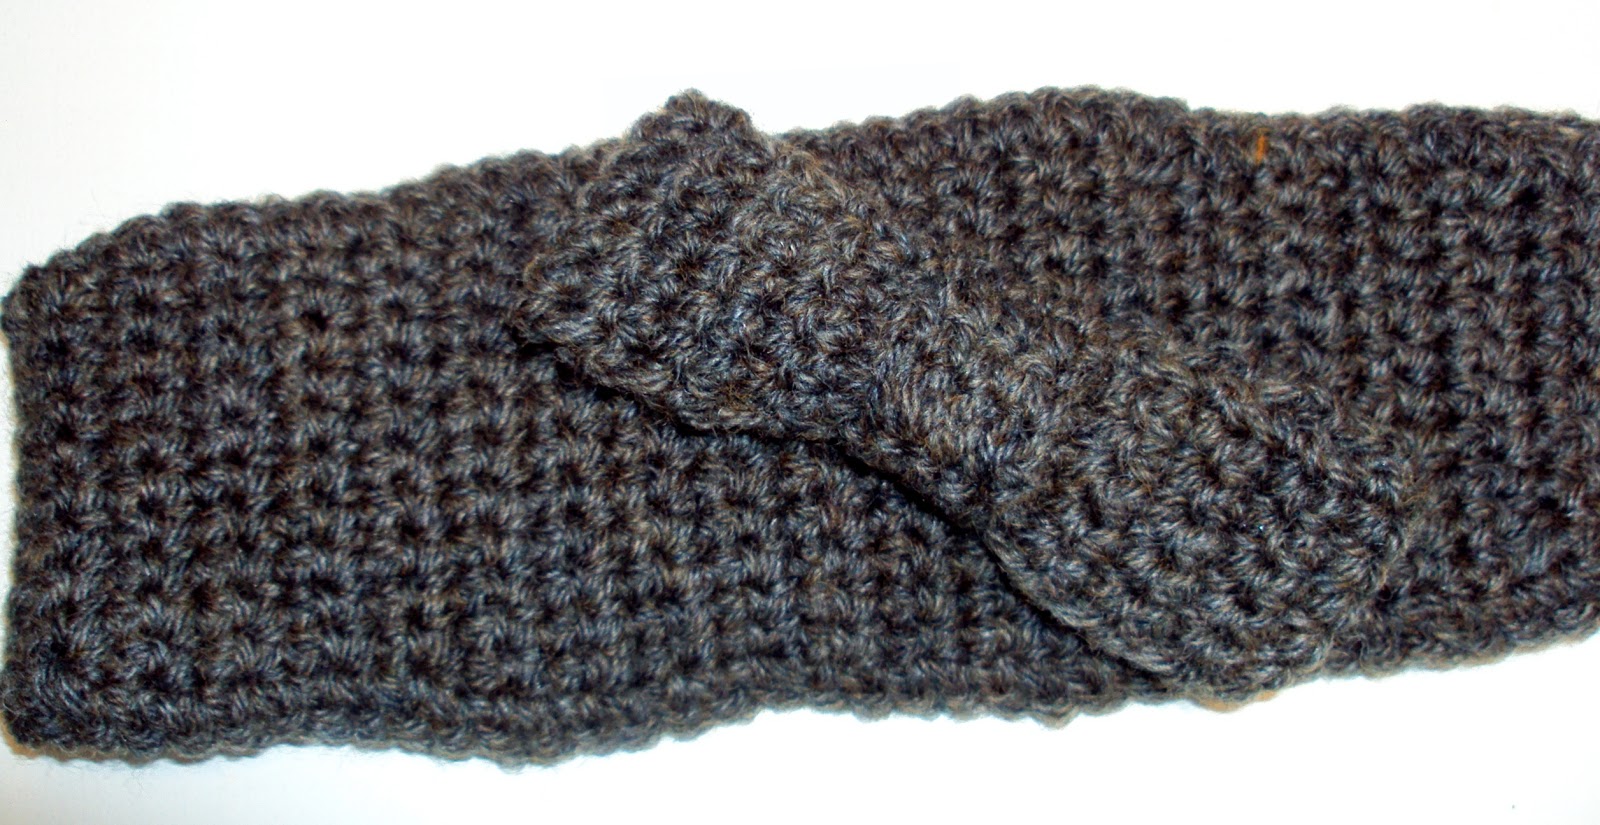
12 Days of Handmade Christmas via lifeingrace

8. DIY Felt Scarf

Thank you, Julie, for sharing this project last year.  I’m determined to make one this year and can’t wait to try one in a gold/mustard color!

12 Days of Handmade Christmas via lifeingrace

9.  DIY Monogrammed Candle

Amy shared this project during our very first 12 Days and it’s still THE most popular 12 Days post. (Thank you, friend!) Make one or 12 for your favorite family and friends!

12 Days of Handmade Christmas via lifeingrace

10. Grannie’s Homemade Fudge

This is my favorite gift to give away.  And my favorite holiday treat to make.  It’s so easy and SO delicious!  Thank you, Grannie!

12 Days of Handmade Christmas via lifeingrace

11. DIY Crayon Roll

The super talented Lindsey shared this post with us and it’s been one of the most popular of the 12 Days posts.  Make some for traveling gifts for your own littles or for all the lovely littles in your life.  Thank you, Lindsey!

12 Days of Handmade Christmas via lifeingrace

12.  Homemade Honey Wheat Bread

Perhaps, THE perfect Christmas gift!  I usually gift it with some homemade strawberry jam or local honey.  It’s love at first bite.  I get these clear cellophane bags from Amazon and give bread away all year!

12 Days of Handmade Christmas via lifeingrace

Have you made any of these projects?

What’s your favorite (easy-ish) handmade gift to give to others?  Leave links or descriptions in the comments.

Happy Veterans Day and thank you to those who serve our blessed country and to those who love them!

If you’re new around here?  Thank you for visiting my blog!  I’m honored you’re here and I hope you’ll find some encouragement (and some laughter!) for your days.  Visit my about page, which highlights some of my popular posts or will at least show you a peak into my crazy people.  You can subscribe to this blog by email here.  I am currently addicted to Pinterest, so follow at your own risk.  I also post updates to Facebook, Instagram, and Twitter.

Filed Under: 12 Days of Christmas tutorials, crafts, DIY, holidays, tutorials

Bonus Day 13:: A free printable for all your handmade gifts!

November 14, 2012 by Edie Wadsworth 7 Comments

You thought you were gonna get a break from me?  Well, around these parts, we like to keep the awesome coming!

My friend Heather made us these great printable tags to add to all our beautiful projects! I made a dishmat this week and wrapped it around a cookbook to give as a gift and then tied a cute little ribbon around it with one of Heather’s tags.  I’ve made this dishmat  SOOO many times in the past 3 years.  So easy, so cute, so useful.  Make some this year, why don’t ya.    This one is not really for my sister, Gina,  but I am making her another one because hers is all kinds of abused and perhaps even leaning toward the moldy side.  It never gets a break at her busy house.

Then I used Jan’s tutorial and have made 4 make up bags so far!

There are six tags total and you can download them and print them onto card stock and then cut out and add to your handmade gifts!

Click here to download the pdf.

Thank you, Ms. Heather and thank you to everyone who participated in the series.

Here’s a listing of all the projects from this year’s 12 days!  What are you planning to make?

Day 1 Large Zippered Make-Up Bag


Day 2 French Press Cozy

Day 3 Angel Pasta Ornament

Day 4 Anthropologie inspired candle

Day 5 Book Page Christmas Tree

Day 6 Embellished 3 Tiered Stand

Day 7 DIY Kindle Cover Tutorial

Day 8 Crocheted Headband/Earwarmer

Day 9 DIY Felt Scarf


Day 10 Advent Calendar/Jesse Tree ideas

Day 11 Casserole Carrier

Day 12  Hello Darlin’ Stenciled Pillow

Day 13 Free Printable


Filed Under: 12 Days of Christmas tutorials

12 Days of {handmade} Christmas Tutorials::Day 10 Advent Calendar/Jesse Tree Ideas

November 11, 2012 by Edie Wadsworth 13 Comments

This is day 10 in a 12 days series of {handmade} Christmas tutorials.

I’m Nicole and I blog at thepantrybook.com, a notebook of homekeeping, crafts, and professional motherhood. Come on over to join me and my family on our journey of eucharisteo (radical gratitude) in the midst of loving our amazing Everett, our one-year-old son who lost over half of his brain in a stroke.

Jesse Tree Advent Activity

Whether you decide to make a wall hanging like ours or use pieces of paper printed from the computer as ornaments that you hang on a branch, I want to encourage you to do the Jesse Tree this year! This is a fun way to create a meaningful tradition for your family. Although it can be fun to gather ornaments over time, you don’t have to wait until it’s perfect to begin. Our first year, we were missing a few ornaments and none of the pockets were sewn on our wall hanging!

Our completed Jesse Tree on Christmas Day.

I just LOVE doing the Jesse Tree with my family during the month of December. I love it because it puts the emphasis on the “Reason for the Season” – that’s Jesus. The name comes from Isaiah 11:1, which says, “A shoot will spring forth from the stump of Jesse, and a branch out of his roots.” The Jesse Tree is a set of daily Advent bible readings and questions to explain the family tree of Jesus, starting with Jesse, the father of King David.

You have a few different options (in a range of prices and time commitment) to help you find a way to do the Jesse Tree in a way that works for you!

You’ll need: a list of readings for each day, a set of ornaments to represent the theme of each day’s reading, and something to hang the ornaments on each day. I suggest starting by deciding which set of readings you will use, since they can vary (both in number of days and symbols). Then you can get as fancy as you want!

Option One: Quick and Free

You don’t need a wall hanging or fancy ornaments to do the Jesse Tree! You can find the scriptures and questions online for free! I really like the packet put together by Ann Voskamp at A Holy Experience (find it here). It includes ornaments you can cut out as well as all the readings. Click here to see how Lindsay at Passionate Homemaking used Ann Voskamp’s packet and made her own ornaments to hang on a miniature Christmas Tree.

Additional Jesse Tree bible readings and printable ornaments available here and here.

Option Two: Purchase a set of ornaments ready-made

This kit is ready-to-go, available on etsy.

You can purchase an already-made set of Jesse Tree ornaments on etsy for about $45. You can bring in a branch from the yard, anchor it in a vase with stones, and hang these ornaments on the branch each day as you do the readings. Or, instead of a branch, you can sew or paint a wall hanging and hang the ornaments from buttons or cup hooks. The same etsy crafter above sells a cute set of magnets and a vinyl tree decal for using on a cookie sheet here!

How cute is this?

You could just take a plain piece of fabric and sew buttons (like mine) or you could paint a piece of plywood and screw in tiny cup hooks for hanging the ornaments. The possibilities are endless! You don’t even need to have pockets for the ornaments. You could place them in numbered reusable boxes at the base of the tree and open the box on the corresponding day.

Option Three: Fancy Ornaments and an Appliqued Wall Hanging

I like things on display in my home to be lovely, so our Jesse Tree includes lots of glitter and velvet in rich holiday tones. When I was nine months pregnant with my first child (i.e. when I had a lot more time for sewing projects than I do now with two little ones), I decided to piece this together, essentially sewing a quilt with 24 pockets. If I had to make another one today, I think I would go for something a bit simpler. But, I reeeeaaaally love it and I’m so glad I put in the time when it was available. I also purchased a hardcover book with the daily readings, questions, and prayers – I prefer the look and feel of the hardcover book to a stack of papers that can get ratty after a few years’ use. I also really enjoyed gathering the ornaments, but some were just impossible to find, so I made them myself. For most of the homemade ornaments, I printed an image from the internet, then traced and cut out the shapes from cardboard (cereal boxes) and covered them in different shades of metallic glitter. However, the cardboard ornaments are not super sturdy. This will be our fourth year using ours and they are still holding up fine. However, I like to think of this as a family heirloom, so I plan to eventually replace all the cardboard ornaments with wooden ones (which I will also glitter).

Here you can see how the numbers on the pockets are embroidered in metallic thread. That took a long time, but I love it! I skipped number one because it’s a globe and would need a super-sized pocket to fit. But, it never needs to go in a pocket since it’s the first one to go on the tree.
This is a quicker-to make version of the Jesse Tree wall hanging because the numbers are painted on (using foam stamps) instead of hand embroidered. Also, the tree shape and the pockets are sewn down with the raw edges (trimmed with pinking shears) exposed instead of pieced together like a quilt top. You could even use glue or that iron-on tape stuff! This one also uses a different book, which has readings and ornaments for 29 days instead of 25.
This is the book we use (available here).

Our ornaments

Here is a quick list of our ornaments and where I got them or how I made them. In order to hang as an ornament, many of these have a teeny-tiny screw eye (available at any hardware store) twisted into the top – to hang from the string. Also, when looking at regular Christmas ornaments, look for smaller ones or they won’t fit in the pockets (or you could keep them in numbered boxes instead of storing the unused ornaments in pockets). If you want to see a more detailed shot of any ornament, just let me know in the comments.

  1. Globe – readymade ornament (ours from here). I also saw a smaller one at PierOne (sold as a lamp finial).
  2. The Fall – plastic snake from craft store covered in red glitter hot glued to silver styrofoam apple from floral arrangement.
  3. Noah’s Ark – homemade cutout shape glittered. You can find a Noah’s Ark picture online easily.
  4. Camel in a Tent – homemade cutout shape glittered.
  5. ram – Schleich plastic toy.
  6. Jacob’s Ladder – a wooden picket fence for a doll house, trimmed to ladder shape and glittered.
  7. Joseph’s Coat of Many Colors – this is cut out from a felted wool sweater.
  8. Shoot from the Stump of Jesse – branch from my yard with green leaf shape hot-glued on.
  9. Josaiah finds the Law – “scroll” with fabric rolled on the ends.
  10. Slingshot – Y-shaped branch from my yard and a rubber band.
  11. Wheat – two pieces of wheat from an old floral arrangement. Actually, this ornament got eaten by a mouse two years ago – he decided to die in our living room on Christmas Eve a few hours before our guests arrived for our huge party! awesome! – so, I replaced it with a brass pin in the shape of wheat from etsy.
  12. Wine – grapes floral pick. I’ll bet you could find some miniature bottles of wine at the craft store, too.
  13. Ten Commandments – glittered cardboard cutout in the shape of stone tablets.
  14. Lion and Lamb Resting Together – two Schleich plastic toys hot-glued together.
  15. Prince of Peace – precut wooden dove ornament (from the craft store) glittered, I still need to add a crown to this ornament.
  16. Shepherd – this is a ceramic figurine for a nativity (mine’s a bit chipped – I found it on ebay) with a screw eye in the top.
  17. Cross – pre-cut wooden ornament (from the craft store) glittered.
  18. The Law, Written on our Hearts – pre-cut wooden heart ornament (from the craft store) glittered with book shape glued on top.
  19. Star – readymade ornament, you can find this one anywhere.
  20. Brick Wall – this is a piece from a dollhouse or Christmas town set (I found this one on ebay).
  21. Fiery Furnace – this is a fireplace for a dollhouse and the flame part really lights up! I still need to add four little stick people on the flame with a fine-tip Sharpie.
  22. Bethlehem – homemade cityscape cutout glittered. You can find the Bethlehem skyline online easily.
  23. Candle – pre-cut wooden ornament (from the craft store) glittered.
  24. Angel – pre-cut wooden ornament (from the craft store) glittered.
  25. Nativity – readymade ornament, easy to find =).

For more ornament ideas, go here. It doesn’t look like her blog is actively being updated, but she has some super Jesse Tree ideas. She used notecards for the first year – until she could find or make all the ornaments – what a great idea to help you just get started!!! She also uses a regular-sized tree and wraps her ornaments in bags below the tree, so her ornaments don’t have size constraints like ones that have to fit into pockets on a wall hanging. I personally like having a wall hanging, but hers is a really lovely set-up too! Check out her post on making Noah’s Ark from an unfinished wooden pirate ship ornament – wow!

Do any of you already do a Jesse Tree with your family? If you have pics online, leave a link in the comments – I’d LOVE to see!! If you have any additional sources for Jesse Tree ornaments, please share those too!!!

Filed Under: 12 Days of Christmas tutorials, Advent Tagged With: advent calendar ideas

12 Days of {handmade} Christmas Tutorials::Day 9 DIY Felt Scarf

November 10, 2012 by Edie Wadsworth 17 Comments

This is day 9 in a 12 days series of {handmade} Christmas tutorials.  You can find all the projects here!

Welcome my friend, Julie, from Less Than Perfect Life of Bliss, today as she shows us how to make a felt scarf!  Julie is beautiful, talented, with a wonderful family and especially wonderful parents, that I adore.  Her dad is a great preacher and was the first person to ever share the gospel with me and he will always be special to me for that.  Her mother,  Denise, is precious and blogs at Counsels of the Heart .  Julie’s sister, Amy,  has a great crafty blog that I’m sure you’d enjoy.  Talent seems to run in the family.  Thank you, Jules, for sharing with us today!

I’m genuinely honored that Edie has invited me to be a part of this series this year and I can’t wait to show you how to make this felt scarf.  It’s a quick and easy project, no matter what level of crafty you are.  


DIY Felt Scarf

diy felt scarf


Start with 1/4 of a yard of 72″ wide felt, and cut approximately 8″ off of one end.


Then, simply sew a couple of buttons onto one end of the “scarf” and carefully cut some button holes into the other end.


At this point, you’ve spent less than 10 minutes on a great little neck warmer.  Just wrap it twice around your neck, button it up, and you’re done!


Or, you can choose to wear it another way by creating a matching felt flower pin from the extra 8″ you cut off.

To do this, cut a circle approximately 3 inches in diameter. Then, cut about 30 leaf-shaped petals, approximately 2.5 inches long.


Then, just hot-glue them on in layers, overlapping them as you go, using the same technique as you would for a felt flower pillow.


To make the center, fold 2 of the petals in half, placing a dot of glue in the fold to hold it together, then stand them up and glue them into the center.


Glue a pin mechanism onto the back and you can wear it on your scarf or with what ever you want.


For this look, just button the scarf in the back and pin the flower on the front!


To make a child’s version, just cut the felt to the length needed to best fit them.


I hope you like this as much as I’ve enjoyed sharing!  It’s a great little idea for a simple, homemade Christmas gift. And since each of these only cost about $3 to make, it’s great for any budget.  


Filed Under: 12 Days of Christmas tutorials, crafts, DIY, tutorials Tagged With: diy felt scarf

12 Days of {handmade} Christmas Tutorials::Day 8 Crocheted Headband/Ear Warmer

November 9, 2012 by Edie Wadsworth 5 Comments

This is day 8 of a the 12 days of {handmade} Christmas tutorials.  The landing page where you’ll find all the projects can be found here!

My name is Ruth and I blog at Farmgirl In My Heart.  I am thrilled to be here on Edie’s blog,  sharing one of my favorite things.    

Today we will be working on a crochet ear warmer.   The cold days will be here rapidly, for some of us they already  are.  Ear warmers work for those who are not hat people. They are everywhere recently.  These are quick and easy to crochet and make fantastic gifts.  You will need a basic knowledge of crochet stitches to work on this project.  The stitches required for this project are chains(ch) and single crochets(sc).  Both  are beginner stitches and you can find basic crochet tutorials on You Tube and Google.  Lion Brand and Red Heart yarn both have Learn to Crochet tutorials on their sites.


To begin this project you will
need: one skein of yarn (size 3 or 4) and a size H hook.  You can read about yarn weight from the
Craft Yarn Council.
To begin this project you will
ch (chain) 6 sts (stitches).

Row 1:  Sc in the 2nd stitch from the hook
and in each chain across; turn-5 sts.
Notice the 2nd
stitch in the photo.  This is where you
will begin your sc stitches.

Row 2-8: Chain 1; sc across
evenly, turn-5 sts.
For these rows you will
crochet one stitch in each of the previous stitches.  At the end of the row you will turn your work
and ch 1.  Repeat this step until row 8.
Row 9-Inc.:  Ch 1; 2 sc in the first st, sc across to last
st, 2 sc in the last st; turn-7 sts
Unfortunately, this picture is
not the best.  You will work two sc in
the first stitch of this row.

and in the last stitch of the
same row.  When you are finished there
should be 7 sts.


Rows 10-16: Ch 1; sc across
evenly, turn.
For these rows you will
continue to single crochet in each stitch across the row.  Turn and repeat.  Beginning each row with a chain. 
Row 17-Inc: Ch 1, 2 sc in the
first st; sc across to the last st 2 sc in the last st; turn-9 sts
You work this row as the
previous increase rows.  There will be 2
stitches in the first and last stitch of the row. 
The gradual increases should
be visible in your work. 
Rows 18-24: Ch 1; sc across
evenly, turn-9sts.
Your work should look like
this:
(excuse my scribbly pattern in the background)
Row 25-Inc: Ch 1, 2 sc in the
first st; sc across to last st, 2 sc in the last st; turn-11 sts
Rows 26-32: Ch 1; sc across
evenly, turn-11 sts


Row 33 – Inc: Ch 1, 2 sc in
the first st; sc  across to last stitch,
2 sc in the last st; turn 13 sts.


Rows 34-50: Ch 1; sc across
evenly, turn


Row 51-Dec: Ch 1, sc2tog, sc
across to last 2 st, sc2tog-turn 11 sts
For this row you will begin to
decrease.  For the first st you will work
2 sc together.  You can go
here for instructions to complete
this stitch. 
To crochet to stitches
together you will insert the hook through the first st, yarn over the hook,
insert hook in next st, yarn over and pull up a loop, there will be three loops
on hook, yarn over and pull through all three loops on hook.  First decrease st made.


Rows 52-58: Ch 1; sc across
evenly, turn
You will begin to notice the
gradual decrease in your work.  It should
resemble this
You are able to see the
gradual thinning.  You will now continue
this pattern for the following rows.
Row 59-Dec: Ch 1, sc2tog, sc
across to the last 2 sts, sc2tog: turn-9 sts.
Rows 60-66: Ch 1; sc across
evenly-9 sts.
Row 67-Dec: Ch 1, sc2tog, sc
across to last 2 sts, sc2tog; turn-7 sts.
Rows 68-74: Ch 1; sc across
evenly- 7 sts.
Row 75-Dec: Ch 1, sc2tog, sc
across to last 2 sts, sc2tog; turn- 5 sts.
Once you have completed the
decreases, your rows should have 5 sts. and look similar to this.

Rows 76-82: Ch 1, sc across
evenly, turn. 

At this time you can try the
headband on.  If it seems that the
headband may be too large you can subtract a couple of rows from above, if it
is seems to be too small you can add a couple of additional rows.  We will be adding additional rows and making
two buttonholes so it will be adjustable.
Take this
into consideration when you
try it on.
The buttonholes may sound
difficult but in crochet they are very simple.
Row 83-Buttonhole:  Ch 1, sc in first 2 sts, ch 1, skip next st,
sc in next 2 sts, turn.
Unfortunately, this is a bit
blurry, but you can see that I have sc in the first 2 stitches, then I ch 1,
you will skip the next st.

and crochet in the following
one.  You can see the space this
leaves.  That is the completed
buttonhole.

Rows 84-86: Ch 1, sc across
evenly, turn

At this time you will crochet
through each st and over the space for the buttonhole.
Row 87 Buttonhole: Ch. 1, sc
in first 2 sts, ch 1, skip next st, sc in next 2 sts; turn
This second buttonhole will
make the ear warmer adjustable and better suited for gift giving. 
Row 88-90: Ch 1, sc across
evenly-do not fasten off.
Finishing: Ch 1, sc evenly
around edge of headband; join to first st. Fasten off.
Turn the ear warmer sideways
you will now crochet a sc st around the outside edge of the piece.  This will neaten the edges.


You will continue around the
piece until you reach the beginning.
Once you have reached the end
you will fasten off.  You can view how to
here.
Then using a yarn needle you
will tuck in the ends of your yarn.
Add a button to the end
opposite your buttonholes.


These ear warmers can be
embellished with crochet roses, or any other flower.  A bow is a fun alternative if you do not like
the flowers or have not reached that level of skill.  
 Ear warmer embellished with
flower.                


   Headband embellished with bow.
  For a great gift idea you can
make several embellishments, different color flowers and bows, to create fun styles.
                                                                                                                                                                                          
I will be posting some fun
crochet flower tutorials and bow tutorial on my blog so come on over and see all the fun
possibilities for embellishing your ear warmer.
If you have any questions,
stop by, I will be glad to help.

Filed Under: 12 Days of Christmas tutorials, crafts, tutorials

12 Days of {handmade} Christmas::Day 7 DIY Kindle Cover Tutorial

November 8, 2012 by Edie Wadsworth 14 Comments

This is day 7 of a 12 day series of handmade tutorials. All the projects are listed on this landing page!

Howdy to all of Edie’s wonderful readers! I was so excited to be invited to fill in one of these 12 Days of Handmade Christmas spots, so thanks for having me. I’m Heather and I blog over at Lark & Lola {my small craft biz blog} and Last Day Ago {my family blog}. I’m a Colorado native, married to my high school sweetheart, and raising two little girls. There is a long history of artists and creators in my family, so it’s no surprise that I spend most of my spare time making things with my hands. I hope you enjoy this tutorial for sewing your own tablet/Kindle cover!

Cheers,
Heather


diy kindle cover tutorial

 DIY kindle cover tutorial
My husband gave me a Kindle Fire for an early Christmas gift this year, and I love it! When I started looking for covers, however, I had a hard time finding any that I liked even a little bit. I’m very picky about my accessories, and I just couldn’t settle for a blah plain one…
So here is my FIRST ever sewing tutorial/pattern that I created all by myself. I won’t lie, my first attempt didn’t turn out so well, but I learned from my mistakes and now I’m showing you my second try, which turned out a lot nicer. You can easily alter this tutorial for any tablet–so if you don’t have a Kindle Fire, you should still be able to pull this off. I’m a very novice seamstress, and my second try went off without a hitch.

You will need:

1 – 17″ x 5 3/4″ fabric piece for the outside (I used a laminated fabric for mine)

1 – 17″ x 5 3/4″ fabric piece for the inner lining

2 – 17″ x 5 3/4″ pieces of thin, but medium stiffness fusible interfacing

1 – 8″ x 5 3/4″ fabric piece for holding the Kindle in place

1 – 8″ x 5 3/4″ piece of fusible interfacing

You will also need elastic. I decided to try clear elastic for mine (like the kind used in bras and other delicates), and it seems to have worked out well. You could use regular white or black woven elastic, too, if you feel more comfortable with that.

(Post edit: almost a year later, the clear elastic has held up beautifully!)

And of course the basic sewing supplies: a sewing machine, marking pencil, measuring tape, pins, thread, etc.

If you are not making this for a Kindle Fire, you want to size what would be the 17″ x 5 3/4″ pieces by measuring 1/2 inch seam allowance on three sides of your tablet. Then at the top you will add about 3/4″, the length of your tablet again, and 1/2″ at the end. (Or, more simply, 2 times the length of your tablet plus 1 3/4″  and 1″ wider than your tablet.)

For the Kindle/tablet holding piece, simply cut a piece of fabric that is 1/2″ longer and wider on each side of your tablet.

So you will end up with 6 pieces of fabric which will become your Kindle/tablet cover.

Start by fusing each piece to it’s matching interfacing.

For the 8″ x 5 3/4″ piece, trace the size of your Kindle to help you press the edges evenly when your turn them in.

I attempted rounded corners for this piece (I’m a novice, don’t forget.)

And pressed it like so:

Now you will need to cut four lengths of your elastic, about 5″ each. (If you use the clear elastic like I did, be sure to pre-stretch your elastic.)

This is the way in which you want to sew your elastic onto each corner of the Kindle holder, making a loop that will come out on the right side of your fabric.

It’s hard to see, but if you look close in the photo above you can see the elastic angling out toward me. Start by sewing on one end, then bring it around the front, leaving just a little extra slack (as opposed to running it around the corner straight up against your fabric) , and sew the other end onto the other side of your corner, also at an angle.

Do this on all four corners, creating elastic straps that will hold your Kindle in place.

Once you have those in place, pin the Kindle holder piece to your lining fabric, leaving 1/2″ on three sides, like so:

Then continue by stitching the Kindle holding piece onto the lining, close to the edge. Be sure to pull your elastic straps to the left so that they are stitched around the edge nicely and you don’t lose any slack.

This next little bit is optional, you can simply use an elastic strap if you like, but I wanted a ruffled strap for my Kindle cover, so I took a strip of fabric, about 3″ wide and 20″ or so long.

Fold the strip in half lengthwise, and sew 1/4″ or so along the edge, then turn it right side out:

Flatten your strip, placing the seam in the middle (this will be the backside of the strap.)

Now sew 1/4″ seam down each side, creating a tube in the middle.

Run a piece of elastic through the middle tube portion, using a safety pin to guide it through.

Stitch one end of the tube shut, being sure to get the elastic in place. Now figure about how much elastic & ruffle you want your strap to have, don’t make it too tight. Snip off any excess of the strap and stitch the other end shut, being sure to catch the elastic in your stitch. The ruffle effect is created by the fabric being longer than the elastic.

Now you’re ready to sew it all together. Place the lining and cover pieces right sides together and pin it in place. Remember to tuck your strap (or elastic) inside, don’t pin it sticking out and around like I show in this picture! (Sometimes my mind has to work at figuring out how these things come together.) Simply tuck the edges of your strap piece in between and up to the edges, making sure it will be stitched with your seam. I placed by strap across the bottom about 1-2″ up from the bottom (on the same end as the Kindle holding piece with the elastic, of course).

Before stitching, take a moment to check your tablet/Kindle to get a good idea of how much seam allowance you should have. If you have a lot of excess, now is the time to trim it down. I wanted my cover to fit my Kindle pretty snug, so I stitched about 1/3″ seam all around.

Be sure to leave an opening at the bottom so you can turn your cover right side out!

Turn it right side out. Usually I would press my project at this point, but I don’t want to melt my clear elastic so I skipped this step. Instead I just top-stitched around the entire edge, being sure to stitch my turnout hole shut as well.

Another optional bit: Before top-stitching, I used my Kindle to check for the crease, and added pins where the crease started and stopped.

Using the pins as a guide, I marked 3 straight lines down the middle crease, and I stitched along each line. I find this helps the cover fold well.

Like so:

diy kindle cover tutorial

Now it’s the moment of truth! Check your Kindle to make sure it fits in your cover nicely. Hopefully it does, just like mine:

diy kindle cover tutorial

I have to say, I’m glad I chose the clear elastic. It seems to hold up pretty well and I find it less distracting to my eye than the 4 white elastic strips would be.

You should now have a pretty little Kindle (or tablet) cover!

DSC_0262

I love how well it fits my Kindle, and it’s so much more my style than any other Kindle cover I saw for sale.

The nice thing about the strap is that I can flip it over to the backside to hold the cover back when I’m using my Kindle.

And it’s ruffled. Ruffles are always a plus.

DSC_0266

If you decide to use this tutorial to make your own tablet cover, please share pictures when you’re done!

DSC_0263
Thanks for stopping by and 
have a very Merry Christmas!

Filed Under: 12 Days of Christmas tutorials, DIY, sewing, tutorials Tagged With: diy kindle cover tutorial

  • Go to page 1
  • Go to page 2
  • Go to page 3
  • Go to Next Page »

Primary Sidebar

ediewadsworth

Coach. Healer. Life Mentoring School.
💕💕I help women heal & rediscover their purpose & calling.💕💕 Click below for my free purpose field guide!

Dr. Edie Wadsworth|Lifeingrace
2 years ago today, your world shattered into a mil 2 years ago today, your world shattered into a million pieces.

Sometimes I marvel at how we were blessed enough to be there holding you when it all came crashing down. I do know this—I can’t remember my life without you.

I do know that thousands of tears and meals and boo-boos and toy trucks later, we stand in awe of you---your courage, your brave big boy fight, your tender little boy heart, your hilarious old man ways. 

We know how sacred this walk with you is and we don’t take it lightly.

We are here for it all and we couldn’t be more grateful.

We have always loved you and you have always been our special gift.

 Love you little one. Let’s keep listening for Aslan. He will find a way to put everything back together. 

“Herein lies the world. Beautiful and terrible things will happen. Do not be afraid.”
Hiring these two out for all your ring bearer and Hiring these two out for all your ring bearer and flower girl needs.  They provide ample entertainment to your guests and accept plush toys for payment in lieu of money. May or not be VERY strong willed.  And also adorable. @williamsperformance @ginawilliamsh @ameliadurand4
I turned 51 last week and spent a much needed few I turned 51 last week and spent a much needed few days alone with this guy.  As soon as we drove out of the driveway I started crying. I don’t think I realized how much I needed a break.

it was incredible and relaxing and amazing and so life-giving. 

this week it feels like last week was 100 years ago because you know, life. 

I am excited to say that despite the fact that I’m another year older I managed to figure out how to go live on YouTube with my new camera. It only took me approximately 6000 hours. So maybe you’ll join me at noon today on YouTube and we’ll try something new together.

Here’s to 2021. Maybe it will get its act together but if it doesn’t we will get ours together😂🥳❤️❤️❤️
“To have Faith in Christ means, of course, tryin “To have Faith in Christ means, of course, trying to do all that He says. There would be no sense in saying you trusted a person if you would not take his advice. Thus if you have really handed yourself over to Him, it must follow that you are trying to obey Him. But trying in a new way, a less worried way. Not doing these things in order to be saved, but because He has begun to save you already. Not hoping to get to Heaven as a reward for your actions, but inevitably wanting to act in a certain way because a first faint gleam of Heaven is already inside you.”
― C.S. Lewis, Mere Christianity
Got my halo yesterday🤩😇😂 (That ridge lin Got my halo yesterday🤩😇😂

(That ridge line right above my head is the infamous Angel’s Landing)

Here’s to climbing out of tough spots in 2021❤️
What I learned in 2020?? I am HERE FOR ALL THE L What I learned in 2020?? 

I am HERE FOR ALL THE LOUNGE WEAR. 

Amen. Goodnight. 🤩🤩🥳🥳🥳 

Okay fine. Currently sporting sweater from Target which I have worn everyday for 3 months.  Natori PJ’s which I HIGHLY recommend, and Ugg slippers which I’ve worn everyday for a solid year. 

How’s your lounge wear game?? Tell me everything.
Day 2 of LIVE YOUR DREAM starts in 30 min. We’ll Day 2 of LIVE YOUR DREAM starts in 30 min. We’ll be talking all about DESIRE and the difference between false desire and true desire and how true desire leads us to our calling. 

It’s not too late to join us and if you could see the comments inside this group, you would 😭😭😭 and 🥳🥳🥳 because we are getting to the heart of things and it’s only gonna get better! 

If you’re already in, tell us how yesterday’s training impacted you and if you’re not, JOIN US FRIENDS!!

Head over to https://lifeingraceblog.com/dream
We took Tommy boy for this first ski adventure tod We took Tommy boy for this first ski adventure today and it was so satisfying to see him tackle something hard and keep his chin up and have a BALL doing it.

He was very entertaining to his ski school friends, despite the fact that his German instructor couldn’t understand a WORD he said. 😂🥳

But all you mamas out there can see through all the pretty pictures and videos to know that days like today can also be full of frustration.

Making sure everybody has their stuff, the reservations, the snacks, the HASSLE of boots and poles and gloves and skis, the tears, the snappy replies, the hurt feelings, the wrong turns, the missed moments, the potty breaks.

NEED I GO ON??????

But then there’s the down to your soul goodness of being smack dab in the middle of God’s glorious creation, the sheer joy of the wind and sun on your face, the fleeting feeling that everything is right in the world, the triumph of tackling something hard and pushing through all the doubt and fear.

I felt every emotion today. What a privilege to live this life we’ve been given. What grace to live it with these people.

Today was a dream. But like every dream come true, it has a cost, it requires more of you than you think it will. You will want to quit.  A million times.  But what waits for you on the other side is worth fighting for. 

That’s what we’re diving into this week in my online workshop LIVE YOUR DREAM.

You may have given up on setting goals, but don’t stop dreaming.

Come dream with us and let’s make 2021 the year we were willing to be so alive that we would risk feeling EVERY emotion, every setback, every failure in order to see it come true.

We start tomorrow.

It won’t be the same without you.

Join us at https://lifeingraceblog.com/dream.

It’s time to dream again.
❤️❤️❤️❤️❤️❤️

What’s one thing you’re dreaming about this year???
It was magical. ⛄️⛄️⛄️ Know what’s It was magical. ⛄️⛄️⛄️

Know what’s more magical for me???? The week between Christmas and the new year and I’ve made it even more epic by hosting an online workshop called LIVE YOUR DREAM🥳🥳🥳🥳

This one is for the dreamers and the doers!! Join me at lifeingraceblog.com/dream and let’s make some magic❤️❤️❤️❤️

Tell us in the comments if you’re already in!!!
  • Facebook
  • Instagram
  • Twitter

© Copyright 2008-2019 life{in}grace · All Rights Reserved · Graphic Design by Jenna Riccio Laible · Website by Erin Ulrich