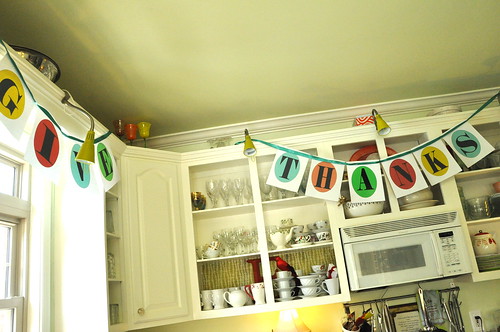
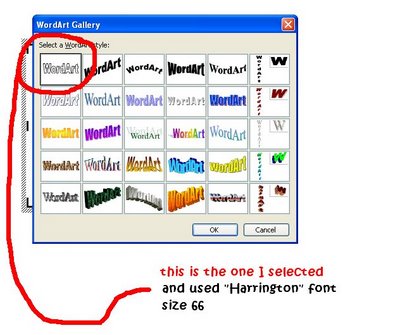
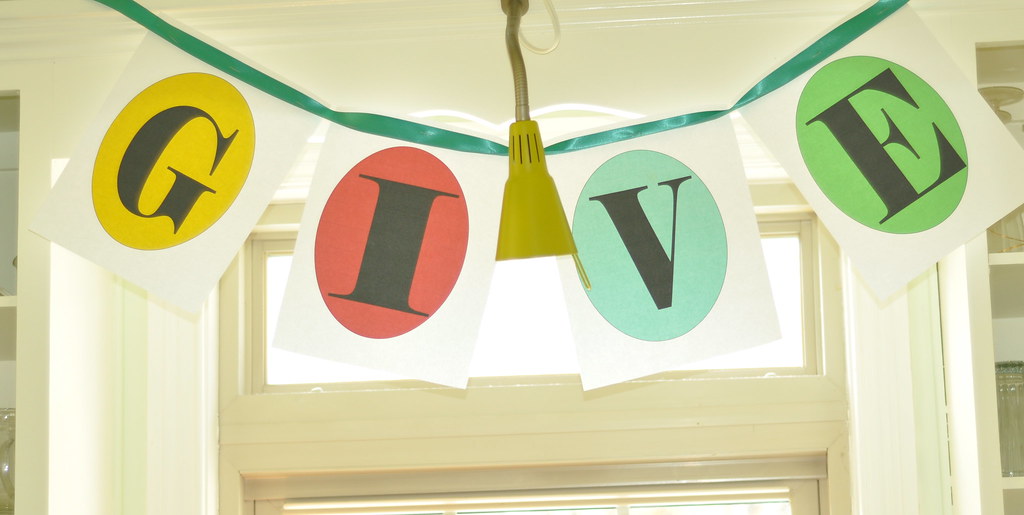
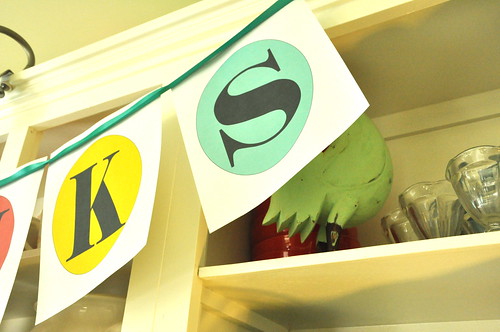
And, in the spirit of creative living, I thought you might enjoy my first attempts at Thanksgiving/Christmas decorating. I took Darby’s idea from day 12 and made the cutest banners ever. I just printed these wonderful letters on regular paper and stapled them to a ribbon and then hung them from my cabinets.
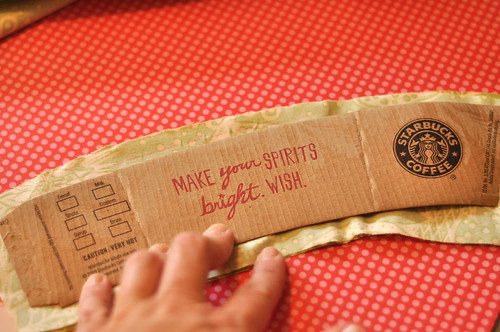
Archives for 2009
12 Days of Handmade Christmas Tutorials Day 12 {Christmas Tags}
Whew!!! I don’t know about you but I’m kinda sad it’s day 12! I’ve had so much fun with this series and am most grateful for the wonderful contributors who have given of their time and ideas to make it all happen! Let’s recap:
On the 12th day of Christmas, my blog friend gave to meand a dishmat made by Dar-by!
The following is a pic-tutorial of how to create your own labels in Microsoft Word.
A few words to the wise:
1. Print on plain paper first
2. Use solid sheets of “label paper” {so they will be stickers–that you can cut out in your desired shape}. Be sure you get ink jet paper for an ink jet printer or laser paper for a laser printer.
3. Make your margins smaller so you can squeeze more on a page
And just to prove to you that you can do it, look what I made yesterday! Thanks so much Darby for your endless inspiration!
Note: For all you who are considering bifocals {like me} here’s the link to the post on Darby’s blog. You can click on her pictures to enlarge them! You’re welcome.
12 Days of Handmade Christmas Tutorials Day 11 {Fudge, Peppernuts, and Baskets}
Hello to all fellow fans of Life in Grace! I’m Richella from Imparting Grace, and I’m so glad to be part of Edie’s 12 Days of Handmade Christmas! Wife to my college sweetheart and mother to three wonderful boys, I’m a woman who is blessed beyond measure. I am passionate about making a home for my family and living a life with God, learning to receive and impart grace as I go.
I’m excited today to be able to share with you one of my favorite Christmas projects. Each year, I like to give a little something to many people: neighbors, teachers, service providers. That list can grow long, but it’s important to me to be able to share a bit of the joy of the season in some small way. Like many of you, I bake cakes, make cookies, and roast nuts. But one thing I do every year is to make fudge. Lots and lots of fudge: at least 12 pounds every year.
My fudge recipe is special, I think. My mother’s family has lived in Kansas for many generations, and I inherited a few old Kansas cookbooks. My fudge recipe comes from one of those cookbooks. The body of the cookbook is long since lost, so I don’t know the name of the book; all I have is one yellowed and tattered page. The name of the recipe is Mamie’s Fudge, and under the recipe name is this note: “She made this to woo Ike.” Yes, indeed, this recipe originated with Mamie Eisenhower. President Eisenhower was from Abilene, Kansas, and Kansans proudly claim this family as their own. Just imagine sweet young Mamie Doud making this fudge for the handsome young lieutenant.
::Mamie’s Fudge::
pinch of salt
2 Tablespoons butter
12 ounce can evaporated milk
12 ounces semi-sweet chocolate chips
12 ounces German sweet chocolate, broken into pieces
2 7-ounce jars marshmallow creme
2 cups chopped nuts
Butter a pan for the fudge. A 9 x 13 pan works well for thick fudge; a small sheet pan is good for slightly thinner fudge.
Place semi-sweet chocolate, German sweet chocolate, marshmallow creme, and chopped nuts into bowl. Set aside.
Combine sugar, salt, butter, and milk in heavy saucepan. Cook over medium-high heat, stirring constantly, until mixture comes to a boil. Boil, continuing to stir, for six minutes. Remove from heat and pour immediately over chocolate mixture; stir until all the chocolate bits are dissolved.
The mixture will look pretty goopy for a moment, but you’ll soon be rewarded with the delectable aroma of those chocolates and the look of smooth, satiny fudge.
Pour into buttered pan. Let stand one hour before cutting.
The fudge costs me about $13 per batch, which seems like a lot, but it makes more than six pounds. Mamie’s original recipe actually says that it makes seven pounds. Six or seven, the per-pound price is pretty low.
I keep a eye out for containers for my fudge, such as pretty gift boxes, tins, or ceramics. Just last week I found this cute mitten plate at my thrift store for $1.
My favorite presentation of all is simply to put some fudge on a plate, cover it in plastic wrap, tie a bow with some pretty ribbon, and attach an ornament.
::Peppernuts::This yummy little treat is of German origin and they are so wonderfully addictive! This makes a huge batch but they ‘keep’ forever—like months! Steve’s mom made these with the girls when she was here and then we made them again on Reformation Day.2 1/2 c. butter (marg or shortening also work)
1 1/2 c. molasses
2 c. sugar
1/2 c. brown sugar
1/2 c. milk
1/2 t. nutmeg
1/2 t. black pepper
2 t. baking powder
1 t. cinnamon
1 t. cloves
1 t. allspice
1 t. salt
9 c. all purpose flour
1 qt ground walnutsThe dough should be stiff but not overly dry so add the last 1/2 c. of flour slowly to make sure the dough isn’t too dry.Roll the dough into thin ropes, using a little flour to keep them from sticking to your surface. {the ropes should be about the size of your first finger—unless you have unusually large fingers} Apparently little Elea is unsure of this process—but I can tell you from experience that she loves these little cookies.Then freeze the ‘ropes’ so that they cut easily. It takes less than an hour for them to harden.We took one tray out of the freezer at a time and cooked those—then proceeded to the next tray.Then slice them into little coin size pieces and bake at 350 until they no longer ‘give’ when you press them (in my oven–about 12-15 min). The longer you cook them, the crunchier they’ll be and my family likes them crunchy. I prefer them on the less crunchy side but you’ll have to experiment.Then, wrap them up neat and pretty and Merry Christmas! Or Happy Reformation Day!
And Nancy from Basketmaster’s Weavings has a great tutorial on her blog for how to make a Christmas basket, along with many YouTube tutorials on the different steps of weaving. She lists directions for where to buy the stakes and what kind you’ll need. This would be so much fun to learn how to do with my girls—-and we love a good YouTube video. That cute little basket would be a great handmade gift all by itelf—or you could fill it with fudge and peppernuts.
12 Days of Handmade Christmas Tutorials Day 10 {Coffee Cozy}
I regret to inform you that the person scheduled for Day 10 could not make it due to unforeseen family circumstances. Guess you’re stuck with me today. But don’t forget to visit the first 9 days, starting here. Love my new sign? I think Todd Wilken may need it for the studio.
I followed the tutorial pretty closely but found out too late that not all coffee mugs are made alike—so make sure that the template you use {I used a Starbucks coffee cozy} fits your mug–making sure to allow for the seams. For my travel mug, I should have made mine 1 1/4 inches longer than this Starbucks template. Just put your template around your mug and make sure it fits and if not, adjust—making sure to make allowances for both end seams.
Trace the template onto the wrong side of the fabric {right sides of fabric together} allowing for the seams. {I left about 1/4 inch for the seams on all sides—and as you’ll see later, I should have lengthened my cozy by 1 1/4 inch—-so make sure it’s long enough by wrapping the template around your mug}
12 Days of Handmade Christmas Tutorials Day 9 {Pillows}
I had everything I needed so I didn’t spend a dime. If you don’t have an embarrassing stash a few things lying around, like I do, I think you can buy what you need for less than $15.00.
First gather your supplies,
You will need pillow forms to cover. You can buy inserts fairly inexpensively at the fabric store, especially when you catch them on sale, or like I said above, you can just recover pillows you already have. One of the pillows I’m covering today came from Walmart. I was there to buy a pillow form, but noticed that I could buy an 18 inch pillow cheaper than a 16 inch pillow insert, so I went with that.
I am using a rotary cutter, but you can make your cuts with scissors. If you plan to do much sewing, I recommend getting one and a self healing cutting mat. You will also need something to measure your fabric for cutting. I have a clear ruler and my cutting mat has markings, but a tape measure or yard stick would be sufficient.
You will also need a few pins, something to mark with is helpful ( I use a water soluble fabric marking pen), an iron and of course a sewing machine.
For the first pillow, I used a fabric called osnaburg, it looks very much like linen but is much cheaper. You can find it at JoAnn or Walmart for around $3/yd. I pre-wash my fabric before sewing to get any shrinking out of the way.
Measure the pillow or form you want to cover. Cut one piece for the front of the cover the exact dimensions. My pillow is 16″ square so I cut one piece of fabric that size. Normally when you sew, you cut the item larger, taking your seam size into consideration. For pillows I cut the fabric the same size so that the insert will fit snugly into the cover. Otherwise you end up with a saggy baggy pillow.
I want to recreate this Pottery Barn pillow, cause I think it’s really cute, but I don’t have $29 (plus shipping) to spend on a pillow- especially since I really like the set ($29 plus shipping times three- YIKES!)
To make the LOVE pillow, I took my 16″ front piece and found the center by folding it in half then in half again. I made the little pocket by cutting a pieces of the same fabric 6″ x 8″. I machine embroidered the word LOVE in the center, but you could just as easily paint the words on using regular craft paint- if you have a nice steady hand- which I do not. You could stencil it on using regular stencils or the freezeer paper stencil method or use iron on transfer paper and iron it onto your pocket. Once you have your word on your pocket, turn under all four sides 1/2″ and press.
I bet I just lost half of you
didn’t I? When I said press? Pressing gets such a bad wrap, no one
wants to fool with ironing. It takes too much time. I don’t like toiron any more than the next guy. In fact, I think that may be whatturned me off to sewing when I was young. My granny tried to teach meto sew and once she got all preachy about pressing after every step andshowing me the propper way to press an item, I started hearing CharlieBrown’s teacher “wa wa waaa waaaa….” If I have to do all that, I’mnot messing with it! Well, fast forward to today, and I’m probably abigger preacher on the merits of pressing as you sew than my grannyevery thought of being. It really doesn’t take much time, and it notonly makes the sewing easier, it makes what you sew look so, so, muchbetter. Have you ever seen a handmade item and just it just screamed“homemade!” I bet it was because it wasn’t pressed. So please, please,if you are going to take the time to make something, take just a tinybit more time to press. OK, off my soapbox and back to the tut.
Find the center of the pocket and place it on the center of the pillow front. To keep this extra secure for stitching I used a little bit of stitch witchery (fusible web) under the sides and bottom. Once it’s nice and secure, I used a quilting stitch on my machine and red thread to give it a hand stitched look ( not necessary, you could use a regular straight stitch, just increase the stitch length). You could also hand stitch it if you like.
On one short side of each back piece, turn under about a 3/4″ hem, press, and turn it under again. Yes, again with the pressing. Sorry.
Sew a straight stitch close to the edge of the fold on each back piece.
Now lay your front piece right side facing up on your work surface. Lay each back piece on top with right sides facing down, lining up the outer edges of the back pieces with the outer egdes of the front pieces. You will be overlapping the back pieces. This creates your envelop back.
Pin in several places to hold everything in place for sewing. Be sure to pin the edges of the back pieces so they stay put while you sew everything together.
Now sew around all four sides, I used a 3/8″ inch allowance because it looked like enough for the fabric I was using.
Clip your threads, turn your cover right side out, stuff your pillow in and admire your work. Take a picture of your lovely new pillow so you can share it with all your friends!
I also made the JOY pillow (didn’t get to PEACE yet, maybe today) and this gift box pillow like one Ballard has for- are you ready for this? $75.00!!!. I used the same construction method, you just embelish the front piece any way you like first.
Want to know how I made the Ballard’s pillow? OK I’ll tell you. It was really easy and didn’t take very long at all.
You will need a printed fabric, burlap, ribbon or double fold bias tape, freezer paper and steam-a-seam lite.
Cut your first piece to fit your pillow. Mine was 18″ this time. I happened to have a piece of green fabric almost exactly like the print on the Ballard’s pillow.
Next, cut a piece of steam-a-seam 9″ x 9″ and fuse it to the back of a piece of burlap. Do (this before cutting the burlap to size, that way you have less fraying) Cut the burlap 9″ x 9″, remove the paper backing and fuse to the center of the printed fabric.
Go around all four sides of the burlap with a zig-zag stitch in dark brown or black thread.
With the stitch witchery, (or any fusible tape- or you could use a glue stick) secure a piece of red ribbon or bias tape down the center of the burlap box, turning under the raw edges.
To make the gift tag, cut a piece of freezer paper 8.5″ x 11″ (the size of printer paper) and iron the shiny side to a piece of light weight cotton fabric. Cut the fabric 8.5 x 11 after adhering the freezer paper. Now you should have a piece of fabric that will run through your printer. I had to fiddle with mine a bit, but it worked nicely. I am not guaranteeing this will work in your printer. I simply googled free printable sheet music, found and image I liked and printed it on the freezer paper backed fabric. After printing the image onto the fabric, remove the freezer paper. Next fuse a piece of steam-a-seam to the back and cut it out in the shape of a gift tag. Remove the paper backing and iron it in place on the burlap box. Stitch around the edges with a zig-zag stitch. (sorry for the blurry photos)
Construct the pillow following the instructions above, then tie a bow from your ribbon and attach it to the front. I used fabric glue, but you could hand stitch it in place.
Stand back and admire your pillow and brag to your husband that you saved $75.00!
A little bonus tip~If you are limited on space where ever your sewing area is, you can make a little portable pressing board instead of putting up a big ironing board. I made one yesterday with a scrap of wood, it wasn’t plywood, just some sort of paneling stuff Mitch had that measured 16″ x 24″. I covered it with 2 layers of cotton quilt batting and a layer of fleece interfacing then a layer of cotton fabric. I stapled it all to the back and now I have a surface for pressing I can keep right next to my cutting area, saving me steps to the ironing board and clearing up some floor space in my sewing room.
For more crafty goodness, visit Kris’ blog for ‘I can make that’ day!
DIY Monogrammed Candles {12 Days of Handmade Christmas Tutorials} Day 8
This is day 8 in a 12 day series of handmade Christmas tutorials. For an overview of the all 12 days, click here. For all the great projects from 2012, click here.
Don’t you just love candles! I love them so much I light them year round. My husband comes home from work in the middle of the summer when it is 95 degrees outside, and goes around the house blowing out all my candles…and I follow right behind him relighting them all.. I always buy candles that have a fragrance to match the season. Year round, I just cannot get enough of them. Well you can imagine my delight when I learned to paint and monogram candles. These lovelies make beautiful gifts: birthdays, baby showers, Christmas, weddings, etc.. Here is what you are going to need:
A candle (my current favorite is this brand from Bed, Bath and Beyond). Candle manufactures come and go, as soon as I fall in love with one they will stop making it. Try out a few and see what works best for you. There are lots of great, affordable candles out there.
Next, paint on a very thin coat of the Glass and Tile Medium over the monogram on the candle as shown below. This coat will dry slightly “milky” so be sure to use a thin coat. Allow about 15 or 20 minutes to dry.
Using your thin paint brush, paint over your carved letter with black paint. Keep your hand as steady as you can, and paint the letter to look as much like the letter you printed off the computer as possible.
Once you are satisfied, allow the paint to dry for at least 30 minutes before wrapping the candle. These candles look lovely wrapped in clear plastic cellophane wrap, tied up with festive ribbon. I keep lots of ribbon on hand, by simply changing the ribbon it becomes a great, unique gift for lots of different occasions.
Click here to hear all about the square dance I went to this weekend!