

(my black and white Day Designer is from the talented Whitney English)
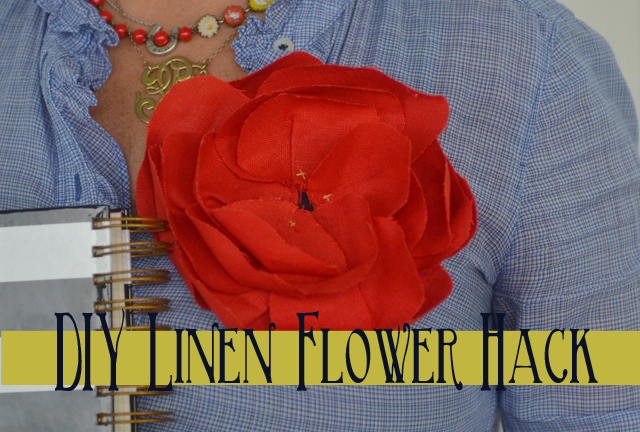
DIY Linen Flower Tutorial
I’ve been in love with the Emerson Fry flower pin for years. I got my first one 3 years ago and now have 3 of them. Sadly, they do no make them anymore so those of us who are super fans are up a creek, except not anymore! Since I still wear mine ALL the time, I decided to deconstruct it (I actually took it apart!) and figure out to make some for a few friends and family. I’ve had to re-fluff and re-starch mine over the years but they’ve held up remarkably well for as much as I’ve worn them. About knee deep into this project (which I’ve been working on for a good week), I decided to see if anyone else had made them, and lo and behold, my friend, Amy, from Playing Sublimely, did them with her crafting friends 2 years ago. She is a crafty girl and I’m trying to beg her to be part of our 12 Days of Handmade Christmas this year. The only difference in our tutorials is that mine may insult you because it’s ridiculously detailed and bossy.
Y’all. I ADORE these flowers. They take about an hour to make and it’s WELL worth the time and effort. I was so impressed with how they turned out. Also, the red one is my favorite but I’m making navy blue, as we speak, and I want to find some light pink or blue linen too.
My most important advice for this project is DON’T SKIMP on the linen. You need good quality, lightweight linen, which I couldn’t find at Hobby Lobby. You’ll probably have to go to a fabric store, but it’ll be well worth it in the end. I made a flower with the blue linen from Hobby Lobby that I used to make my skirted tablecloth, and it’s not nearly as pretty as the ones with the fine gauge linen!
Here’s what you’ll need:
- Lightweight linen (I had to go to Hancock’s and with 40% off it was still $10 per yard. You can probably make 4 flowers at least but don’t skimp on thicker, cheaper linen! These flowers sold for $60-70 each and I’m guessing part of the priciness was the cost of the linen.)
- Navy felt—I couldn’t find the right color navy (for my personal taste) in the squares so I bought a couple yards of navy felt.
- Good scissors—It makes your life easier if you have good, sharp scissors, especially if you’re gonna make several.
- Heavy Spray Starch—You will do the bulk of this project at the ironing board because these flowers need plenty of starch to hold their shape
- Iron
- Templates (You can download mine below)
- Gold Thread and an embroidery needle—used to sew the petals onto the felt.
- Hot glue—to glue the 2nd navy felt circle
- Brooch pins

1. Spray you linen with spray starch and then iron it. You’ll spray and iron it again, but the more starch you put into the flowers, the better they’ll hold their shape.
2. Using the template—which you can download here for the actual size of the petals and here for the 80% smaller version—cut out your petals. You’ll need 10 large ones and 9 small ones. I’ve provided two different sized templates for this reason. The larger template is the actual size of the flowers so if you want to trace the shape onto the linen with a pencil, use that size. I used the 80% smaller version so that I could just hold the template with one hand, and cut around it, leaving a 20% margin. See below if that confuses you!


3. Spray your petals again, crease the bottom like shown below and then iron the crease into the flower. You want to JUST iron the crease so that the petal curves upward slightly.

4. Keep cutting petals until you have 10 large ones and 9 small ones, spray starching them and ironing the creases as you go. When you’re ready with your petals, cut out 2 square felt circles. I used my coffee mug and just traced the bottom and cut it out. The diameter of my circle is about 3 1/4 inches.

Now it’s time to sew the petals onto the felt. You’ll do six large petals around the felt circle, somewhat evenly spaced. You could be precise and mark the circles with six evenly spaced marks but I’m too much of a free spirit for that. Actually, I tried it, just to be thorough, and it wasn’t worth the worry. The last 3 I’ve made, I didn’t try to be too precise.

Here’s what it looks like after the first row of six is sewn on. Next, sew the four large petals that are left onto the felt, staggering them in between the ones already sewn.

You will do the same thing with the smaller petals, staggering them to make it look like petals on a flower! There’s no exact science here. With the smaller petals, I do one row of 5 and then finish with four on top.
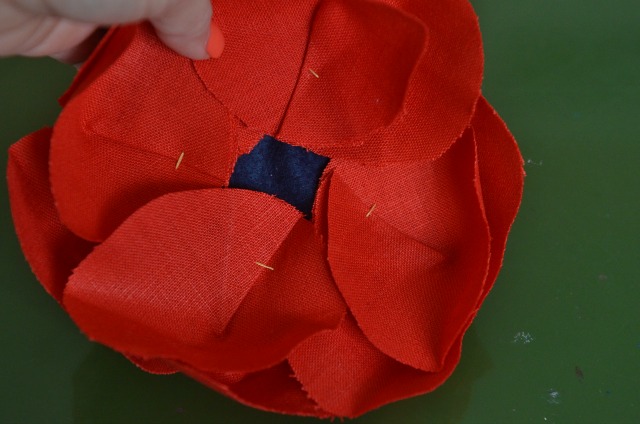
The last row of four, you will sew on with an X stitch to make it look pretty!

The last step is to take your second felt circle and hot glue it to the back of the other circle, to cover up the stitches. Attach you brooch pin in between the layers by cutting small slits in the 2nd felt circle and feeding the pin through. It’s hard to explain so I’ll show a photo of that later today, when the sun is up!
And TADA!! Your lovely linen flower is finished! I can think of 101 reasons to make a bunch of these and give them as gifts or use them as decoration. I have two of mine attached to a wreath I made and they look awesome!
Hope you had a great long weekend and try to squeeze some time in for making stuff with your hands this week. It’s all kinds of fun!

More tutorials? Sure, I’ve got plenty!
Also, I’m linking today with Beth and Sharon and Cheryl today, so visit there for lots of other DIY projects!